Programmers and test engineers always need to set up their own environments for development and testing purposes, and these machines may only be in use for a short period of time. Typically, we use virtual machine products such as Hyper-V and VMWare on the local machine, or we use virtual machines assigned by enterprise IT administrators to do the work.
However, installing and managing these VMs are not an easy task, so many companies now have solutions to simplify the process to benefit IT administrators, and Microsoft Azure has provided us with a DevTest Lab to make our lives easier.
Azure Lab Services
Microsoft describes Azure Lab Services as "Azure Lab Services enables you to quickly set up an environment for your team (for example: development environment, test environment, classroom lab environment) in the cloud. A lab owner creates a lab, provisions Windows, or Linux virtual machines, installs the necessary software and tools, and makes them available to lab users. Lab users connect to virtual machines (VMs) in the lab, and use them for their day-to-day work, short-term projects, or for doing classroom exercises. Once users start utilizing resources in the lab, a lab admin can analyze cost and usage across multiple labs, and set overarching policies to optimize your organization or team's costs."
Currently, this Lab Services contains two individual services: Classroom Labs and DevTest Labs, this article talks about DevTest Labs.
"Azure DevTest Labs enables developers on teams to efficiently self-manage virtual machines (VMs) and PaaS resources without waiting for approvals.
DevTest Labs creates labs consisting of pre-configured bases or Azure Resource Manager templates. These have all the necessary tools and software that you can use to create environments. You can create environments in a few minutes, as opposed to hours or days.
By using DevTest Labs, you can test the latest versions of your applications by doing the following tasks:
- Quickly provision Windows and Linux environments by using reusable templates and artifacts.
- Easily integrate your deployment pipeline with DevTest Labs to provision on-demand environments.
- Scale up your load testing by provisioning multiple test agents and create pre-provisioned environments for training and demos."
Create DevTest Lab
Click Create a resource in Azure Portal to search for DevTest to open the Create Wizard.
Enter Lab name and select a subscription, resource group, location, enable automatic shutdown and also choose the public environment (Internet access). The Resource group refers to the resource group of the lab itself, not the resource group used by the VM in the lab.

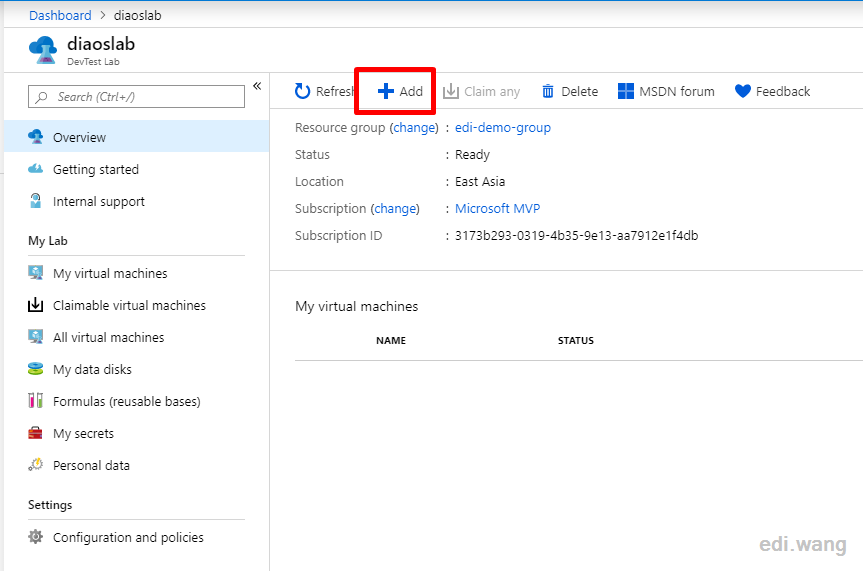
Once the creation is complete, click Add to add the first virtual machine.
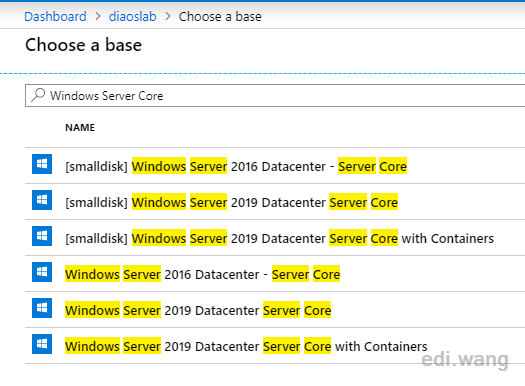
Search and select the operating system images you need, this list also includes many pre-configured images, such as SQL Server, AKS, various Linux, and more, and even Windows 10 with Office 365. You can also make your own images.
Enter the virtual machine name, administrator account, password, select the virtual machine size, and disk configuration. If you've used a regular Azure VM service, you'll find that the wizard is a minimalist version of Azure VM, eliminating the advanced configurations for network cards, NSGs, IP, and many other things.
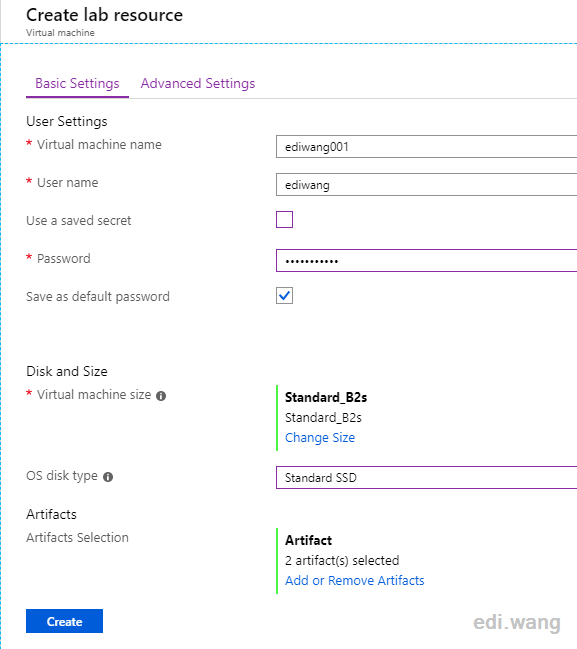
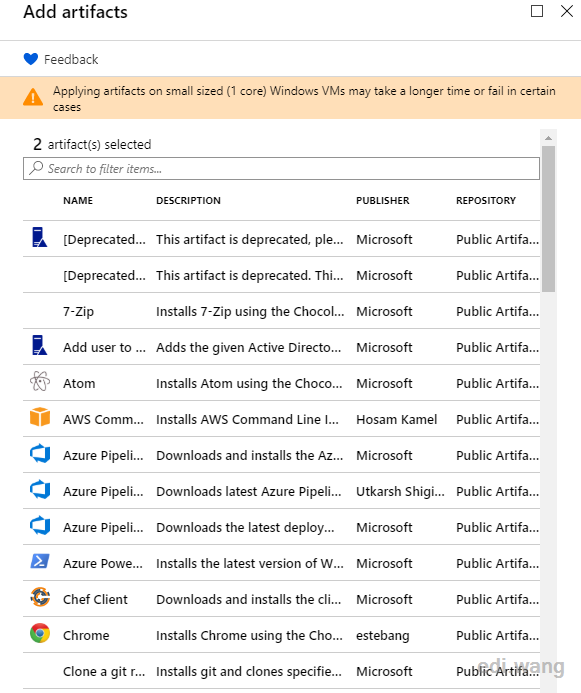
Artifact means pre-installed software, such as 7-zip and Chrome, which I can add from this list. Of course, this list certainly does not contain your own business software, don't worry, Microsoft allows you to add these artifacts from the third party library (you can check the method yourself, this article isn't discussing this topic)
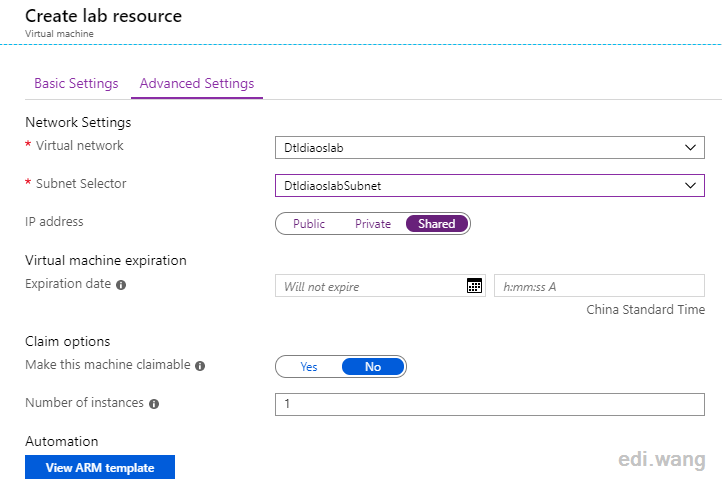
In the advanced settings of VM, in addition to the traditional virtual network, subnet, IP and other information, there are also Expiration time and Claim settings. Expiration time is well understood, administrators can set a VM life limit. Claim means that before the user needs to first claim the ownership of the machine before turning it on. After done using the machine, the user will need to unclaim the machine.
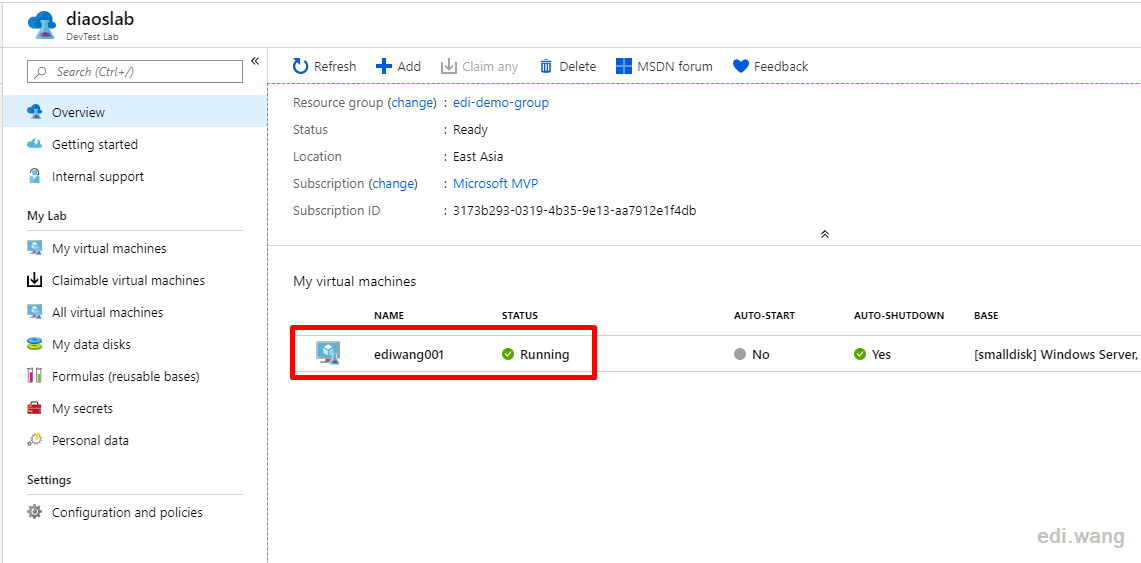
When the virtual machine is created, you can see it in Labs Overview.
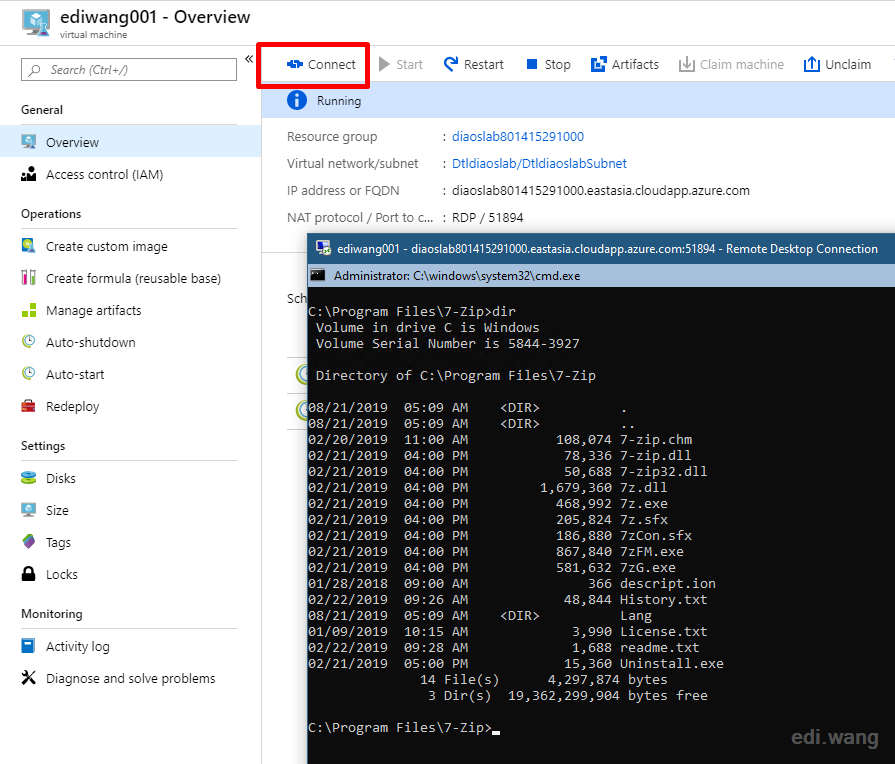
Just like the ordinary VM, click Connect to connect to the virtual machine using RDP or SSH, and then play as you want.
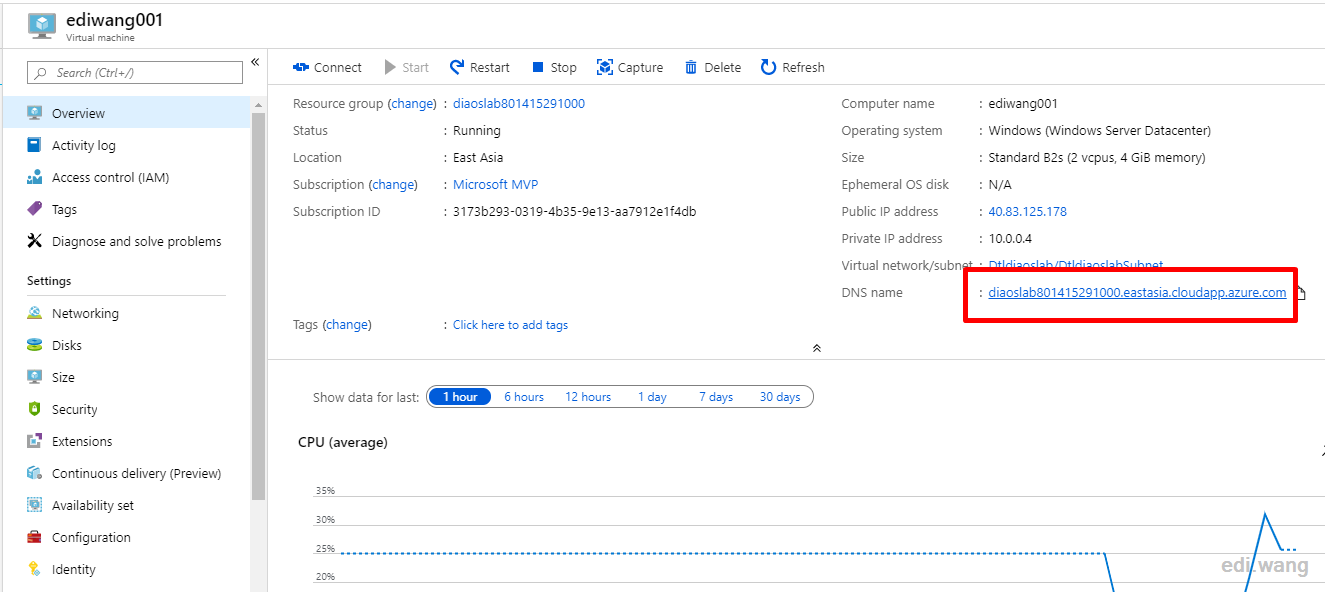
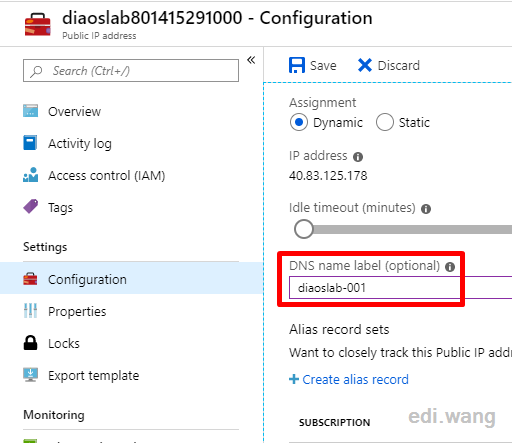
If you don't like the default assigned DNS name, it doesn't matter, this can actually be changed! This VM can also be accessed from the normal Azure Virtual Machine blade, and you can click on DNS name to assign a new domain name.
Configure Auto Start and Auto Shutdown
We can set up a usage time period for this VM to save resources and money. For example, for an ordinary Chinese programmer, he/she works 996, so I can configure the VM to start at 9 AM and shutdown at 9 PM.
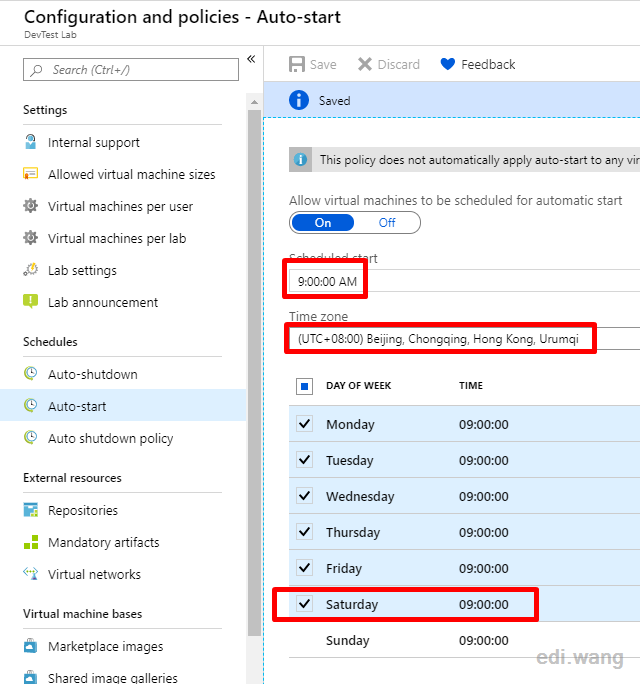
Enter Configuration and policies

Set the time at 9:00 AM in Auto-start, don't forget to select Saturday, because it's a working day for ordinary Chinese programmers.
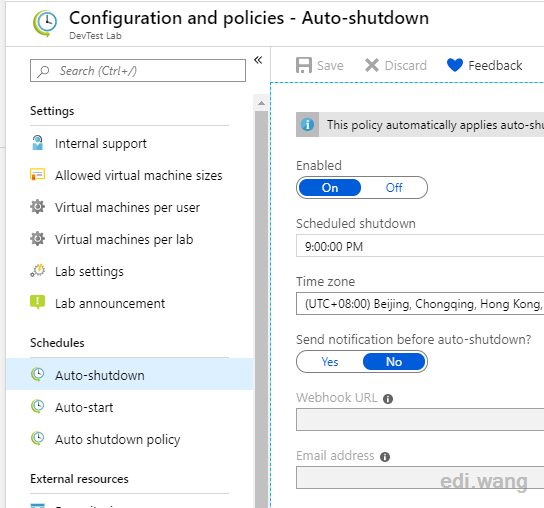
Similarly, set the time to 9:00 PM in Auto-shutdown. For programmers in some Chinese firms like Suning, this time can be set as 12:00 AM because it's good for health.
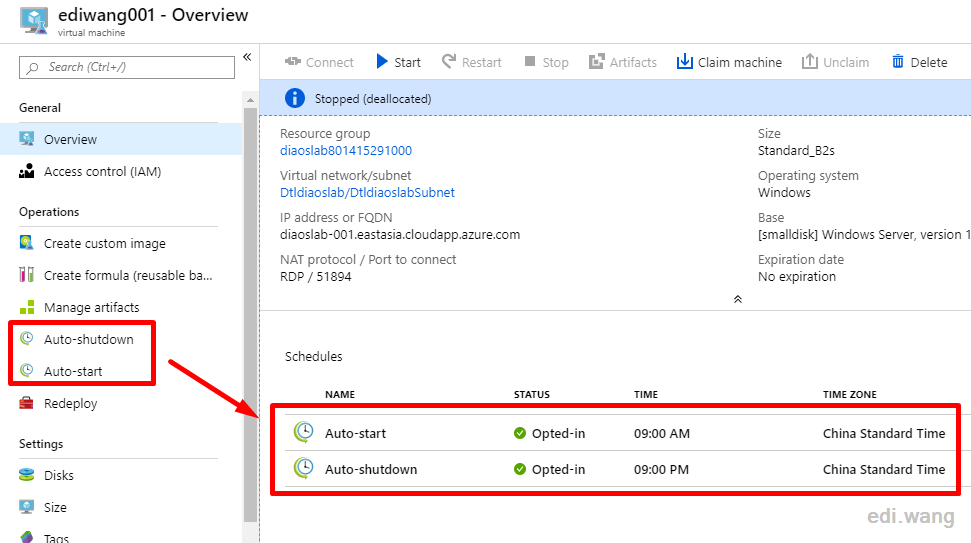
Now, go back to the VM's settings, you can complete the 996 timing setup! It's fubao on the cloud!
Assign Users
If your requirements are very simple and you don't have many users, you can simply rely on the RDP administrator account to assign users for this machine. But in a formal organization, Azure AD is usually synchronized within the organization, and we can assign different users and roles to use or manage machines in Labs.
Since my Azure AD is for personal use and is not convenient to simulate a corporate environment, here's an excerpt from Microsoft's official documentation:
Select Configuration and policies in the left menu.
Select Access control (IAM) from the menu, and select + Add role assignment on the toolbar.

On the Add permissions page, do the following actions:
-
For Role, select DevTest Labs User.
-
Select the user you want to add.
-
Select Save.

Reference: https://docs.microsoft.com/en-us/azure/lab-services/lab-services-overview
Comments