
Some time ago, I successfully migrated an ASP.NET Core Web API project to the latest Azure Function V3, thereby taking advantage of the serverless features of the Azure platform to reduce operation and maintenance costs by 10 times. This article will introduce the key steps and practices in the migration process to help you migrate similar Web API projects.
Project background
This Web API project is part of my blog system and is used to send email notifications to administrators or readers. It is separated from the main blog site in the overall blog architecture, and runs on an independent service with Azure App Service. It's using custom API Key authentication. Email account passwords are stored in Azure Key Vault. There is no database support in the back-end. When the main blog site needs push notifications, it will send the payload of the notification through the REST request with proprietary API Key of the website to the API to complete the email sending.
Why Azure Function
Although the Web API does not have event and queue which are normally used in a serious notification system, my simple notification system has been running well and can meet business needs. However, the most significant problem is the cost, including operation and maintenance costs and development costs.
First of all, the App Service Plan that hosts the Web API is a huge overhead. For an ASP.NET Core application, there is currently no way to choose Consumption Plan, so the API will be billed even when it is idle. According to business, the API is only called about ten times a day, and the total processing time is less than 2 minutes. But I have to pay for the rest 1438 minutes every day. I also need to free up computing resources so that Microsoft can assign them to those who need it in COVID-19, and also reduce carbon footprint to help improve the global environment.
Secondly, even a simple and ordinary Email notification function still needs a complete basic framework to host it. Although ASP.NET Core provides a very flexible and powerful framework, Azure Function can completely free up these basic tasks. Azure Function only cares about business code, not infrastructure. That is to say, in general, developers only need to write the business logic of the function, and do not need to write code such as how to start, route, and assign API Keys.
Finally, Azure Function allows me to continue to use the .NET technology stack which I am already familiar with. Azure Function supports .NET, Java, Python, Node.js, and even PowerShell to write business logic. This means that my code needs only a few modifications to run on a brand new platform.
Wait, am I bind to Azure forever?
Perhaps the most important question for everyone is that will Azure Function makes your application only runs on Azure? The answer is negative. Azure Function's infrastructure is now open source, and its applications can be containerized and deployed to any (even competitor's) cloud, including China's Alibaba Cloud and other platforms, it instantly helping competitors achieve world-class serverless platforms. Even if you don't want to go to the cloud, you can also run the entire architecture in a local data center. Therefore, there is no need to worry about being trapped by Microsoft.
Migration steps and key points
This article does not discuss the getting start fundamentals of Azure Function. If you have not used Azure Function before, it is recommended to go to the Azure website and Microsoft Learn to learn the basics.
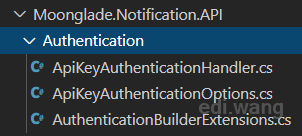
API Key authentication
This is part of the original ASP.NET Core Web API project framework. I used custom API Key authentication to ensure that the API will not be called anonymously.
Azure Function saves us from this part of code, which itself provides a very similar App Key concept to manage authentication without writing a line of code, just within a few mouse click!

These App Keys can be passed to the function endpoint with query string. Therefore, when migrating the application, I deleted all the code of the API Key that I had worked so hard to write. This part of the code will no longer have maintenance costs.
Reading Azure Key Vault
The original application used the Microsoft.Azure.KeyVault package and App Service's System assigned Identity to read data from Azure Key Vault. This is obviously real coupling with Azure.
var keyVaultClient = new KeyVaultClient(new KeyVaultClient.AuthenticationCallback(azureServiceTokenProvider.KeyVaultTokenCallback));
builder.AddAzureKeyVault(
    $"https://{builtConfig["AzureKeyVault:Name"]}.vault.azure.net/",
    keyVaultClient,
new DefaultKeyVaultSecretManager());
In Azure Function, I decided to use environment variables to pass the configuration, so that the code would not coupled with Azure, and I can set specific configuration items to read from Key Vault with a mouse click. The process for reading values from Azure Key Vault is transparent to the application, the application still considers it an environmental variable.
Specifically, on the Configuration page of Azure Function, set the configuration items that need to read from the Key Vault to the following format:
@Microsoft.KeyVault(SecretUri=<Azure Key Vault Secret Uri>)For example, my EmailAccountPassword environment variable. After successful configuration, Source will be displayed as Key vault Reference.
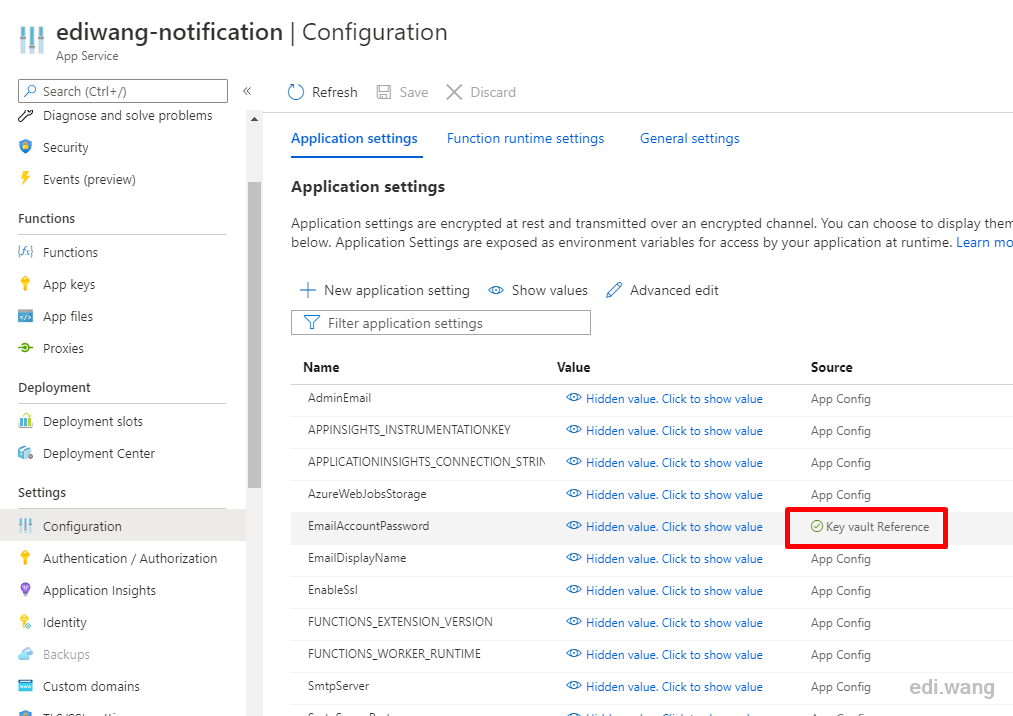
The code for reading this environment variable in the application is exactly the same as reading the normal environment variable:
Environment.GetEnvironmentVariable("EmailAccountPassword", EnvironmentVariableTarget.Process)Therefore, you can still keep the deployment on the local development environment or other clouds uncoupled from Azure Key Vault, which is very flexible. Microsoft has not forced your code to be Azure only.
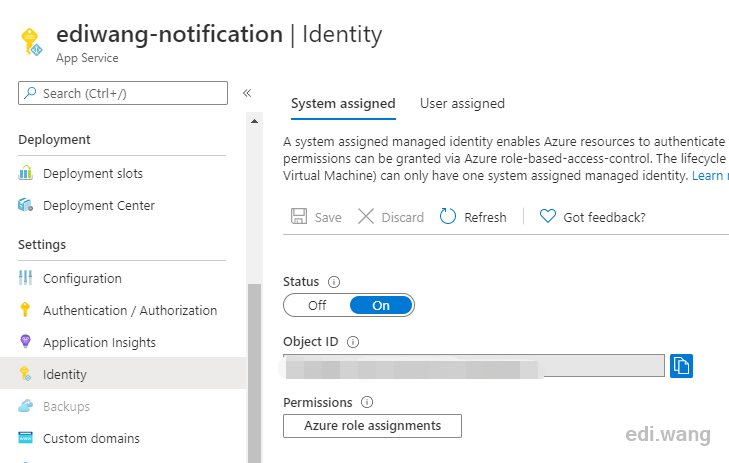
Please be noted that your Function App itself needs to turn on System assigned Identity.
And in Azure Key Vault, you must configure Get, List permissions for the Function App.
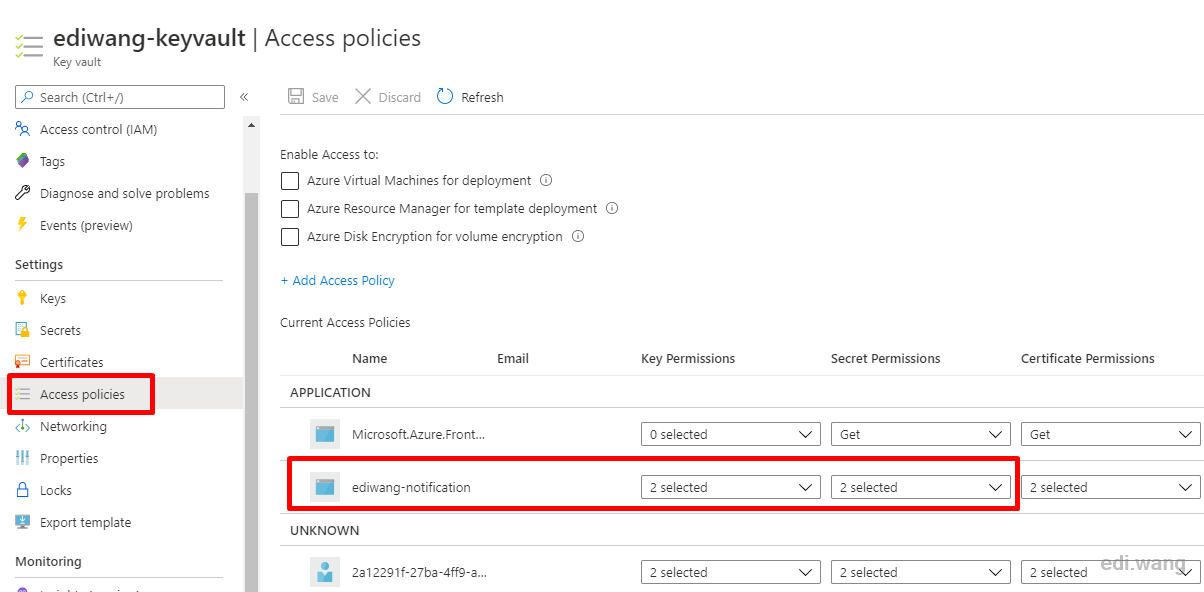
All this can be done with a few mouse click. If you don't like click around, you can refer to my GitHub repository of this project and use the Azure CLI to type commands to do the whole thing.
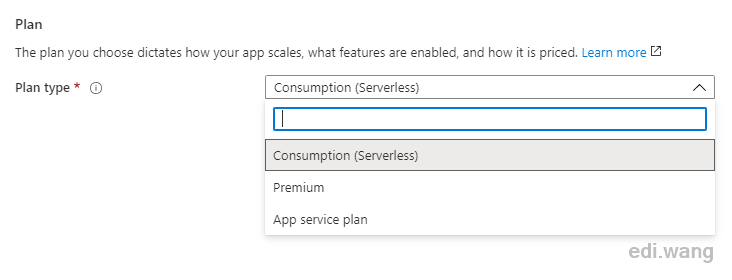
Consumption Plan
This is probably the most exciting feature in the entire Function. When you create an Azure Function, you can choose Consumption Plan. The Plan only charges for the execution time of the function. For my blog notification system, under the normal pressure that the API would be only be called for several times a day, the billing is less than $5 per month. The previous Standard S1 App Service Plan billed $69.35 per month, and the Consumption Plan saved me more than $60.
The code
Finally, when it comes to the one thing that .NET programmers care about most, what is the difference between the Function code and the original Web API code?
First of all, you don’t need Program.cs, Startup.cs anymore, Controller is also gone, even appsettings.json is gone, it's only your business code is now. Now my application tier has only one class, the logic is very similar to the original Web API Controller.
Code of the original API Controller:
[Authorize]
[Route("api/[controller]")]
[ApiController]
public class NotificationController : ControllerBase
{
    private readonly ILogger<NotificationController> _logger;

    private readonly IMoongladeNotification _notification;

    public AppSettings Settings { get; set; }

    public NotificationController(
        ILogger<NotificationController> logger,
        IOptions<AppSettings> settings,
        IMoongladeNotification notification)
    {
        _logger = logger;
        Settings = settings.Value;
        _notification = notification;
    }

    [HttpPost]
    public async Task<Response> Post(NotificationRequest request, CancellationToken ct)
    {
        T GetModelFromPayload<T>() where T : class
        {
            var json = request.Payload.ToString();
            return JsonSerializer.Deserialize<T>(json);
        }

        try
        {
            if (!Settings.EnableEmailSending)
            {
                return new FailedResponse((int)ResponseFailureCode.EmailSendingDisabled, "Email Sending is disabled.");
            }

            _notification.AdminEmail = request.AdminEmail;
            _notification.EmailDisplayName = request.EmailDisplayName;
            switch (request.MessageType)
            {
                case MailMesageTypes.TestMail:
                    await _notification.SendTestNotificationAsync();
                    return new SuccessResponse();
                // skip a few code...

                default:
                    throw new ArgumentOutOfRangeException();
            }
        }
        catch (Exception e)
        {
            _logger.LogError(e, $"Error sending notification for type '{request.MessageType}'. Requested by '{User.Identity.Name}'");
            Response.StatusCode = StatusCodes.Status500InternalServerError;
            return new FailedResponse((int)ResponseFailureCode.GeneralException, e.Message);
        }
    }
}
The Azure Function code:
public class EmailSendingFunction
{
    [FunctionName("EmailSending")]
    public async Task<IActionResult> Run(
        [HttpTrigger(AuthorizationLevel.Function, "post", Route = null)] NotificationRequest request,
        ILogger log, ExecutionContext executionContext)
    {
        T GetModelFromPayload<T>() where T : class
        {
            var json = request.Payload.ToString();
            return JsonSerializer.Deserialize<T>(json);
        }

        log.LogInformation("EmailSending HTTP trigger function processed a request.");

        try
        {

            var configRootDirectory = executionContext.FunctionAppDirectory;
            AppDomain.CurrentDomain.SetData(Constants.AppBaseDirectory, configRootDirectory);
            log.LogInformation($"Function App Directory: {configRootDirectory}");

            IMoongladeNotification notification = new EmailHandler(log)
            {
                AdminEmail = request.AdminEmail,
                EmailDisplayName = request.EmailDisplayName
            };

            switch (request.MessageType)
            {
                case MailMesageTypes.TestMail:
                    await notification.SendTestNotificationAsync();
                    return new OkObjectResult("TestMail Sent");

                //  skip a few code...

                default:
                    throw new ArgumentOutOfRangeException();
            }
        }
        catch (Exception e)
        {
            log.LogError(e, e.Message);
            return new ConflictObjectResult(e.Message);
        }
    }
}
And if you still need to make some customization for the hosting framework, such as using DI, it is still possible:
[assembly: FunctionsStartup(typeof(MyNamespace.Startup))]

namespace MyNamespace
{
    public class Startup : FunctionsStartup
    {
        public override void Configure(IFunctionsHostBuilder builder)
        {
            builder.Services.AddHttpClient();

            builder.Services.AddSingleton<IMyService>((s) => {
                return new MyService();
            });

            builder.Services.AddSingleton<ILoggerProvider, MyLoggerProvider>();
        }
    }
}
For reference: https://docs.microsoft.com/en-us/azure/azure-functions/functions-dotnet-dependency-injection
Conclusion
Migrating a simple Web API that only has little business pressure to Azure Function can significantly save development and operation costs. By using serverless platform, we can focus on the business logic itself rather than infrastructure code. We can continue to use the programming language we familiar with while maintaining certain flexibility and security.
Comments