One of the things programmers hate most is probably setup a computer. Because the programmer's computer environment configuration is very different from normal people. In general, it takes several hours to manually install a new development machine. Let this process automating, after all, the essence of programming is to let complex things simplify, find a way to be lazy!
In fact, automatic installation and configuration of Windows is nothing new, as early as more than 10 years ago that the folk in computer stores used packaging image to achieve a one-click installation system and software. There are many ways to do this, such as editing Windows installation image through Microsoft or a third-party tool, adding automatic answer files, and finally installing common software with silent parameters, as well as a lazier Ghost images, and so on. More than 10 years ago, I was passionate about packaging windows, scripting and installing software also.
The method I introduced today is different from what it was more than 10 years ago, comparing to 10 years ago, now we must face some new problems:
- Software updates are becoming more frequent, and every time you install a computer, you want to use the latest version. Traditional way of packaging applications will be out of date in a few days.
- Applications does not want to be distributed with operating system, Windows 10 is in semi-annual update, maintain the traditional way of OS image packaged with Applications is very laborious.
- Normal people's computers are easy to install without the need to specifically design automatic tools. But programmers' environments are becoming more complex with more tools.
In response to these realities, I chose to use PowerShell and Choco to design a new automatic setup script. PowerShell is Responsible for configuring Windows while Choco can automatically download the latest software installation package from the Internet and install it silently. This way, you don't have to integrate the software installation package into the Windows image.
In my own case, I am an ASP.NET Programmers, but also do some UWP development. So, for me, the environmental requirements are:
- Windows 10 Pro
- Enable IIS + ASP.NET
- Enable Developer Mode
- Install Chrome, 7z, NotePad++, VSCode, LINQPad etc.
Let's see how PowerShell + Choco automate these tasks. The code for my entire setup script is open source, and there is a GitHub link in the end of this article, so this article only describes the key steps and code. For full script, you can see GitHub while free to modify and use. I welcome everyone to participate in the contribution, together we can complete a script for the benefit of a variety of programmers.
Rename Computer
The first step I like to rename the computer for easier management. In PowerShell, you can use the Rename-Computer command to do this.
To get the user input value, use command Read-Host. For output text, use Write-Host. To assign a value to a variable, use =.
The PowerShell code that requires the user to enter the computer name and rename it is as follows:
$computerName = Read-Host 'Enter New Computer Name'
Write-Host "Renaming this computer to: " $computerName  -ForegroundColor Yellow
Rename-Computer -NewName $computerName
Of course, this step requires restarting the computer to take effect, we will do it later.
Disable Auto Sleep
We don't want the computer to go to sleep in the middle of the automatic setup process. So we need to disable auto sleep when the AC power is plugin.
Use PowerCfg command to set the screen timeout to 20 minutes, and disable auto sleep in AC power.
Powercfg /Change monitor-timeout-ac 20
Powercfg /Change standby-timeout-ac 0
Desktop Icons
A newly installed Windows 10 machine does not have "This PC" icon by default on the desktop. However there is a short cut icon for Microsoft Edge, the browser which its only purpose is to download Chrome, and it is becoming Chromium anyway. So we don't need it. Lets take out Edge icon and add "This PC" to our desktop.
To add "This PC" icon, we just need to modify the Registry.
$thisPCIconRegPath = "HKCU:\Software\Microsoft\Windows\CurrentVersion\Explorer\HideDesktopIcons\NewStartPanel"
$thisPCRegValname = "{20D04FE0-3AEA-1069-A2D8-08002B30309D}"
$item = Get-ItemProperty -Path $thisPCIconRegPath -Name $thisPCRegValname -ErrorAction SilentlyContinue

if ($item) {
Set-ItemProperty  -Path $thisPCIconRegPath -name $thisPCRegValname -Value 0
}

else {
New-ItemProperty -Path $thisPCIconRegPath -Name $thisPCRegValname -Value 0 -PropertyType DWORD  | Out-Null
}
Removing Edge short cut is very simple, just delete the file directly. The way to use environment variables in PowerShell is to use $env keywords.
The current user's environment variable is userprofile, Edge is on the desktop.
$edgeLink = $env:USERPROFILE + "\Desktop\Microsoft Edge.lnk"
Remove-Item $edgeLink
Install IIS
IIS is used to maintain some old ASP.NET projects.
The command for enabling Windows features in PowerShell is Enable-WindowsOptionalFeature, with "-All" parameter, it can install dependencies automatically.
Enable-WindowsOptionalFeature -Online -FeatureName IIS-DefaultDocument -All
Enable-WindowsOptionalFeature -Online -FeatureName IIS-HttpCompressionDynamic -All
Enable-WindowsOptionalFeature -Online -FeatureName IIS-HttpCompressionStatic -All
Enable-WindowsOptionalFeature -Online -FeatureName IIS-WebSockets -All
Enable-WindowsOptionalFeature -Online -FeatureName IIS-ApplicationInit -All
Enable-WindowsOptionalFeature -Online -FeatureName IIS-ASPNET45 -All
Enable-WindowsOptionalFeature -Online -FeatureName IIS-ServerSideIncludes
Enable-WindowsOptionalFeature -Online -FeatureName IIS-BasicAuthentication
Enable-WindowsOptionalFeature -Online -FeatureName IIS-WindowsAuthentication
By the way, DISM command can also do this task.
Enable Windows 10 Developer Mode
The developer mode on Windows 10 is for UWP development. To enable it, just edit Registry.
reg add "HKEY_LOCAL_MACHINE\SOFTWARE\Microsoft\Windows\CurrentVersion\AppModelUnlock" /t REG_DWORD /f /v "AllowDevelopmentWithoutDevLicense" /d "1"Enable Remote Desktop
Modify Registry and enable firewall.
Set-ItemProperty "HKLM:\SYSTEM\CurrentControlSet\Control\Terminal Server\" -Name "fDenyTSConnections" -Value 0
Set-ItemProperty "HKLM:\SYSTEM\CurrentControlSet\Control\Terminal Server\WinStations\RDP-Tcp\" -Name "UserAuthentication" -Value 1
Enable-NetFirewallRule -DisplayGroup "Remote Desktop"
Install Choco for Windows
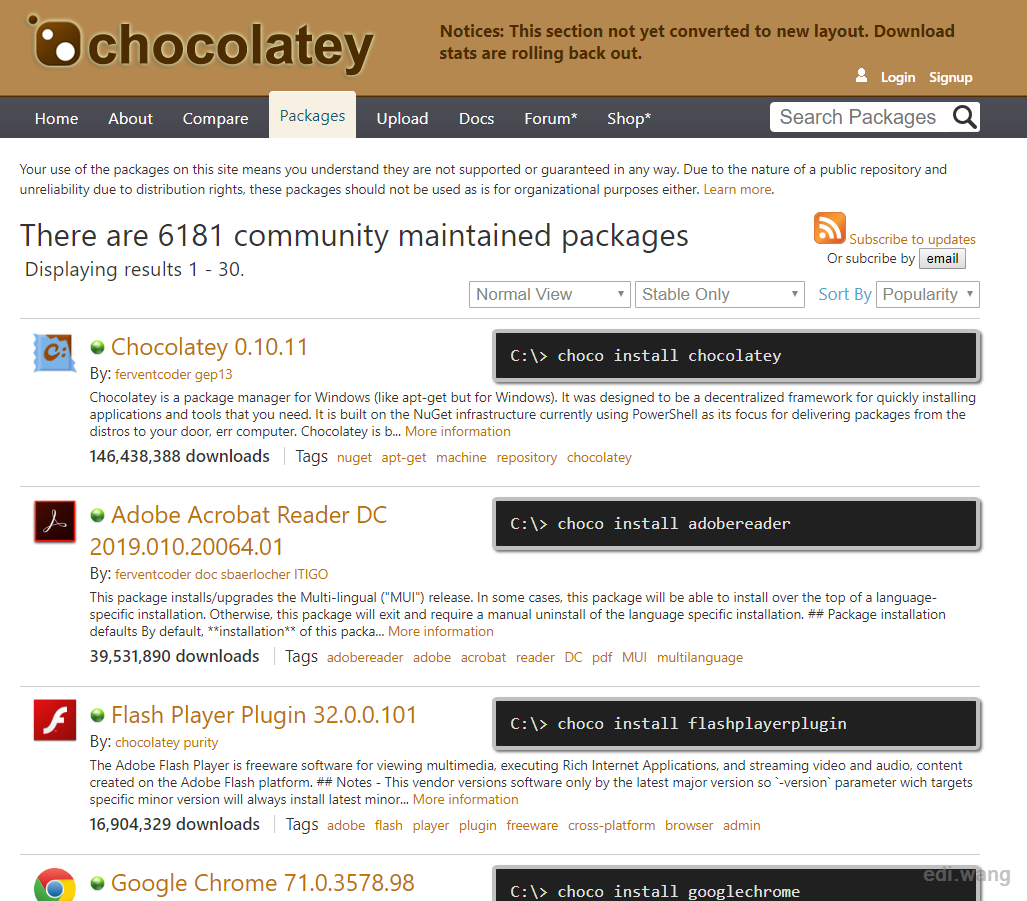
Chocolatey is the tool we are about to use for automatically installing applications. It is just like apt/yum on Linux. We will use the official script to install:
Set-ExecutionPolicy Bypass -Scope Process -Force; iex ((New-Object System.Net.WebClient).DownloadString('https://chocolatey.org/install.ps1'))Restart Windows
We changed the computer name in the first step, it requires reboot of the system. We can let the user to trigger the reboot by asking the user to press enter key. In PowerShell, we use Restart-Computer to reboot the system. You can also do it with shutdown -r -t 0
Read-Host -Prompt "Configuration is done, restart is needed, press [ENTER] to restart computer."
Restart-Computer
Self Elevate
As you may have discovered, the steps above are almost all requiring administrator privileges to be performed. We can run PowerShell as administrator manually, but it is more convenient to run under normal permissions and elevate itself to administrator permissions. Put this in the header of the script file:
if (!([Security.Principal.WindowsPrincipal][Security.Principal.WindowsIdentity]::GetCurrent()).IsInRole([Security.Principal.WindowsBuiltInRole] "Administrator")) { Start-Process powershell.exe "-NoProfile -ExecutionPolicy Bypass -File `"$PSCommandPath`"" -Verb RunAs; exit }In this way, the script detects whether it currently has administrative permissions, and if not, a UAC will pop up to request an administrator right to PowerShell and continue running the current script.
Use Choco to Automatically Install Applications
After restart Windows, we can use choco command to install applications under PowerShell or CMD with Administrator previlege. I choose CMD this time.
There are plenty of applications in chocolatey gallery. Many of them are developer tools. You can check online: https://chocolatey.org/packages
Install command is: choco install [packagename] -y, which the "-y" means automatically respond "yes" to any confirm message. This is how we can install applications unattended.
So, the batch script to install applications is like this:
@echo ------------------------------------
@echo Installing 7-Zip...
@echo ------------------------------------
choco install 7zip.install -y

@echo.
@echo ------------------------------------
@echo Installing Google Chrome...
@echo ------------------------------------
choco install googlechrome -y
I have included the following applications in my script:
- 7-Zip
- Google Chrome
- Pot Player
- Microsoft Teams
- SysInternals
- Lightshot
- FileZilla
- TeamViewer
- Notepad++
- Visual Studio Code
- C-Sharp
- Icons
- MSSQL
- DotPeek
- LINQPad
- Fiddler
- Git
- GitHub for Windows
- FFMpeg
- CURL
- WGet
- OpenSSL
- Beyond Compare
Delete Pre-Installed UWP Apps
The newly installed Windows 10 will include a few UWP applications we don't want. We can also delete them in PowerShell.
First, we need to find the UWP applications' package name, run Get-AppxPackage command, it will return a long list like this:
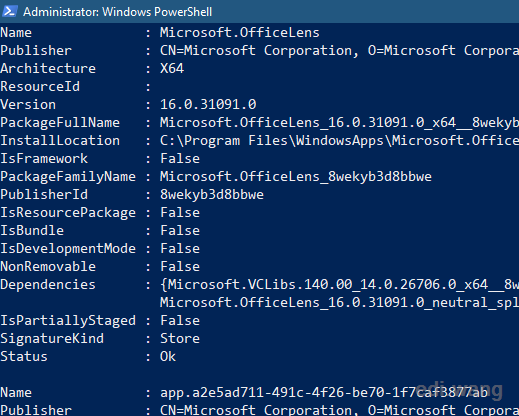
To delete an UWP application, the official way is to use PackageFullName to delete it. For example, Bing News:
Remove-AppxPackage -Package Microsoft.BingNews_4.28.3242.0_x64__8wekyb3d8bbweHowever, this can make problem. If Windows 10 updates this application in background, the version number will change, which will make your script useless. So I use another trick to delete the UWP appliction by name instead of full name.
Get-AppxPackage -Name Microsoft.BingNews | Remove-AppxPackageWe have a lot of UWP to delete, and the programmer's thinking is, of course, writing a loop, not copy of the command everywhere. The way you do loops in PowerShell is very similar to C #, using foreach syntax. In this example, I put the UWP name I want to delete in an array of strings, and then use loop to remove them.
$uwpRubbishApps = @(
    "Microsoft.Messaging",
    "king.com.CandyCrushSaga",
    "Microsoft.BingNews",
    "Microsoft.MicrosoftSolitaireCollection",
    "Microsoft.People",
    "Microsoft.WindowsFeedbackHub",
    "Microsoft.YourPhone",
    "Microsoft.MicrosoftOfficeHub",
    "Fitbit.FitbitCoach",
    "4DF9E0F8.Netflix")

foreach ($uwp in $uwpRubbishApps) {
    Get-AppxPackage -Name $uwp | Remove-AppxPackage
}
Now, we are finished with our automated setup on a Windows 10 machine!
The GitHub repository for my scripts is here: https://github.com/EdiWang/EnvSetup/
Philip Gardner
There is a simpler way to install multiple packages using choco, especially if you have an existing machine set up as you want it. On that machine, install and run Chocolatey GUI (a chocolatey package). Click the 'Export' button at the top of the screen and save the file as, for example, <computername>_packages.xml. If you wish you can edit the xml file to remove unwanted packages or add new ones; the version numbers are optional.
Now copy the xml file to the new machine, install choco, and run choco install -y \path\to\xxx_packages.xml. All the packages should be installed.
It's Me
I appreciate your time. I can make use of this. As Philip stated you can use Choco GUI, to export and then import the file.
My plan (once I learn Git and I'm copying off someone else) Modify your scrip to sync to GIT, download the other PS1 files, config files and then execute to install the apps etc.
You saved me thank me. Thank you .
anon
thank you for giving me a backdoor into all your machines.
Set-ExecutionPolicy Bypass -Scope Process -Force; iex ((New-Object System.Net.WebClient).DownloadString('https://chocolatey.org/install.ps1'))
Please keep downloading random scripts from the internet and running them in an admin process.