In UWP Apps, if we want to use the device's camera to take photos and save to a file, it is used to be some how complicated, the developer need to know about quite a lot things and also write quite a few code to get it down (As you can find the Camera examples from Microsoft offical sample code). In fact, in many cases, we just want to take a photo by the most easy and default options via the camera. In those cases, our focus is on the business logic of the App instead of spending a few hours just to get the camera code working.
Now, you can get this easily done by Windows Community Toolkit. The CameraPreview control provides a straight forward way for us to use the camera and take photos without knowing the details.
1. Install via NuGet
PM> Install-Package Microsoft.Toolkit.Uwp.UI.Controls2. Allow WebCam capability in your UWP App
You can do it from Visual Studio UI by opening Package.appxmanifest file:
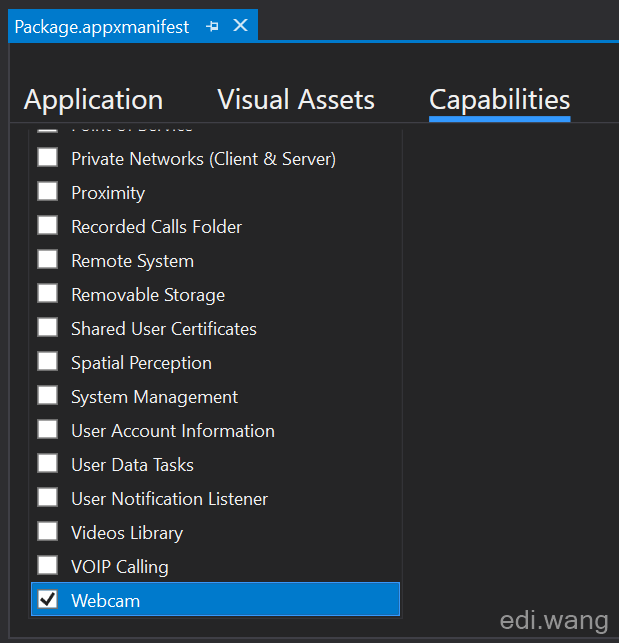
Or edit the file via code and add the DeviceCapability node:
<Capabilities>
  <Capability Name="internetClient" />
  <uap:Capability Name="picturesLibrary" />
  <DeviceCapability Name="webcam" />
</Capabilities>
3. Create the App UI
First, add the namespace into your Page or UserControl
xmlns:controls="using:Microsoft.Toolkit.Uwp.UI.Controls"Then, add the CameraPreview control, it is just one line of XAML
<controls:CameraPreview x:Name="CameraPreviewControl" PreviewFailed="CameraPreviewControl_OnPreviewFailed" />The PreviewFailed event handler is optional but suggestted in order to provide better user experience and also useful for debug.
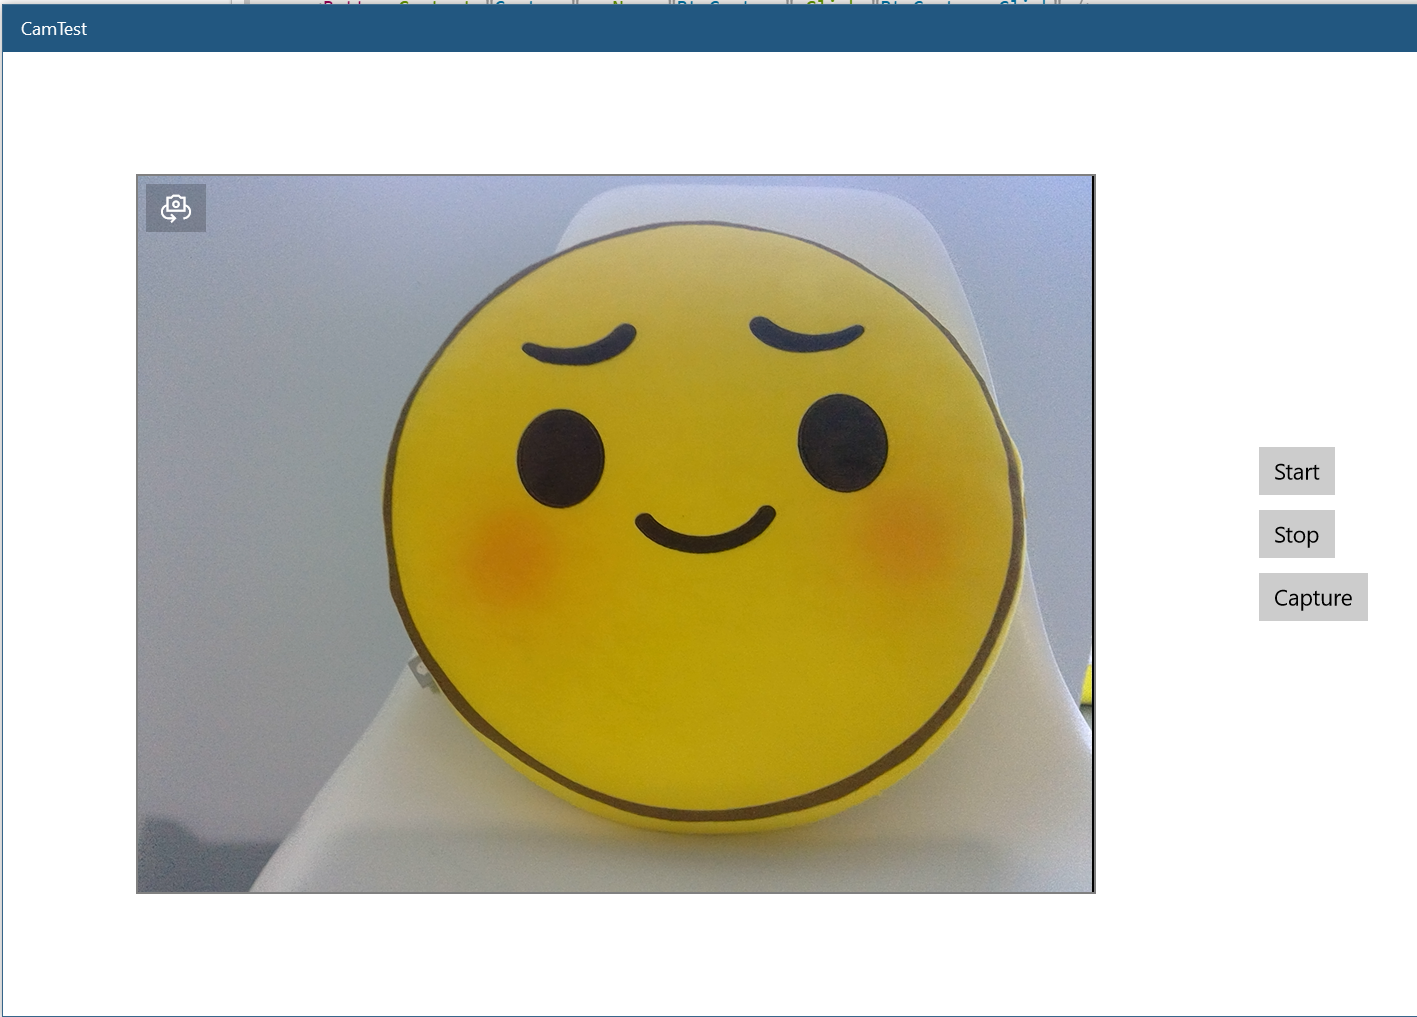
For demo purpose, I also add 3 buttons here
<StackPanel Grid.Column="1" VerticalAlignment="Center" Margin="20,0,0,0">
    <Button Content="Start" x:Name="BtnStart" Margin="0,0,0,10" Click="BtnStart_Click" />
    <Button Content="Stop" x:Name="Stop" Margin="0,0,0,10" Click="Stop_Click"/>
    <Button Content="Capture" x:Name="BtnCapture" Click="BtnCapture_Click" />
</StackPanel>
4. Code
First, let's cover the PreviewFailed event handler. I like to show a message dialog to the user about the failure detail:
private async void CameraPreviewControl_OnPreviewFailed(object sender, PreviewFailedEventArgs e)
{
    await new MessageDialog(e.Error, "ERROR").ShowAsync();
}
Note, the async void is only for event handlers like this, use async Task elsewhere.
Now let's start the camera
private async void BtnStart_Click(object sender, RoutedEventArgs e)
{
    await CameraPreviewControl.StartAsync();
}
till this step, you will get the UI working and see the real time camera frame in your app.
To stop the camera, just call Stop()
private void Stop_Click(object sender, RoutedEventArgs e)
{
    CameraPreviewControl.Stop();
}
So how can we take photo and save to local file system? We will need another event handler: CameraPreviewControl.CameraHelper.FrameArrived
In this example, I add the event handler in Start button's code:
private async void BtnStart_Click(object sender, RoutedEventArgs e)
{
    await CameraPreviewControl.StartAsync();
    CameraPreviewControl.CameraHelper.FrameArrived += CameraPreviewControl_FrameArrived;
}
In the event handler, I wan to set the current video frame into a private field:
private VideoFrame _currentVideoFrame;private void CameraPreviewControl_FrameArrived(object sender, FrameEventArgs e)
{
_currentVideoFrame = e.VideoFrame;
}
Now when we click the Capture button, we need to save the current frame as picture into local file system. The picture is presented as SoftwareBitmap object which we can access via _currentVideoFrame?.SoftwareBitmap
To let the user pick a file save location, we will use the FileSavePicker, it will return a StorageFile object which represents the file we need to save the photo to. You can also choose file format, here I will use JPG because this is the most common format for photos.
private async void BtnCapture_Click(object sender, RoutedEventArgs e)
{
    var softwareBitmap = _currentVideoFrame?.SoftwareBitmap;

    if (softwareBitmap != null)
    {
        if (softwareBitmap.BitmapPixelFormat != BitmapPixelFormat.Bgra8 || softwareBitmap.BitmapAlphaMode == BitmapAlphaMode.Straight)
        {
            softwareBitmap = SoftwareBitmap.Convert(softwareBitmap, BitmapPixelFormat.Bgra8, BitmapAlphaMode.Premultiplied);
        }

        var savePicker = new FileSavePicker
        {
            SuggestedStartLocation = PickerLocationId.Desktop
        };
        savePicker.FileTypeChoices.Add("Jpg Image", new[] { ".jpg" });
        savePicker.SuggestedFileName = "example.jpg";
        StorageFile sFile = await savePicker.PickSaveFileAsync();

        await WriteToStorageFile(softwareBitmap, sFile);
    }
}

Last step, code for save the SoftwareBitmap object into StorageFile:
private static async Task<FileUpdateStatus> WriteToStorageFile(SoftwareBitmap bitmap, StorageFile file)
{
    StorageFile sFile = file;
    if (sFile != null)
    {
        CachedFileManager.DeferUpdates(sFile);

        using (var fileStream = await sFile.OpenAsync(FileAccessMode.ReadWrite))
        {
            BitmapEncoder encoder = await BitmapEncoder.CreateAsync(BitmapEncoder.JpegEncoderId, fileStream);
            encoder.SetSoftwareBitmap(bitmap);
            await encoder.FlushAsync();
        }

        FileUpdateStatus status = await CachedFileManager.CompleteUpdatesAsync(sFile);
        return status;
    }
    return FileUpdateStatus.Failed;
}
If you want to see some more details about the CameraPreivew control, please check the official GitHub: https://github.com/Microsoft/WindowsCommunityToolkit/tree/master/Microsoft.Toolkit.Uwp.UI.Controls/CameraPreview
评论