Azure Functions is an event-driven serverless compute platform that can also solve complex orchestration problems. Build and debug locally without additional setup, deploy and operate at scale in the cloud, and integrate services using triggers and bindings. For me, Function can help me quickly develop some simple APIs, and I just need to write business code instead of building fundamental code such as a complete application framework. This article explains how to use the .NET Core to develop a simple http-triggered Function app, and then setup continuous deployment with GitHub.
Requirement
I need an API to return client IP and User-Agent string. But I don't want to create a complete ASP.NET Core Web API project to do such a simple thing. All I care about is the business logic I'm going to do, not writing and managing the underlying code for configuration files, dependency injection, Controller, validation, and so on.
Prepare Development Environment
- An Azure subscription
- Visual Studio 2019 Community or Enterprise
- Azure Development workload
- .NET Core 2.1 / 2.2 SDK

Create an Azure Function App
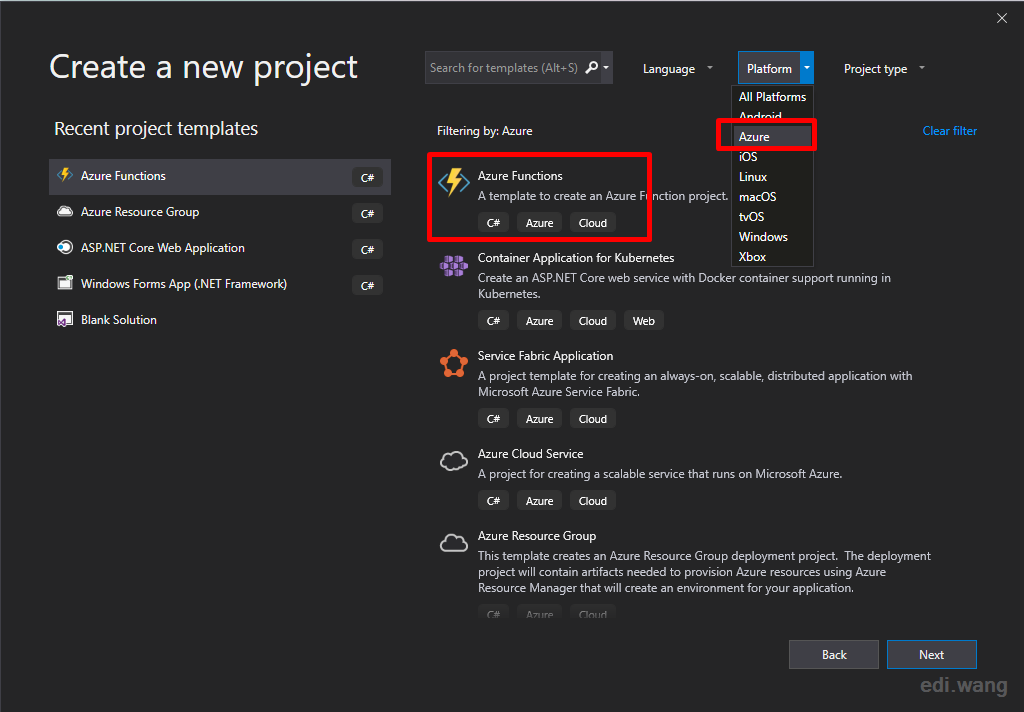
In VS2019, select Azure Functions under Azure category to create a new project. Example: Edi.AzureFunctions
The default version is .NET Core is 2.1, and we can change it manually to 2.2. Edit Edi.AzureFunctions.csproj file, change TargetFramework to netcoreapp2.2. Similarly, we can upgrade Microsoft.NET.Sdk.Functions to the latest version.
<Project Sdk="Microsoft.NET.Sdk">
  <PropertyGroup>
    <TargetFramework>netcoreapp2.2</TargetFramework>
    <AzureFunctionsVersion>v2</AzureFunctionsVersion>
  </PropertyGroup>
  <ItemGroup>
    <PackageReference Include="Microsoft.NET.Sdk.Functions" Version="1.0.29" />
  </ItemGroup>
  <ItemGroup>
    <None Update="host.json">
      <CopyToOutputDirectory>PreserveNewest</CopyToOutputDirectory>
    </None>
    <None Update="local.settings.json">
      <CopyToOutputDirectory>PreserveNewest</CopyToOutputDirectory>
      <CopyToPublishDirectory>Never</CopyToPublishDirectory>
    </None>
  </ItemGroup>
</Project>
Change the default class to ClientInfoFunction and complete our business code: Access Client IP and User-Agent
namespace Edi.AzureFunctions
{
    public static class ClientInfoFuncion
    {
        [FunctionName("IP")]
        public static IActionResult GetClientIp(
            [HttpTrigger(AuthorizationLevel.Anonymous, "get", "post", Route = null)] HttpRequest req,
            ILogger log)
        {
            log.LogInformation("Requesting client IP.");
            var ip = req.HttpContext.Connection.RemoteIpAddress.ToString();
            return ip != null
                ? (ActionResult)new OkObjectResult($"{ip}")
                : new BadRequestObjectResult("ip is null");
        }

        [FunctionName("UserAgent")]
        public static IActionResult GetClientUserAgent(
            [HttpTrigger(AuthorizationLevel.Anonymous, "get", "post", Route = null)] HttpRequest req,
            ILogger log)
        {
            log.LogInformation("Requesting client User-Agent.");
            var ua = req.Headers["User-Agent"].ToString();
            return ua != null
                ? (ActionResult)new OkObjectResult($"{ua}")
                : new BadRequestObjectResult("user-agent is null");
        }
    }
}
As you can see, Azure Function's code is very similar to ASP.NET Core MVC/Web API, and the return type is exactly Microsoft.AspNetCore.Mvc.IActionResult, however, we don't need to care about building a complete ASP.NET Core Web API project, or knowing that Controller exists, just write business logic.
FunctionName can be understood as Route in ASP.NET Core, which is the endpoint address where the end user calls the API.
[FunctionName("IP")] means
https://your function url/api/IP
HttpTrigger is a trigger for Azure Functions that triggers the business logic you write through HTTP requests. Here, I allow anonymous access and limit it to get/post HTTP Verbs.
The logs in the ILogger interface will output messages for debugging Azure Functions locally or on the cloud,
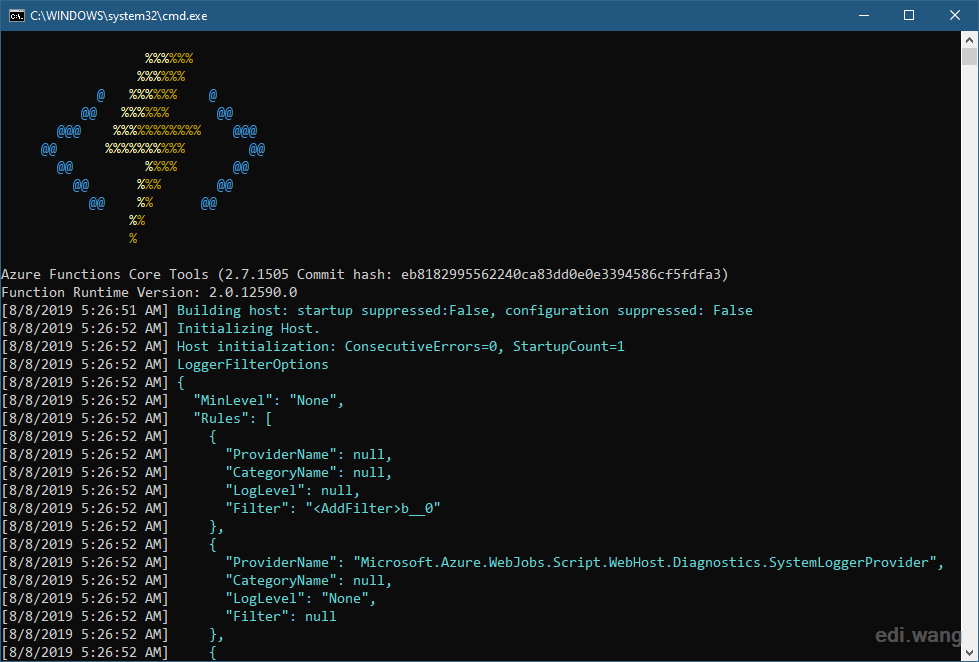
Press F5 to start local debugging. You'll see a cool command-line window that launches a local Azure Functions simulator.
When the simulator is ready, the console outputs two green URL addresses for local testing.
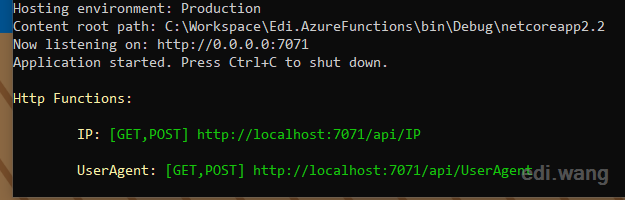
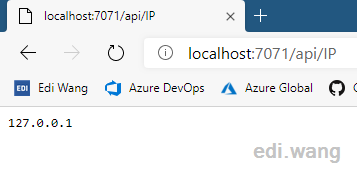
Copy the URL to the browser to test our APIs.
Deploy Azure Functions from VS
Right-click on Edi.AzureFunctions project and select Publish
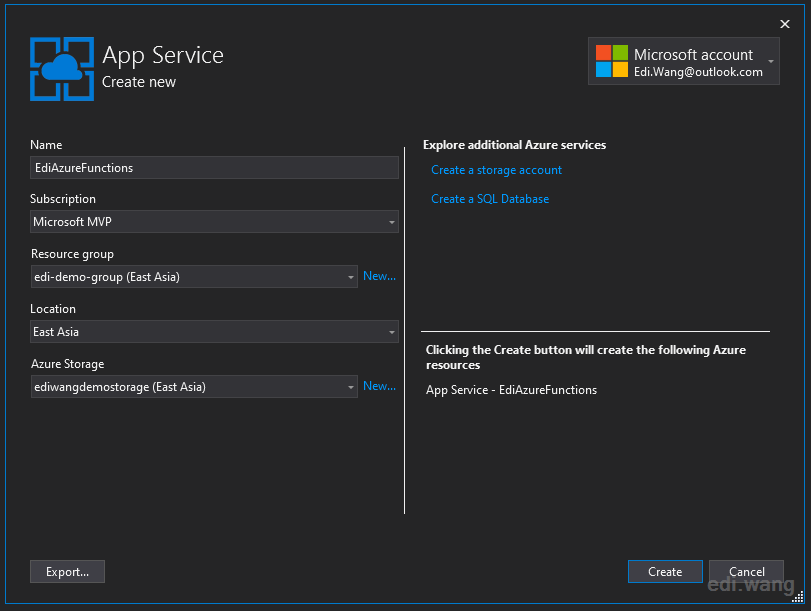
Click Start, select Azure Functions Consumption Plan, and then select Create New. If you've already created a Function app on Azure, you can select Select Existing. We will discuss how to create a Function app from Azure Portal later.
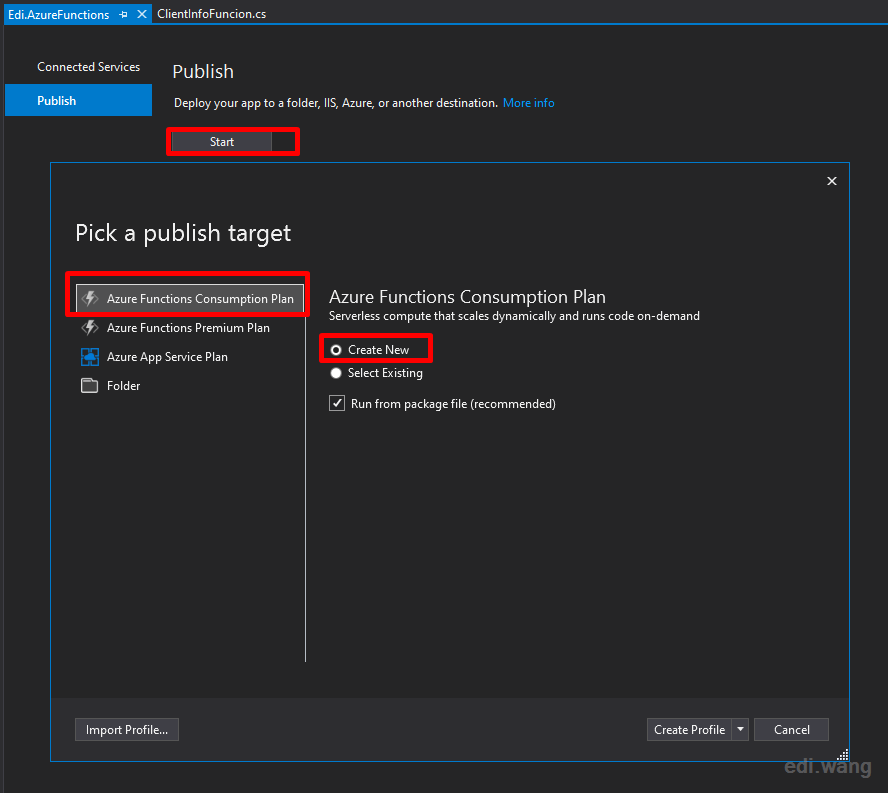
Fill in the parameters as needed
Finally, click Publish to complete the deployment.
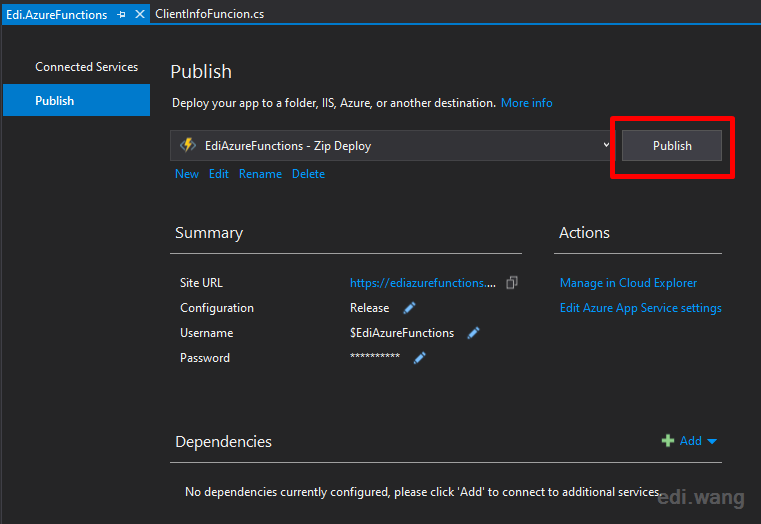
If the deployment is successful, you can find the Function App in Azure Portal and see its URL.
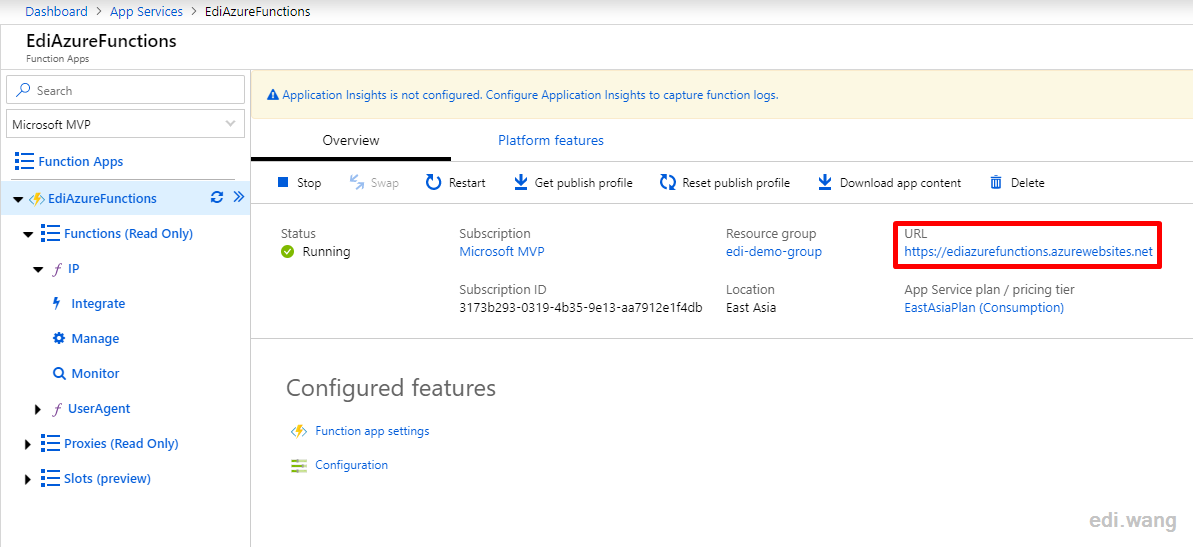
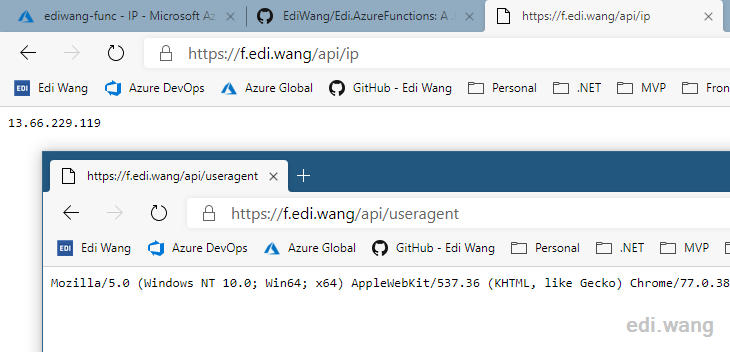
Try to access two APIs in your browser:
https://<your function name>.azurewebsites.net/api/iphttps://<your function name>.azurewebsites.net/api/useragent
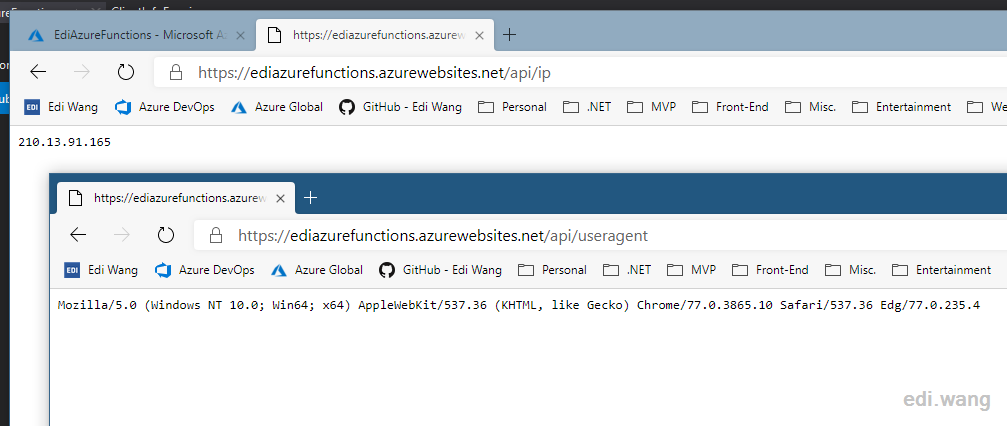
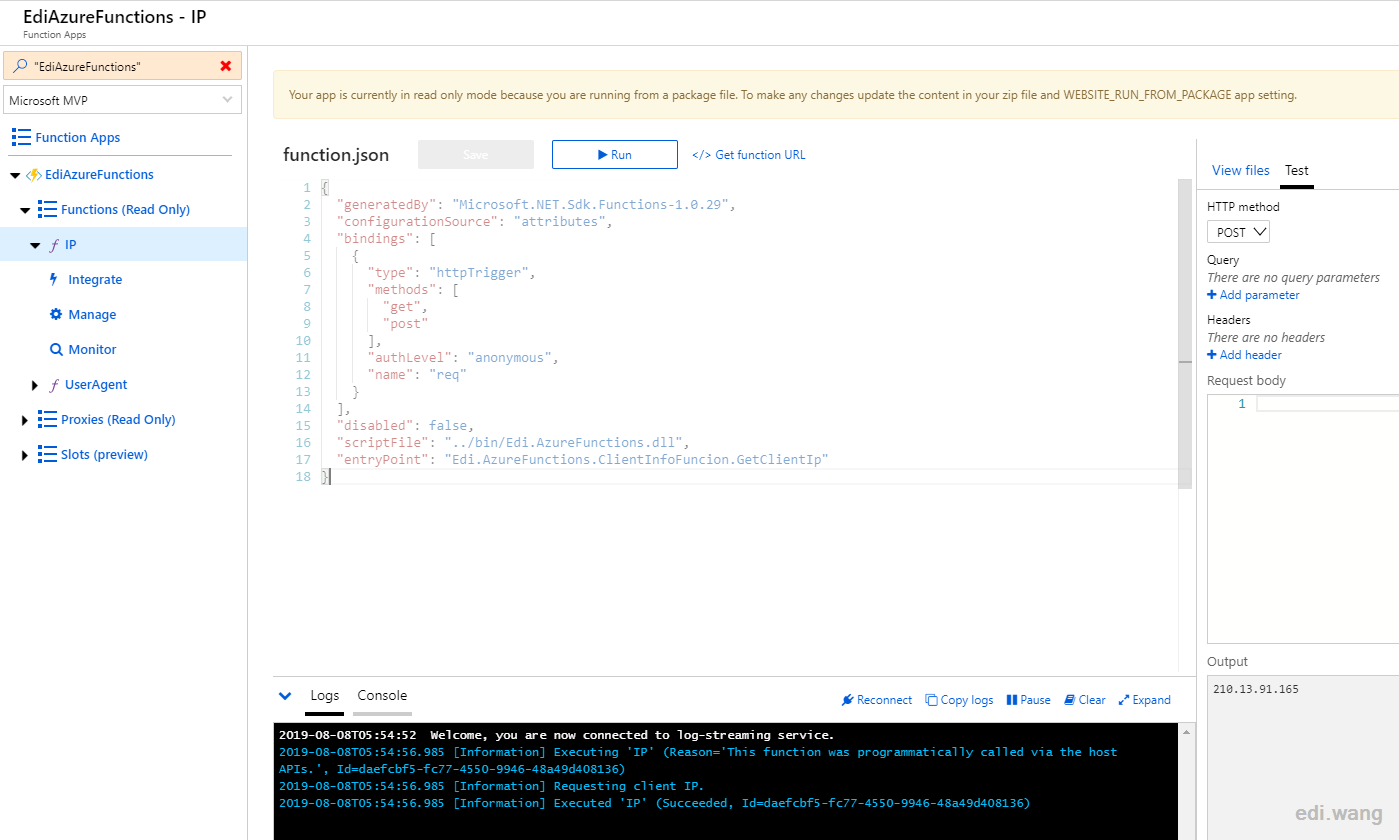
You can also enter the specific HttpTrigger under Functions and complete the test in Azure Portal. This outputs more detailed log information.
Create Function App in Azure Portal
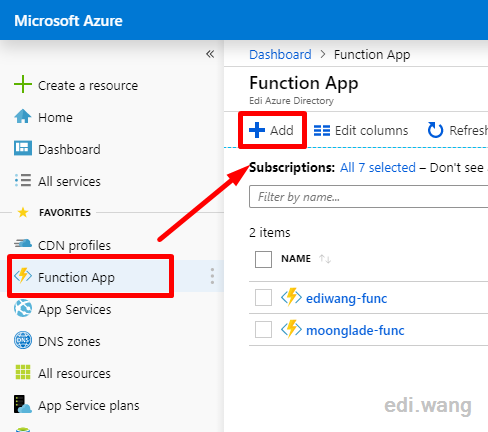
In the above example, we developed and deployed an Azure Function App through VS2019, but deployment via Visual Studio are not usually real world case. Because Azure Portal gives us more detailed parameter options to fit real world requirements. It's also easy to create an empty Function app from Azure Portal, click Function App / Add
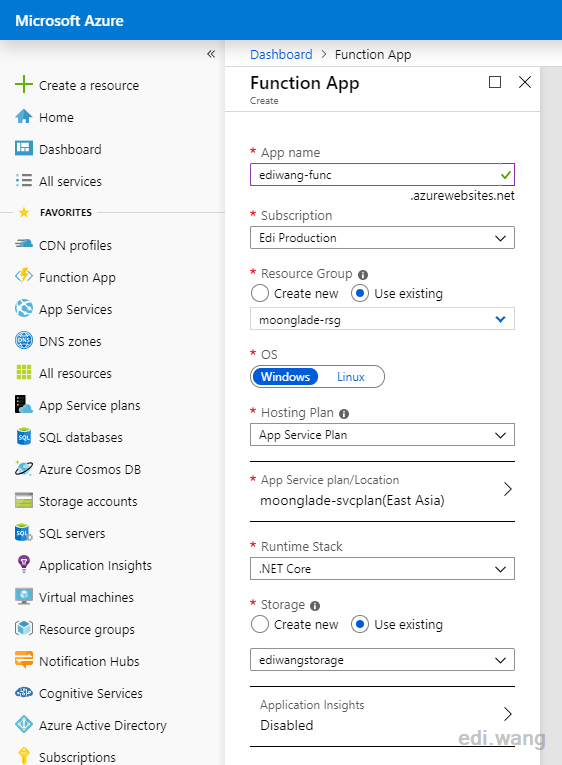
Enter the App name, which will be used as the default domain name for the function. Other parameters are set according to your needs. I recommend that you reuse the existing App Service Plan to save money. Use .NET Core for Runtime Stack
Continuous Deployment from GitHub Repository
I covered the CI/CD process for Azure DevOps in previous blog posts, which is very powerful. But this article introduces you to a simpler, but much basic way for setup CD to GitHub.
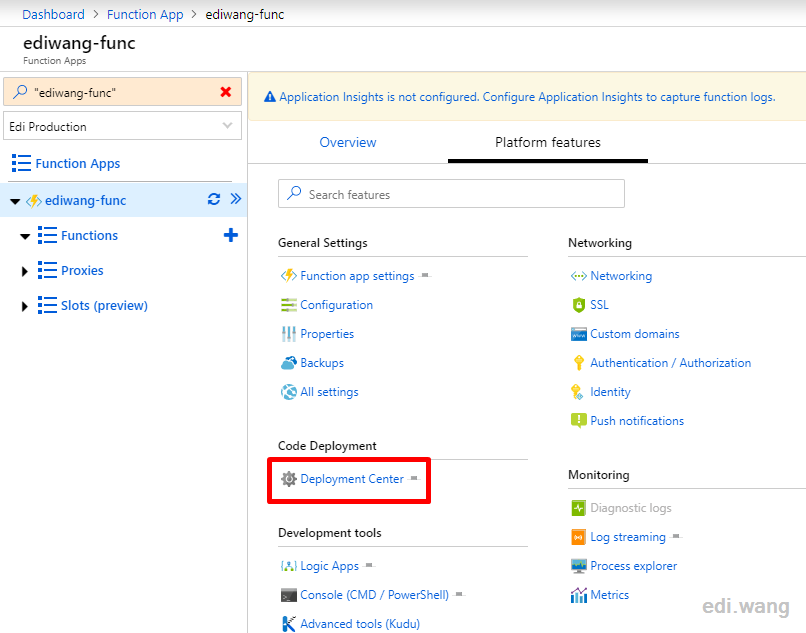
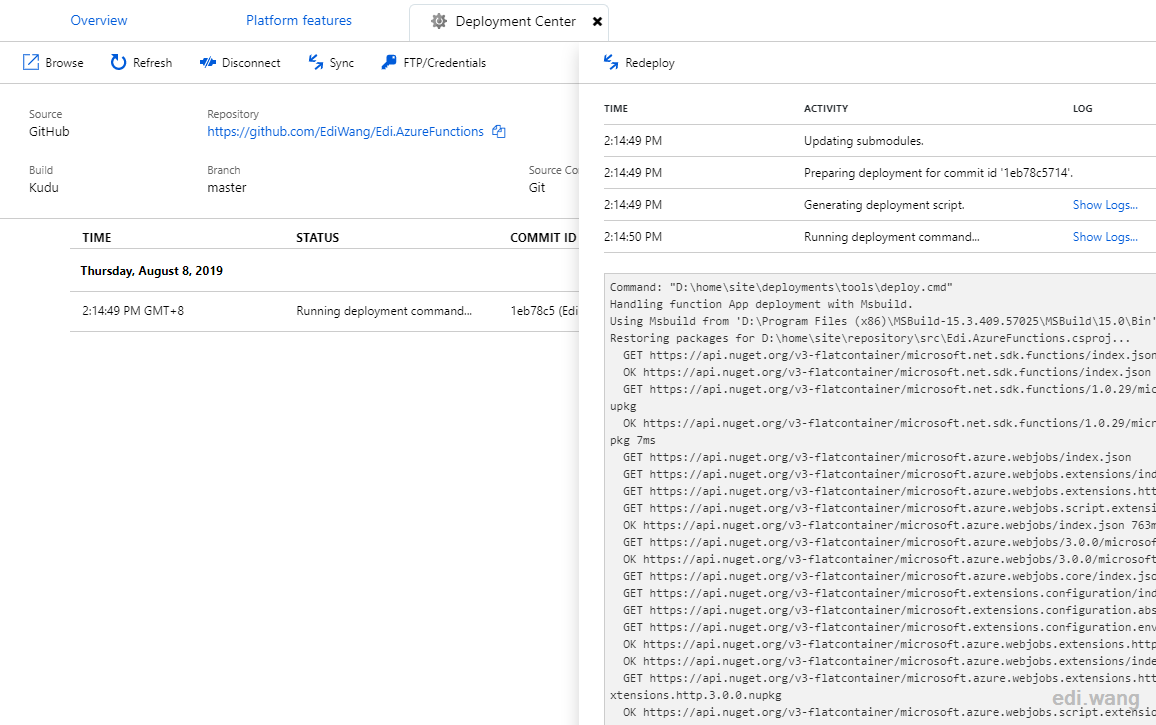
The essence of Function is actually a further package of App Service, so most of the features of App Service, including deployment, are available here. Enter Deployment Center in Platform features.
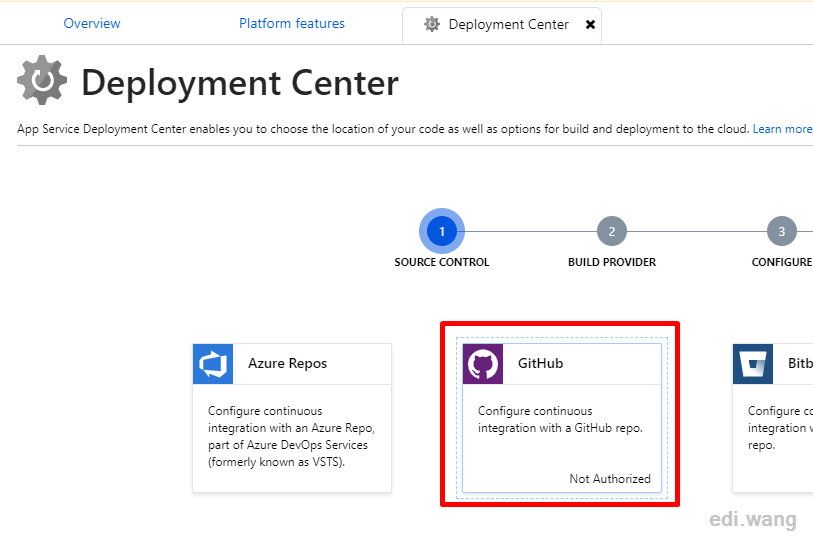
Choose GitHub
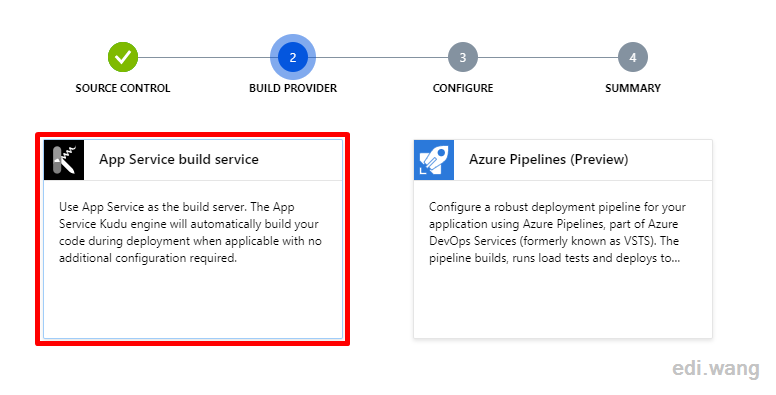
Use App Service build service (Kudu)
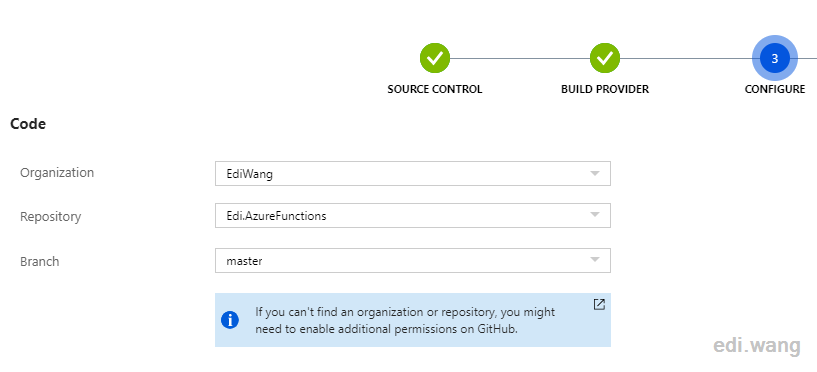
I've uploaded the code for this article to GitHub and you can fork it to your own account.
Select the corresponding repository and branch in Azure and complete the configuration.
When the configuration is complete, a deployment is triggered immediately and we can see the detailed logs.
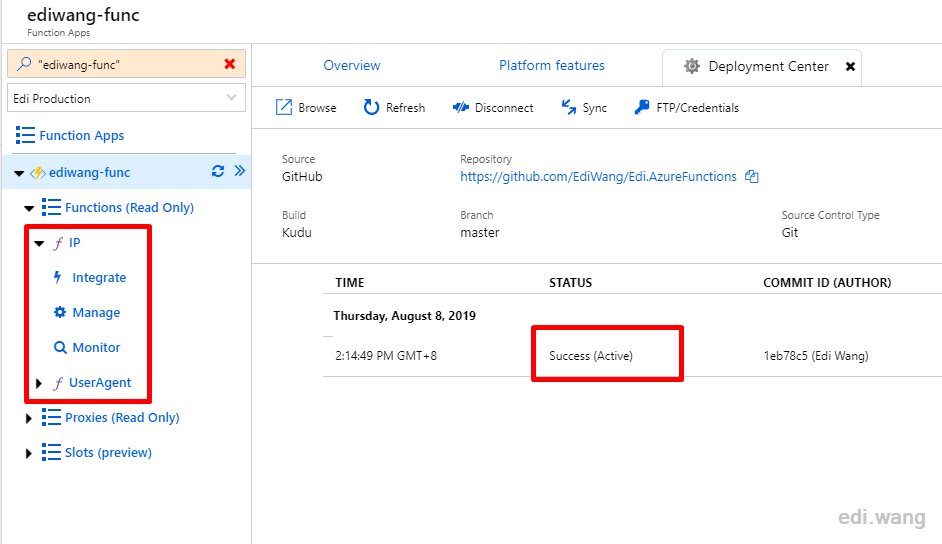
Once the deployment is successfully done, we can find these two APIs under Functions
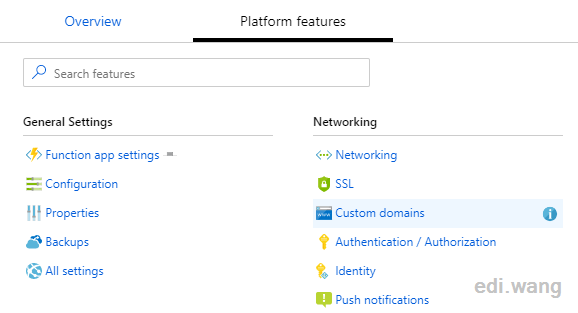
We can even bind a custom domain to the function app with an SSL certificate.
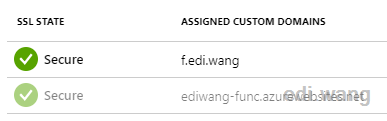
Finally, we can use our Function App by our own domain name
Anduin
What if I mannually config the entire pipeline on Azure DevOps portal instead of Azure portal? Is that supported?