UWP Apps usually require a lot of time to compile a "release" package for submitting to Windows Store, and if you are working in a team, TFS/VSTS can help your team ensure that each check-in has a success build, and make it easier for deployment and testing. Let's see a basic example of how to setup a CI build for a UWP App on VSTS.
Important Pre-condition
Before you do that, please ensure that your App is already build and running on your local machine.
If you want the package can be used to upload to the Windows Store, you need to manually associate the App to the store and create App packages and validate the release on your machine for the first time.
VSTS build on host agents can not automatically increase the build number in your App's manifest, you will need to do it manully in each check-in, or you can create a custom agent to do that (not discussed in this article)
Example App
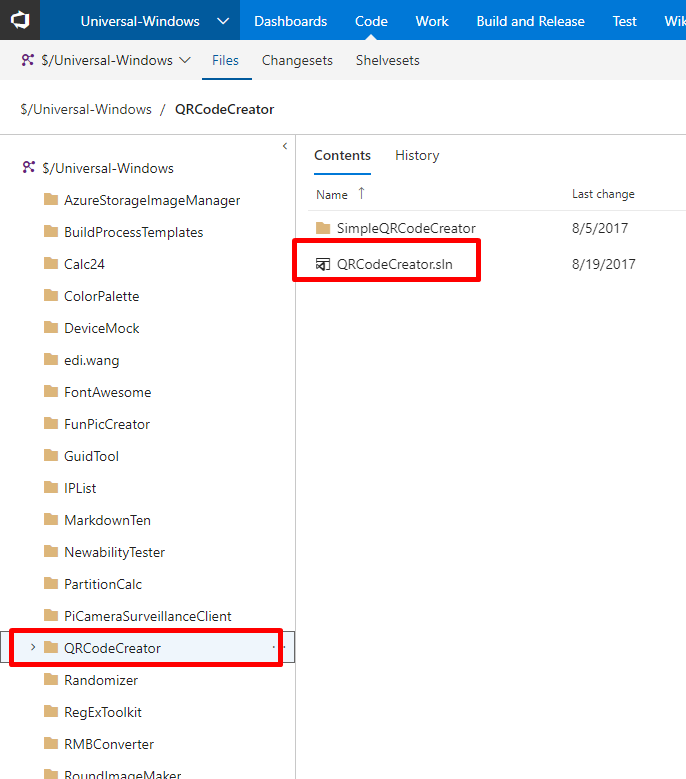
My example App "QRCodeCreator" is under project "Universal-Windows", and there are many other Apps under the same parent directory. Usually in an enterprise, you won't put every App under a same Team Project. But if you do, there will be some different from the default build teamplate, which in this case, you can follow my steps.
Step 1
Go to "Build and Release" under "Universal-Windows", click "+New" button.

Step 2
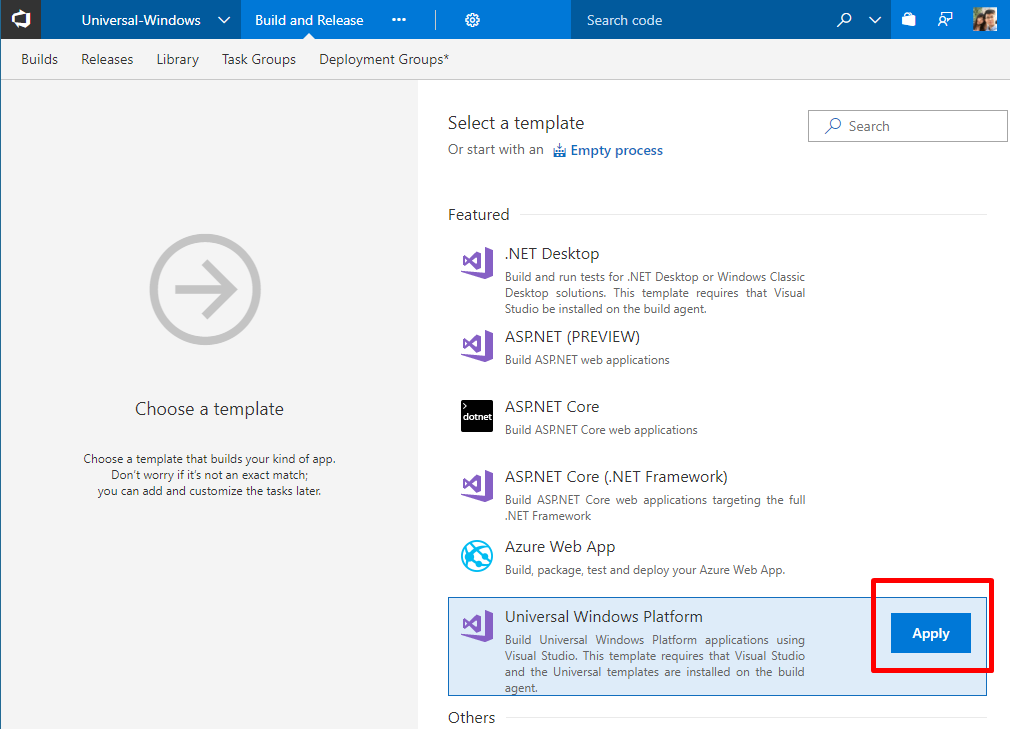
Choose "Universal Windows Platform" and click "Apply"
Step 3
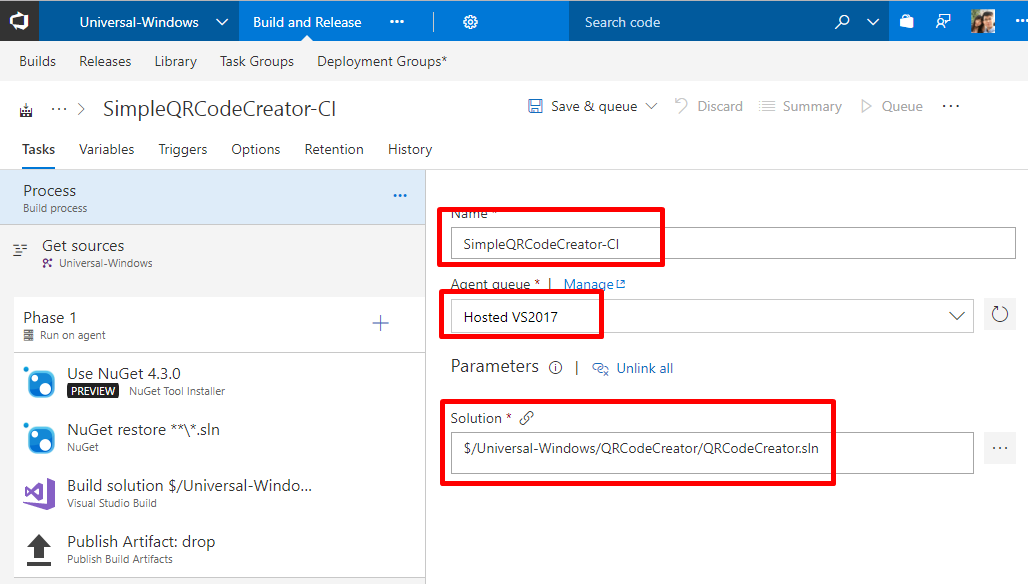
Set a Name, change Agent queue to "Hosted VS2017", and select the "sln" path for this particular App. This is very important, otherwise VSTS will build every "sln" under "Universal-Windows".
Step 4
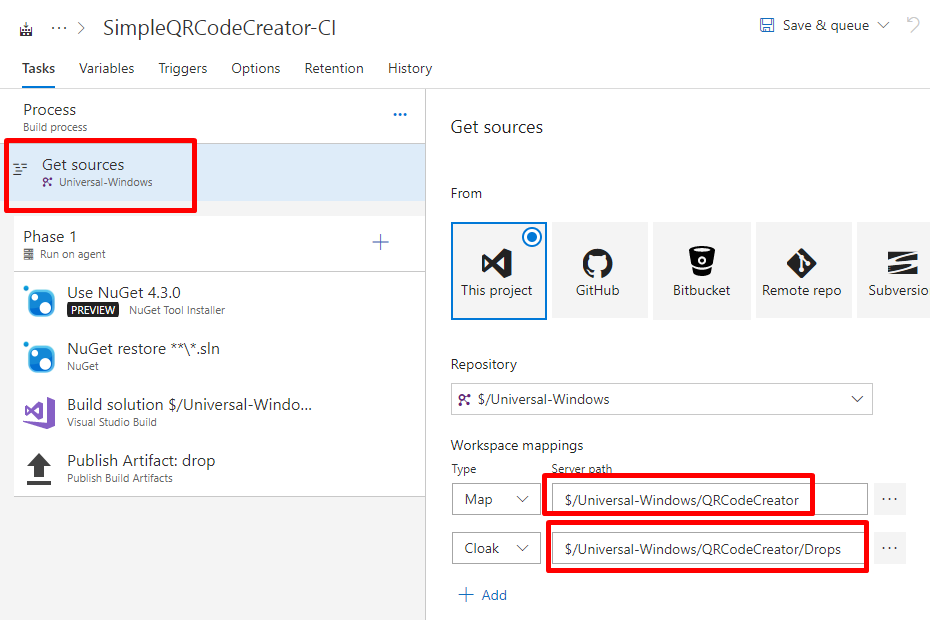
In "Get sources", change Server path to this particular App source folder (QRCodeCreator), this is also very important, otherwise VSTS will get all content under "Universal-Windows" even it is only building "QRCodeCreator" solution.
Step 5
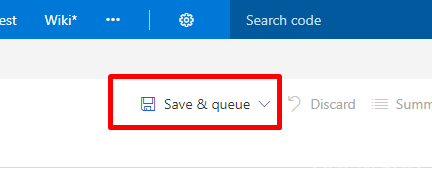
Click "Save & queue" button, and test the build definition.
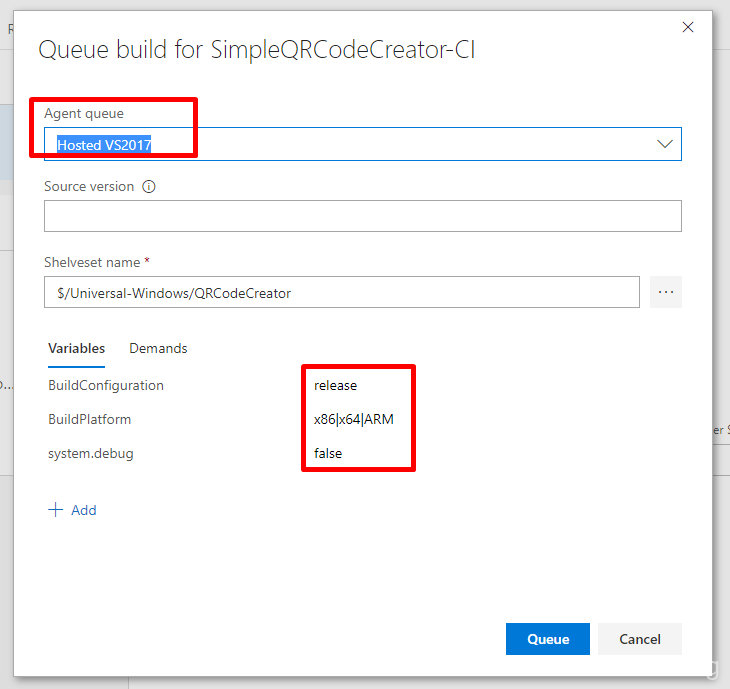
Double check if the environment configuration is correct. In this case, I want the build artifacts can be used to upload to the Windows Store, so I need to use "release" mode on x86, x64 and ARM. You can change this in the build definition settings according to your demands.
Step 6
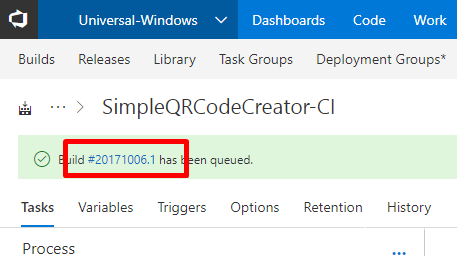
After the build is queued, click the build number on the message will open the build watcher window.
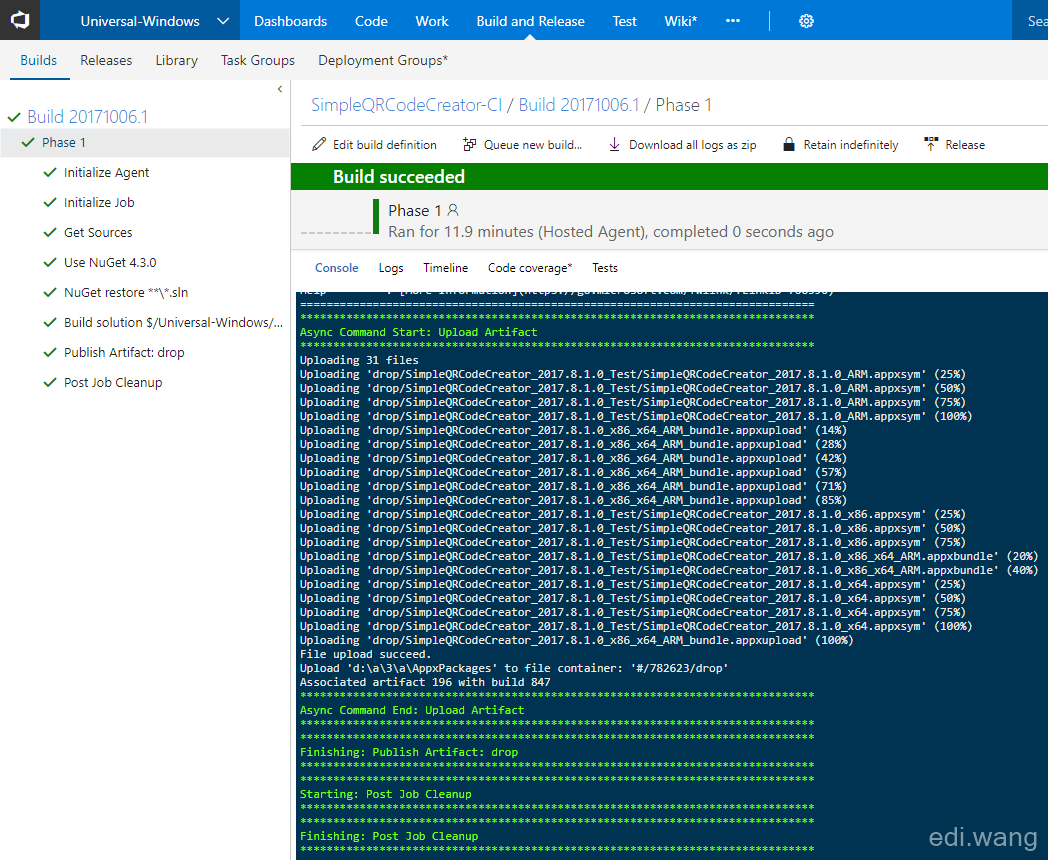
If everything is correct, you should see the build success after 10-20 minutes depending on your project size. I ususally takes more time to build on VSTS comparing to your local machine.
Step 7
Now, we have validated the build works. Let's configure the CI trigger.
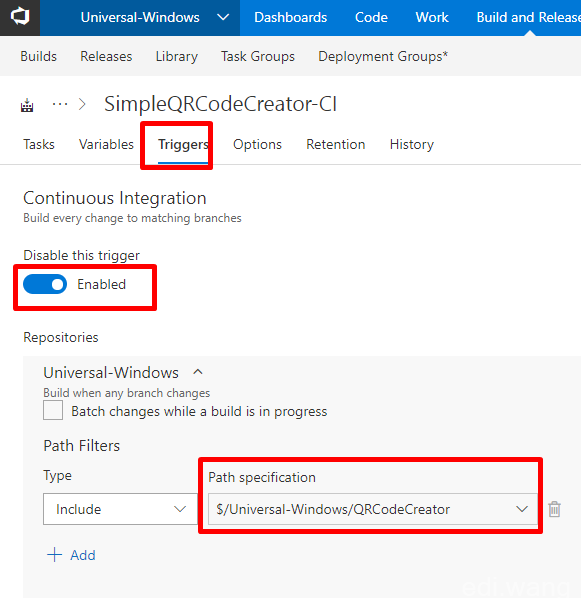
Back to the build definition, click "Triggers", and enable "Continuous Integration" trigger. We also need to change the Path specification to this particular App folder, or every check-in under "Universal Windows" will trigger this build, which is not our intention.
Step 8
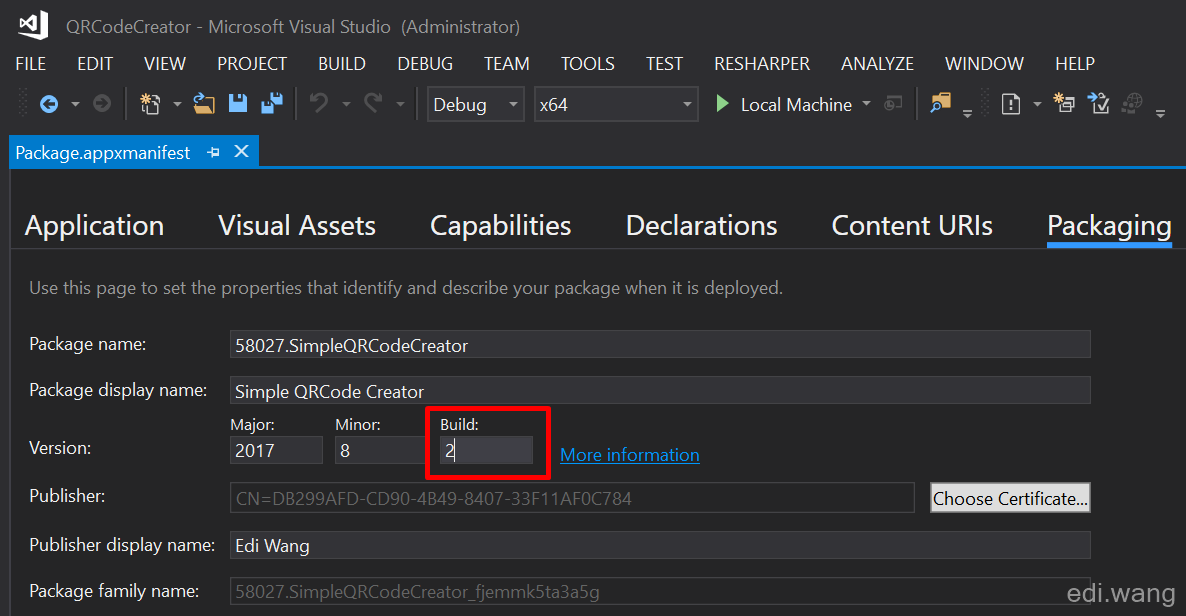
The build number by VSTS will not automatically increase like you do it with Visual Studio manully. If you want to upload to the store, the build number must be higher than the old one already in the store. Now we need to go back to Visual Studio, open your project's manifest file, and manully increase the build number.
Step 9
Now when you check-in the App source, a build will be triggered.

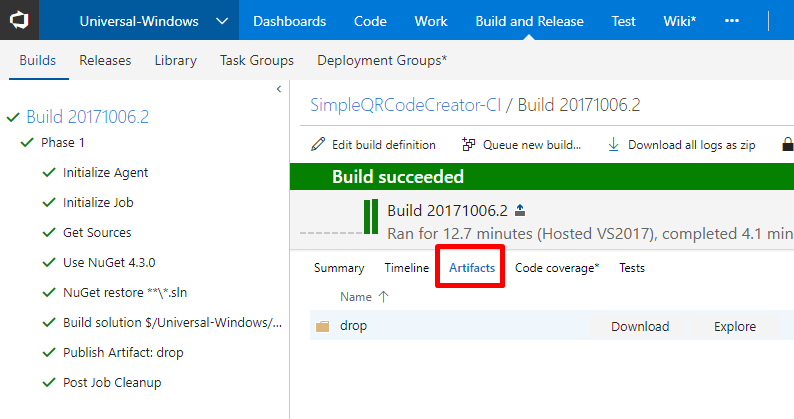
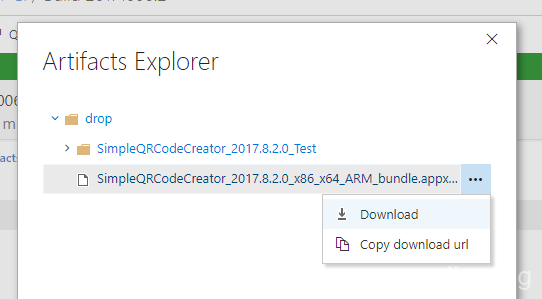
After it is done, go to "Artifacts", now you can download or browse the App packages.
Step 10
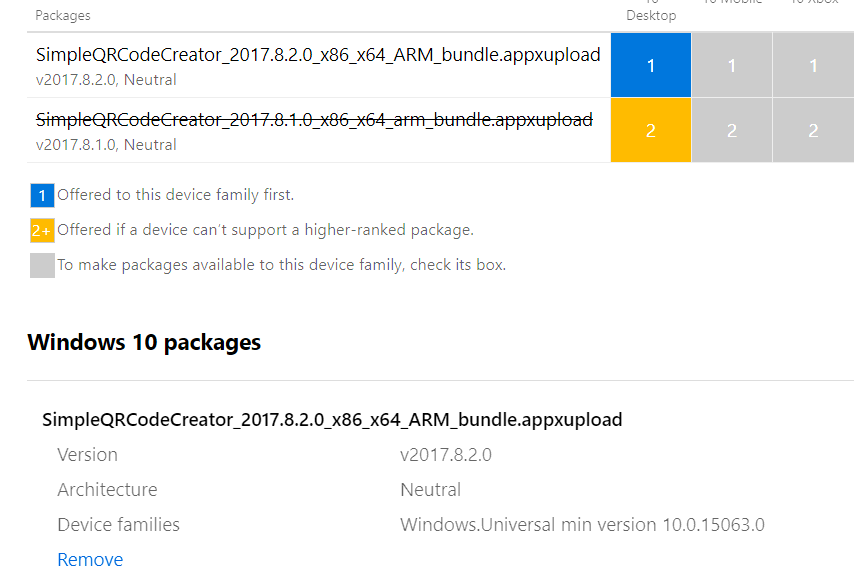
Upload your wonderful App to Windows Store and change the world!!! You can see the "appxupload" file is successfully recognized by Windows Dev Center.
NOTE FOR CHINESE DEVELOPERS
Downloading artifacts from VSTS is very highly result in broken packages sometimes even with a VPN connection, for example, a 27 MB package will stop at 790 KB / 11 MB or others. Advise to RDP into a oversea VM to download the artifacts. Or you can setup a FTP and configure add build task to upload the artifacts to the FTP server and manually download it.
Appendix
If you have problem when generating App packages for Windows Store, please check the build configuration according to this table:
| MSBuild Argument | Value | Description |
|---|---|---|
| AppxPackageDir | $(Build.ArtifactStagingDirectory)\AppxPackages | Defines the folder to store the generated artifacts. |
| AppxBundlePlatforms | $(Build.BuildPlatform) | Allows you to define the platforms to include in the bundle. |
| AppxBundle | Always | Creates an appxbundle with the appx files for the platform specified. |
| UapAppxPackageBuildMode | StoreUpload | Defines the kind of appx package to generate. (Not included by default) |
Reference: https://docs.microsoft.com/en-us/windows/uwp/packaging/auto-build-package-uwp-apps
Comments