Problem
Although Twitter Space audio recording has it's own transcription, it is sometimes incorrectly recognizing wrong languages. For example, English content are producing Chinese transcription (not translation), and not even the English transcription make sense.

Let's see how we can get a correct transcription using Azure.
Azure Speech Service
Azure Speech Service is an AI service that can help us get transcriptions from video or audio files. It has many other features like text to speech (TTS) and translations. In this article, I will only use it's speech to text feature. There are currently 4 ways to use Azure Speech Service. Speech CLI, Speech SDK, Speech Studio, or REST APIs. I will be using Speech CLI this time.
Steps
Record Twitter Space Audio
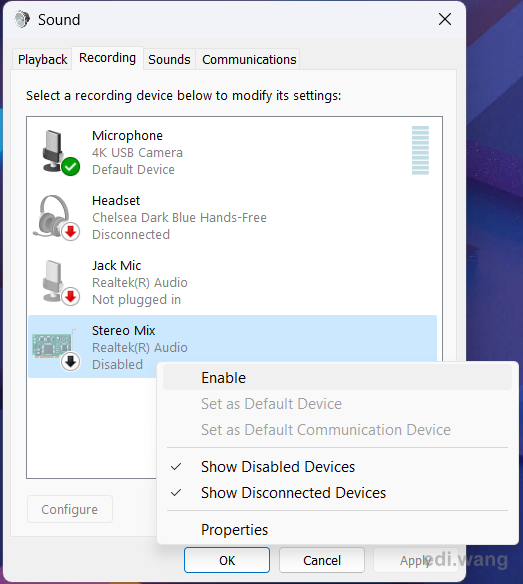
We need to record computer audio from Twitter Space to audio files (.wav). On Windows machine, you may enable the Stereo Mix recording device and record with Windows Sound Recorder if your hardware supports it. But unfortunately, it doesn't work on my machine, so I use a free application called Audacity which is much more advanced and can also record computer audio.
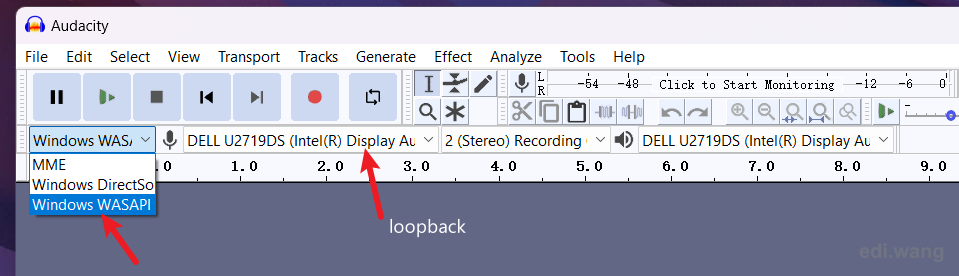
For Audacity, set input configuration to Windows WASAPI and the item with loopback.
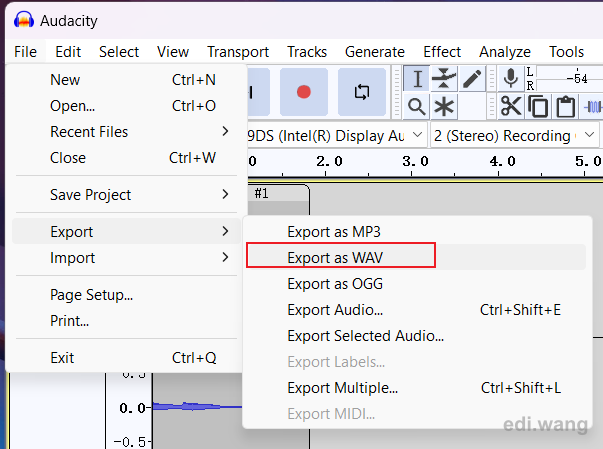
When recording is done, you can export your recording as WAV file.
Azure Speech Service does not require WAV format only, it can support MP4, MP3 also, but you need to install another third-party tool called gstreamer, it will have trouble setting up, so I would recommend using WAV.

Create Azure Speech Service
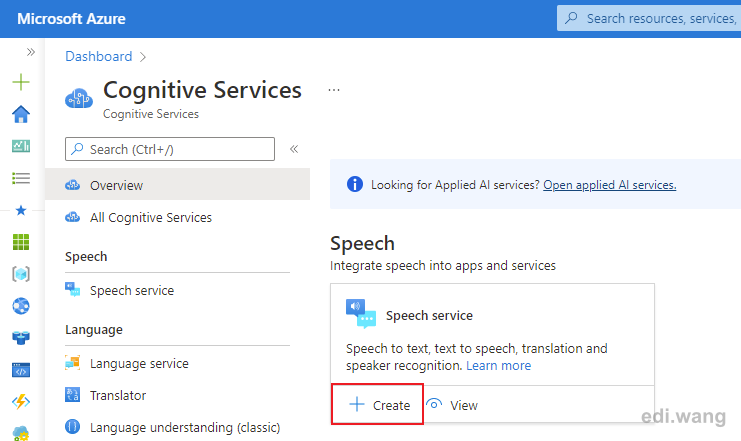
Sign in to Azure portal and use this link "Speech Services" or click "+Create" in Speech Service from Azure Cognitive Services.
Choose a region close to your location to reduce network latency, in my case it's East Asia. You can configure other details as you like.
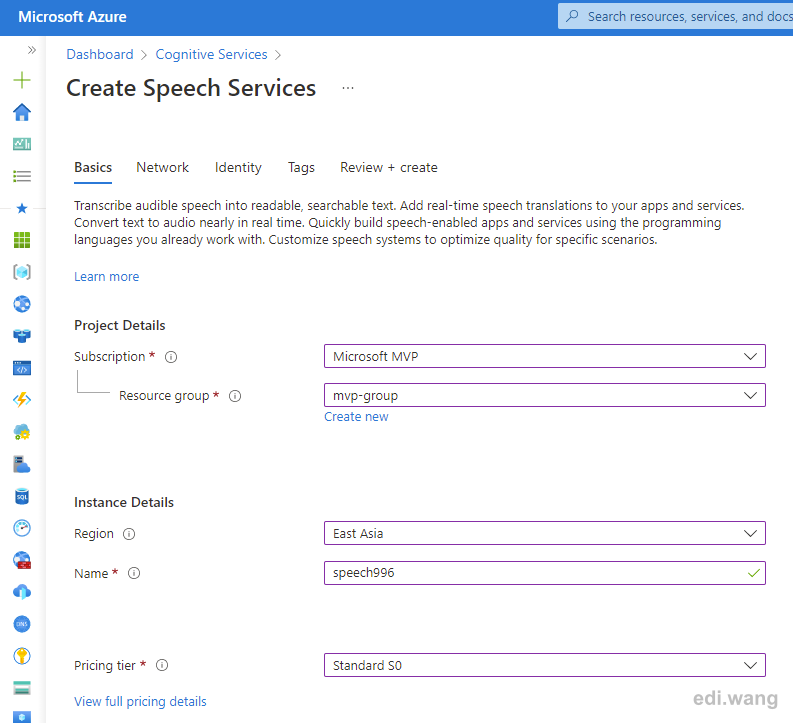
After your Speech Service is created. Go to "Keys and Endpoint" blade, then copy either key. We will use the key and region information for setting up Azure Speech CLI in the next step.

Install and Configure Azure Speech CLI
Azure Speech CLI is written in .NET as a global tool. So, you must install .NET 3.1 from https://dotnet.microsoft.com/en-us/ first. Microsoft may update to .NET 6.0 later.
Then use this command to install the Speech CLI.
dotnet tool install --global Microsoft.CognitiveServices.Speech.CLI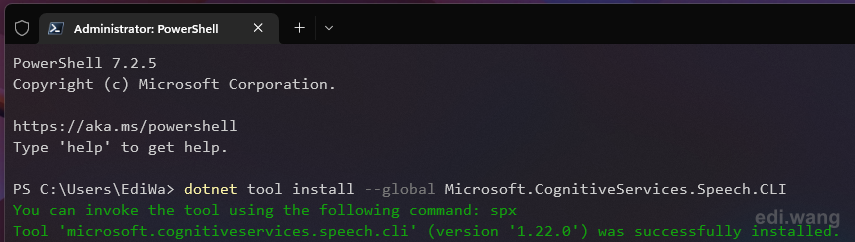
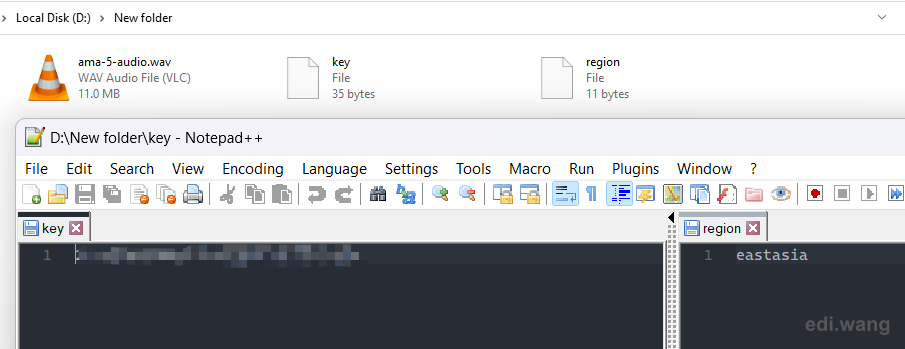
Go to the directory containing your audio file, create a key and a region file, copy your key and region information into them.
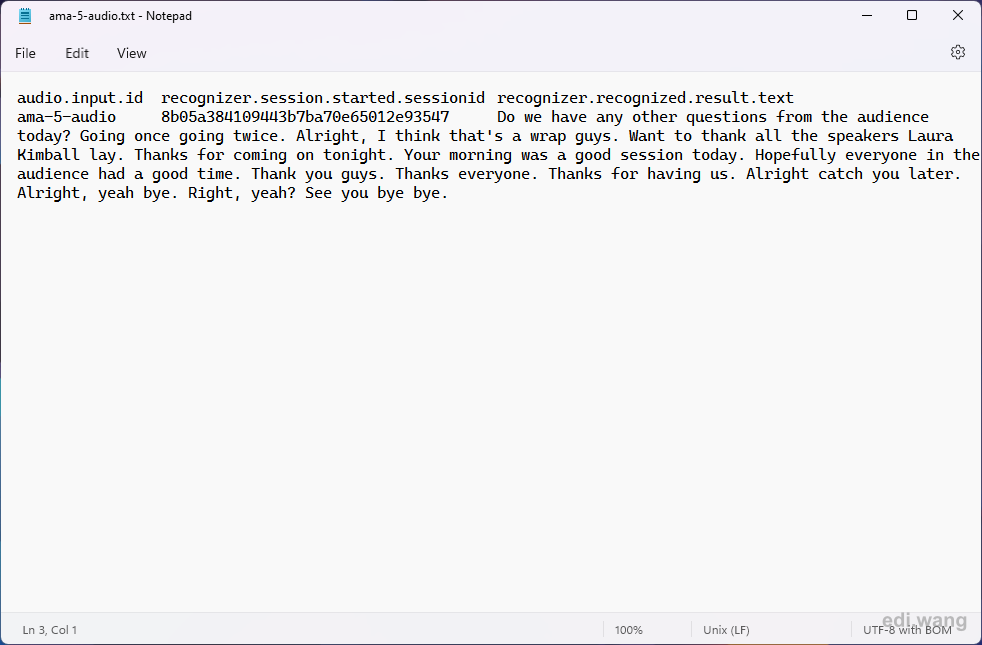
Get Transcription
Open PowerShell or other terminal in current folder and type
spx recognize --file .\ama-5-audio.wav --output file D:\ScreenRecordings\ama-5-audio.txtSpeech CLI will now connect to your Azure Speech Service and send local audio file to Azure for recognizing text.
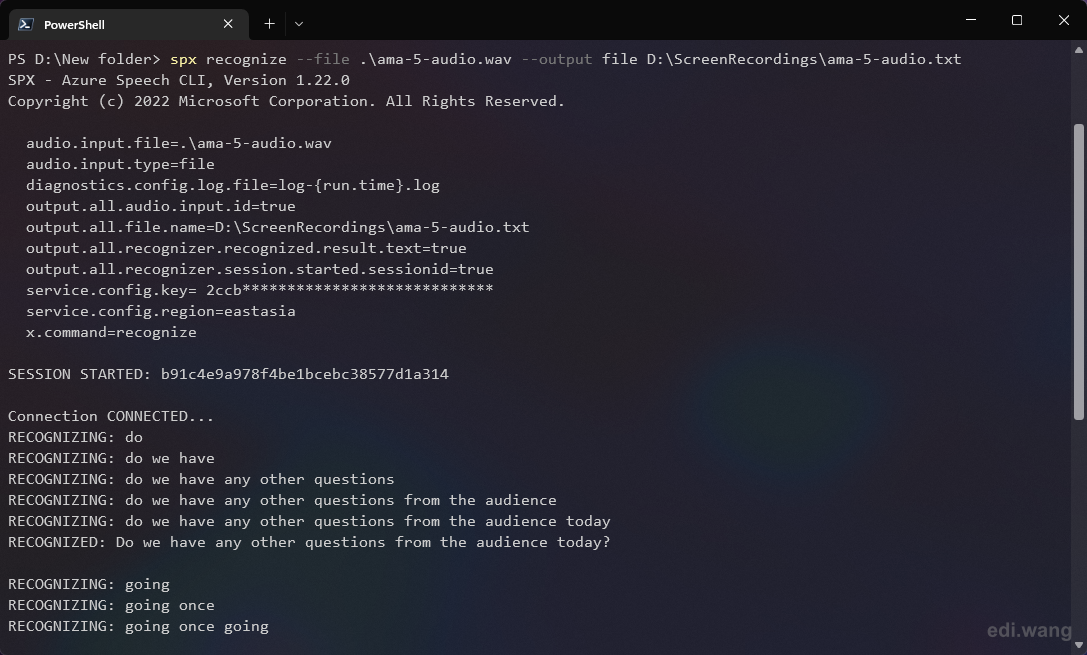
Once it is done, you can view the transcription file.
Mei
Wow! I'm so impressed by your blog - it's been really helpful in building my speech service on Azure for my meeting minutes. Thank you!