Background
The email service used by this blog system, Moonglade.Email, is an Azure Function that originally relied on SMTP for sending emails. I introduced its design in a previous blog post "Cloud Architecture Design of My Email Notification Infrastructure on Azure."
Recently, Microsoft implemented a change that prevents connections to both personal and enterprise Office 365 Outlook mailboxes. The issue stems from the discontinuation of basic authentication due to security concerns. For enterprise M365 users, migrating to the modern OAuth method is straightforward. However, this isn't feasible for personal Outlook.com users since we don't control the server.
To ensure the email service continues functioning, I needed an alternative method for sending emails. Since my entire system operates on Azure, I decided to integrate Azure Communication Services.
In this blog post, I will explain how I implemented support for Azure Communication Services in the Moonglade.Email Azure Function.
Setup Azure Communication Service
Create Azure Communication Service
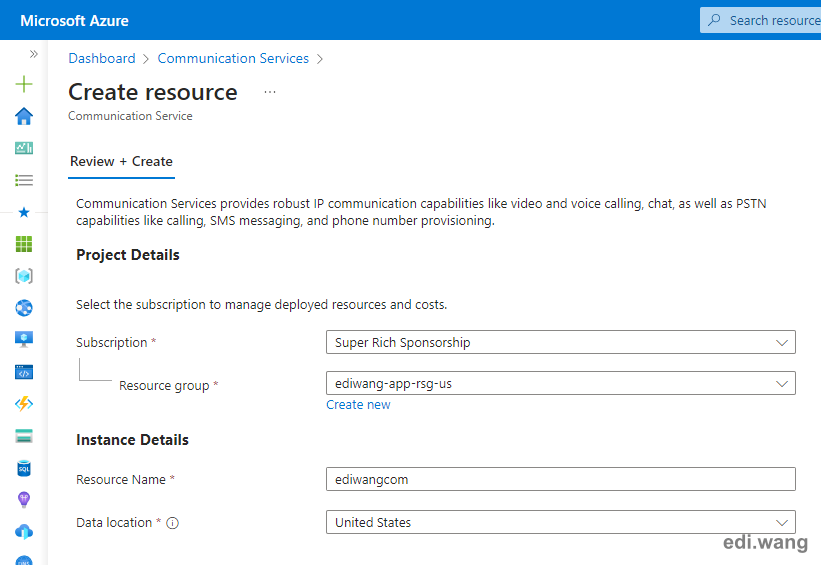
In Azure portal, deploy a new Azure Communication Service is super easy. Select your subscription and resource group, give it a name, and choose your desired Data location. Nothing more.
Add Email Communication Service
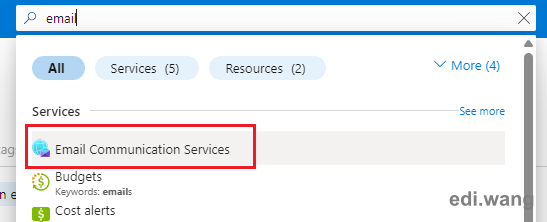
Once the deployment is completed, search "email" in Azure portal, and then create a Email Communication Service
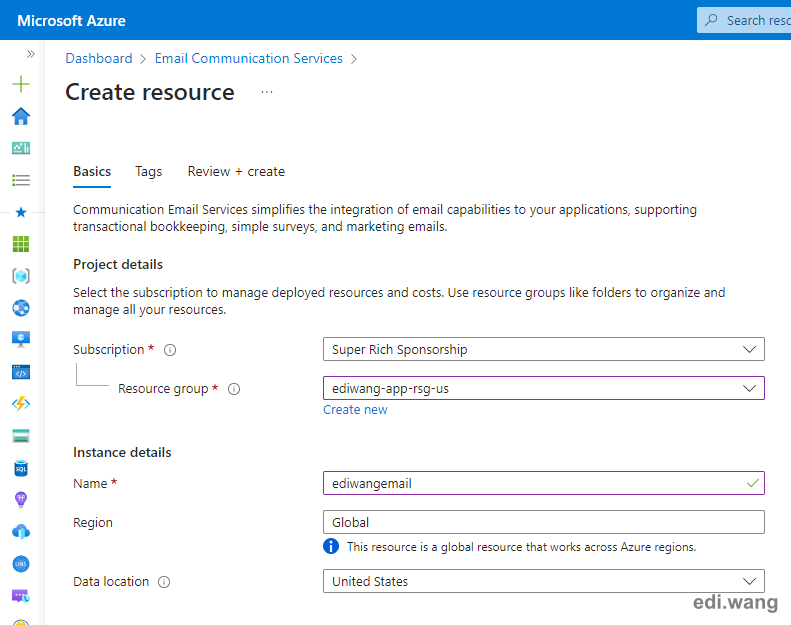
Select the same Data location as your primary Azure Communication Service. In my case, they should be both "United States"
Try Email
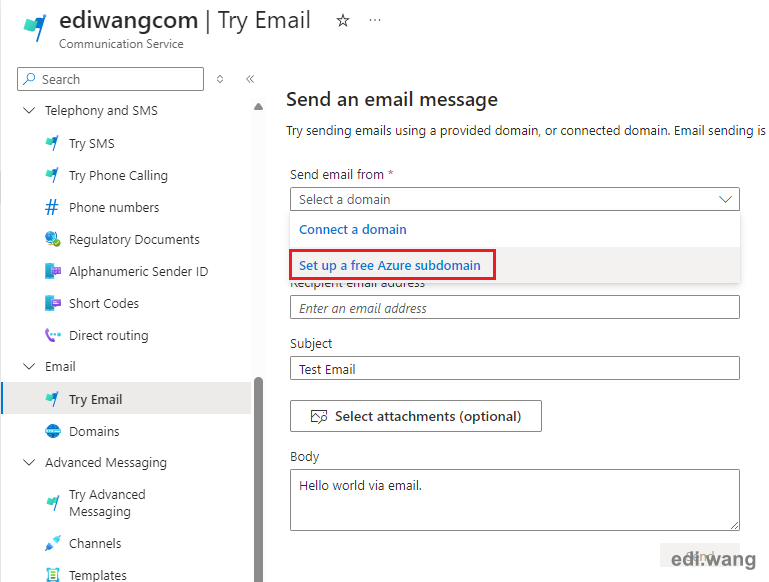
Once the Email Communication Service is deployed, go back to your Azure Communication Service instance. Go to "Try Email" menu, then select "Set up a free Azure subdomain" in the "Send email from" dropdown list.
Select the email service that was previously deployed, and hit "Create + Activate".
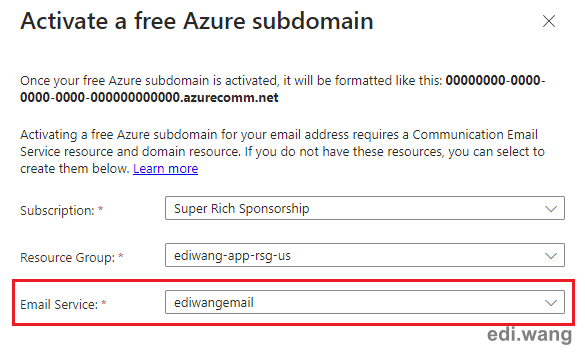
Once the subdomain is activated, go back and select this domain from the dropdown list. Fill everything else, then you can send a test email.
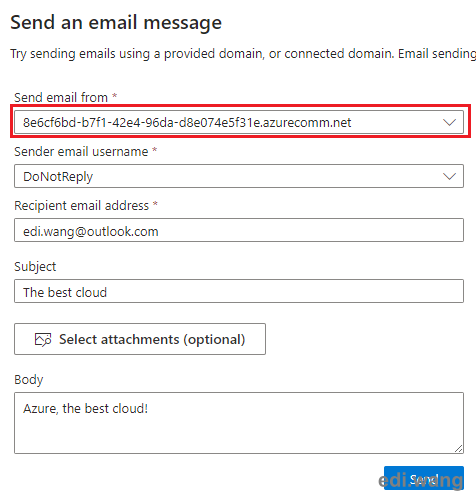

Please be noted, the test email from a random subdomain is likely to go to your junk email folder, make sure to check your junk box for that.
Bind Custom Domain
Now that our test email works, it's time to bind your custom domain to avoid your emails going to user's junk boxes.
You can do this by following the instructions in "Domains" menu.

Get Connection String
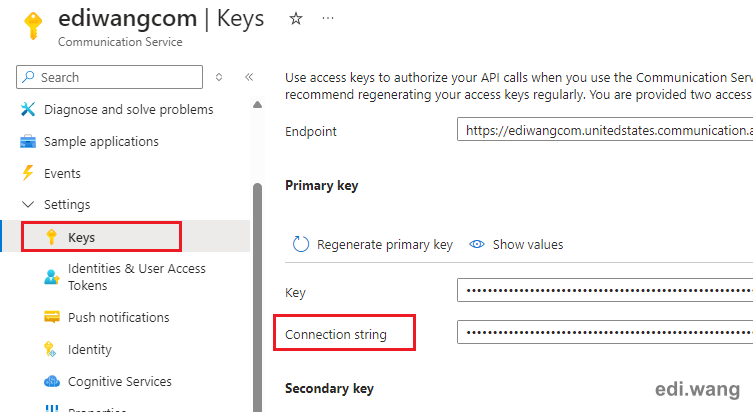
Finally, copy the connection string in "Keys" menu. This will be used in our code to call the Azure Communication Service API for sending emails.
Implementing the Code
C# Sample code in an Azure Function:
public class AzureCommunicationSender
{
    public async Task<EmailSendOperation> SendAsync(CommonMailMessage message)
    {
        var connectionString = EnvHelper.Get<string>("AzureCommunicationConnection");
        var senderAddress = EnvHelper.Get<string>("AzureCommunicationSenderAddress");

        var emailClient = new EmailClient(connectionString);

        var emailMessage = new EmailMessage(
            senderAddress: senderAddress,
            content: new EmailContent(message.Subject),
            recipients: new EmailRecipients(message.Receipts.Select(p => new EmailAddress(p))));

        if (message.BodyIsHtml)
        {
            emailMessage.Content.Html = message.Body;
        }
        else
        {
            emailMessage.Content.PlainText = message.Body;
        }

        var emailSendOperation = await emailClient.SendAsync(WaitUntil.Completed, emailMessage);
        return emailSendOperation;
    }
}
Make sure to add Azure.Communication.Email nuget package first.
The code is pretty straight forward, just one thing to mention. There are two options for sending an email:
namespace Azure
{
    /// <summary>
    /// Indicates whether the invocation of a long running operation should return once it has
    /// started or wait for the server operation to fully complete before returning.
    /// </summary>
    public enum WaitUntil
    {
        /// <summary>
        /// Indicates the method should wait until the server operation fully completes.
        /// </summary>
        Completed,
        /// <summary>
        /// Indicates the method should return once the server operation has started.
        /// </summary>
        Started
    }
}
Azure Communication Service is designed to use a queue, just like how Moonglade.Email is designed. This is a typical cloud native design pattern. If you just want to "fire and forget", set the option to "Started", then your code will finish once the email message is enqueue, no need to wait.
For me, the fundamental design of Moonglade.Email didn't change, as you can refer to previous blog post "Cloud Architecture Design of My Email Notification Infrastructure on Azure.". Azure Communication Service is just another provider besides the original SMTP.
private async Task SendMessageInternal(CommonMailMessage message)
{
    string sender = "smtp";
    var envSender = EnvHelper.Get<string>("Sender");
    if (!string.IsNullOrWhiteSpace(envSender))
    {
        sender = envSender.ToLower();
    }

    switch (sender)
    {
        case "smtp":
            var response = await message.SendAsync();
            logger.LogInformation($"SMTP response: {response}");
            break;

        case "azurecommunication":
            var result = await message.SendAzureCommunicationAsync();
            logger.LogInformation($"AzureCommunication operation ID: {result.Id}");
            break;

        default:
            throw new InvalidOperationException("Sender not supported");
    }
}
So, in my case, there are two queue used to send emails now. A message will first go to the original Azure Storage Queue used in Moonglade.Email. The QueueProcessor then take it out, and decide to use SMTP or Azure Communication Service to process the message. If it is Azure, the email message will then go to another queue internally used by the Azure Communication Service, which is transparent to us.
Conclusion
Azure Communication Service offers a convenient solution for sending email notifications. It's easy to set up and doesn't require complex coding for integration.
Comments