Background
Microsoft Azure does not officially provide Windows XP images for the creation of virtual machines running this legacy operating system. As of now, the earliest version of a client OS image available on Azure is Windows 7, which additionally requires a Visual Studio subscription to access. Despite this, I have devised a method to operate legacy Windows operating systems, including Windows XP, on the current Azure compute platform. While there is little practical reason to use Windows XP in today's environment, my goal is to demonstrate the feasibility of this endeavor. In this blog post, I will outline the steps involved in this process in detail. I hope you find the journey as enjoyable as the destination.
Important Security Warning
The purpose of this post is to demonstrate a technical possibility, rather than to endorse or recommend such a setup for actual use. The blog post should not be taken as encouragement or endorsement to run unsupported operating systems in a production environment or for any purpose that could put your data or security at risk.
Both Windows XP and Windows 2000 are long been out of support by Microsoft. This means they no longer receive security updates or patches to protect against the latest vulnerabilities. Running these outdated operating systems poses a significant security risk to any network or system they are part of, including potential exposure to malware, ransomware, and other security threats that could compromise not only the virtual machine but potentially other connected services and data.
Running Windows XP or Windows 2000 on Azure—or any environment in 2024—should be considered extremely risky. If these systems are exposed to the internet, the risk is even greater, as they could be easily targeted by attackers. Even within a closed network, vulnerabilities could be exploited through other connected systems.
Create Windows XP VM on Local Machine
Hyper-V Setup
The underlying infrastructure that enables Azure to run virtual machines is essentially a specialized variant of Hyper-V server technology, which is the same hypervisor used in modern Windows client and server operating systems. This implies that, theoretically, any OS that is capable of running on a Hyper-V host in a local environment should also be operable on Azure's platform. This forms the basis for our endeavor to set up Windows XP on Hyper-V first, before transitioning it to Azure.
The image I use is Windows XP Professional with SP3 (English, United States) 32bit, you can find it on VS subscription or anywhere on internet.
Please note, we can only use Professional edition as it has Remote Desktop capability to be remotely connected, otherwise you will have no way to use the VM once it's in Azure.
My host machine is Windows 11 Pro with Hyper-V installed.
There are a few important steps I listed below.
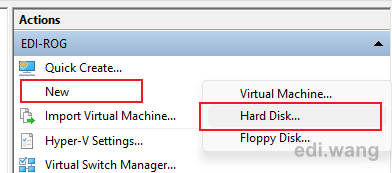
Create a fix size VHD disk
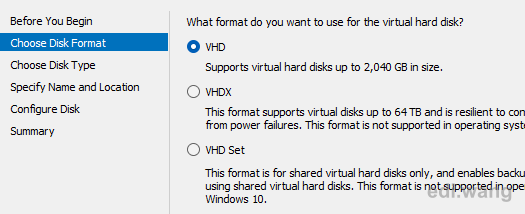
Before going to OS setup, you need to create a VHD format hard disk, because Azure doesn't accept VHDX. 4GB will be fine.

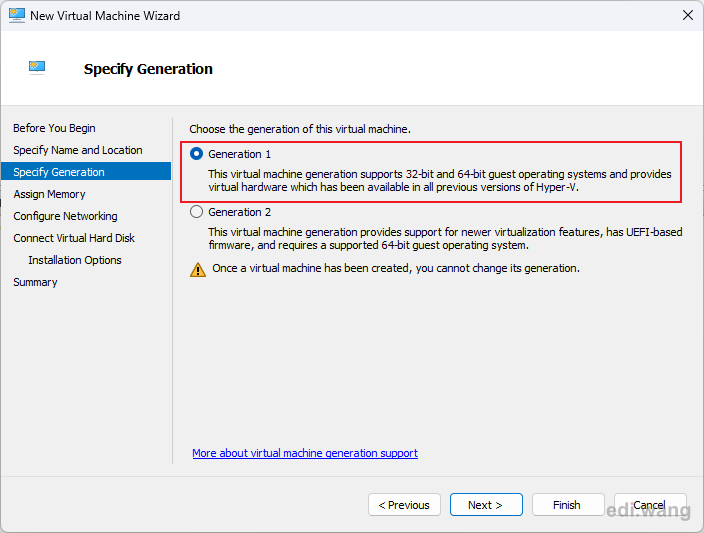
Use Generation 1 VM
You must also use Generation 1 when creating this VM.
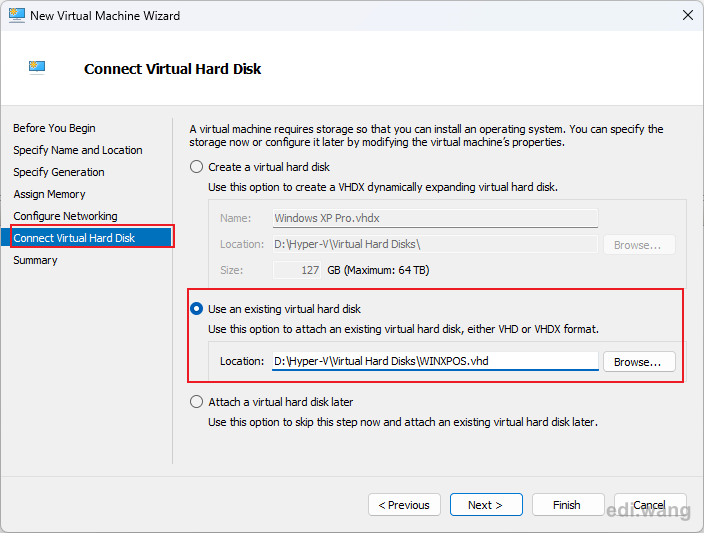
Use the fix sized VHD
Remember to choose the fixed sized VHD you just created as the machine's OS disk.
Install Hyper-V Integration Service
To ensure full functionality after installing Windows XP on a guest VM, it's necessary to install Hyper-V Integration Services. However, on a Windows 11 host machine, this process isn't straightforward as Microsoft has discontinued the integration service image and the associated menu options. Fortunately, the required vmguest.iso file is available for download at the Internet Archive. You can access it via this link: https://archive.org/details/Hyper-V_vmguest.
Reboot the VM after installation complete. You should see all Hyper-V services running as automatic startup.
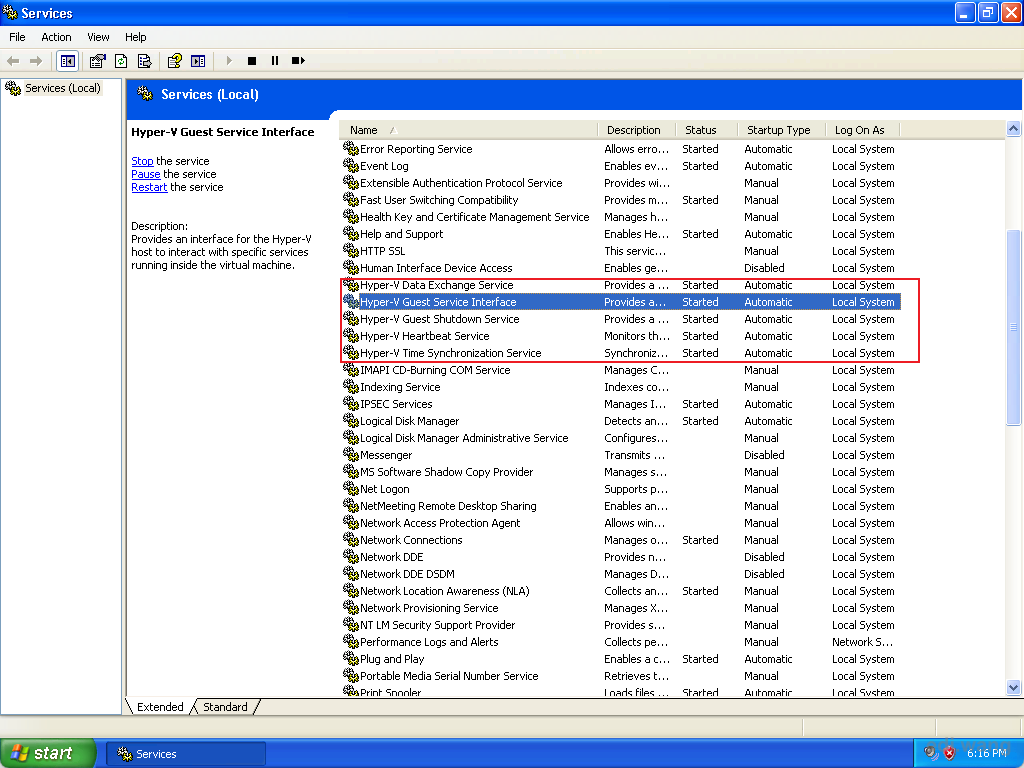
Enable Remote Desktop
Go to system properties and allow remote connections. Make sure your account is added into remote users.
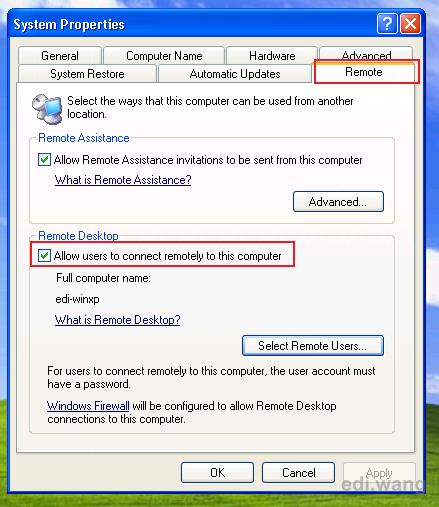
DO NOT run sysprep
I know many of you consider sysprep before making a generalize OS image, but this step is not required this time, If you run sysprep, your VM will blow up sky high on Azure. Just shut down the VM as normal now.
Upload and Prepare OS Disk for Azure
Create a storage account on Azure with a private container, e.g. "vhdstore"
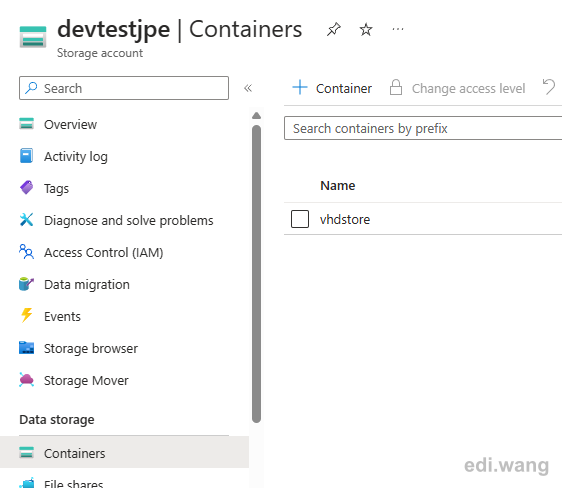
Use Azure Storage Explorer or any other tools you like to upload the VHD file from your local machine to this storage container.
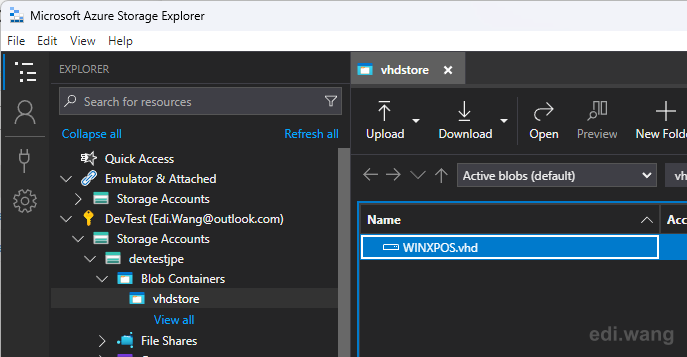
Then, from Azure CLI (on your local machine or from Azure Portal), we need to create a disk based on this VHD.
Replace the values in these commands for your own values.
az account set --subscription "DevTest"
az disk create --resource-group "devtest-group" --name "WINXPOS" --location "japaneast" --os-type Windows --source "https://devtestjpe.blob.core.windows.net/vhdstore/WINXPOS.vhd" --size-gb "4"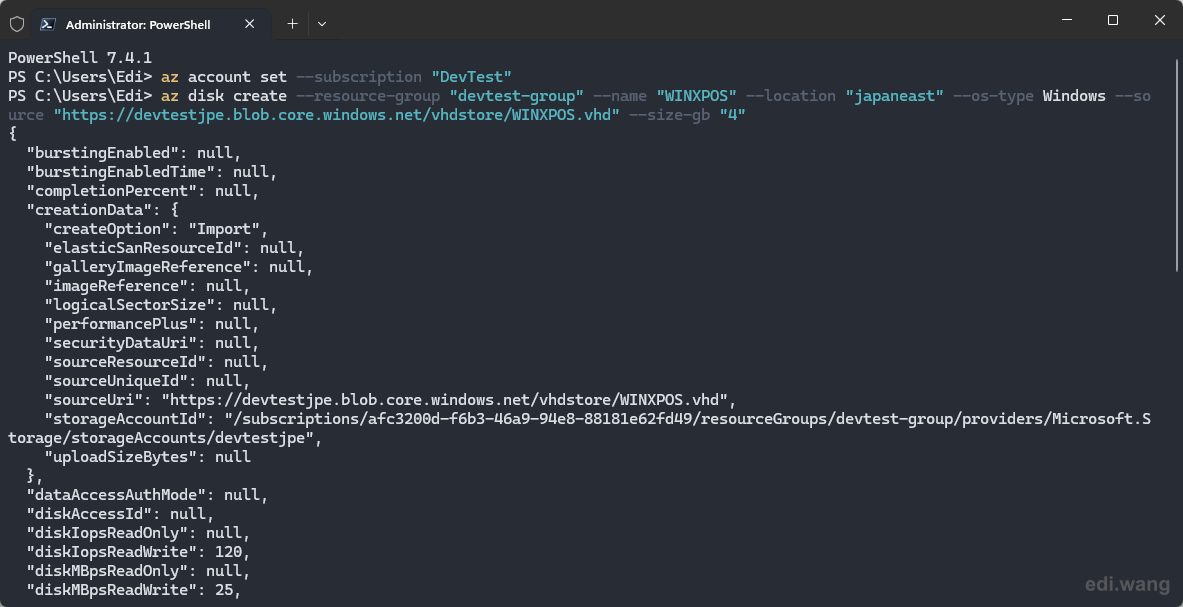
Once the Azure Disk is created, you can delete the VHD from your storage account to save money.
Create VM on Azure
Go to Azure portal, open the resource group you created the disk in, you should see it in the list.
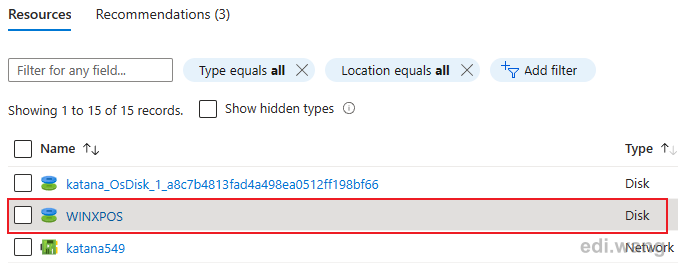
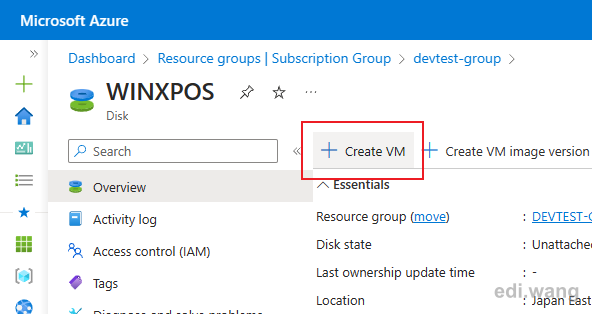
Click this disk, and click "Create VM" button.
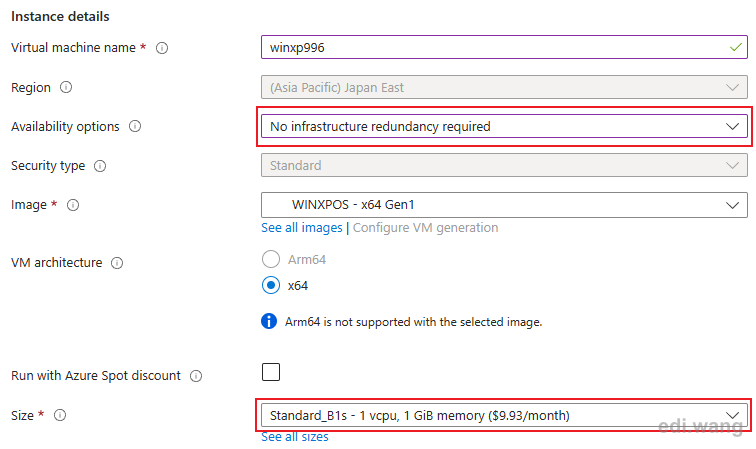
Select "No infrastructure redundancy required", and choose a "Standard_B1s" size. Remember, this is Windows XP 32 bit, it won't recognize RAM larger than 4GB. 1GB is enough for XP to run very smoothly.
Please note, although the VM architecture says x64, it doesn't matter, our 32 bit system can still boot up.
Enable RDP port 3389, and choose "Windows client" in license type.
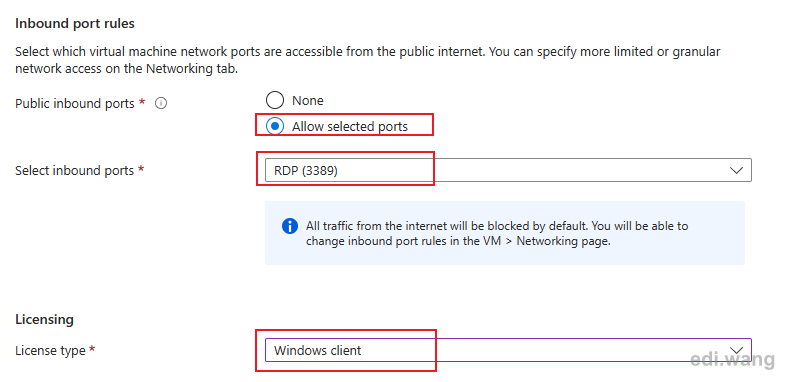
Then, create the VM as normal.
After the VM is created, you can RDP into it using its public IP address as normal.
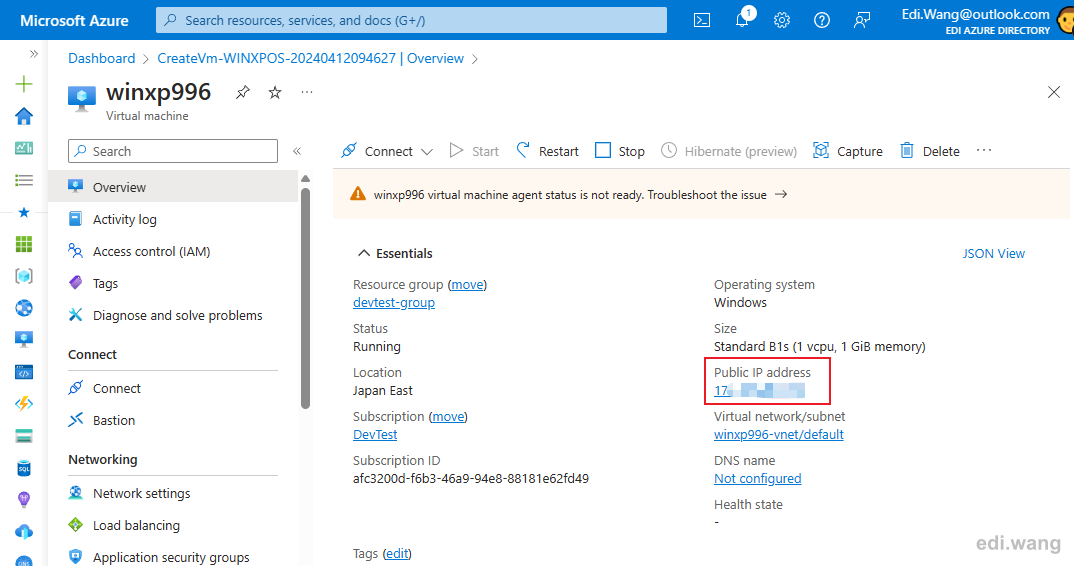
Yeah, this is our Windows XP VM running on today's Azure!
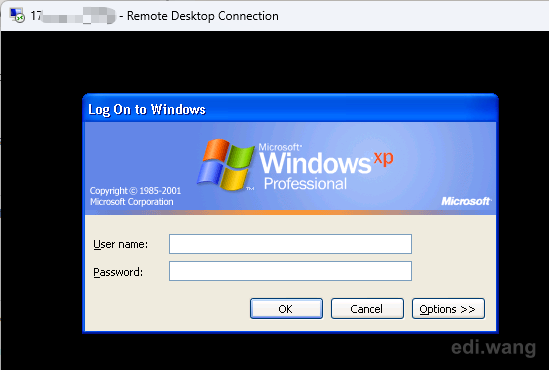
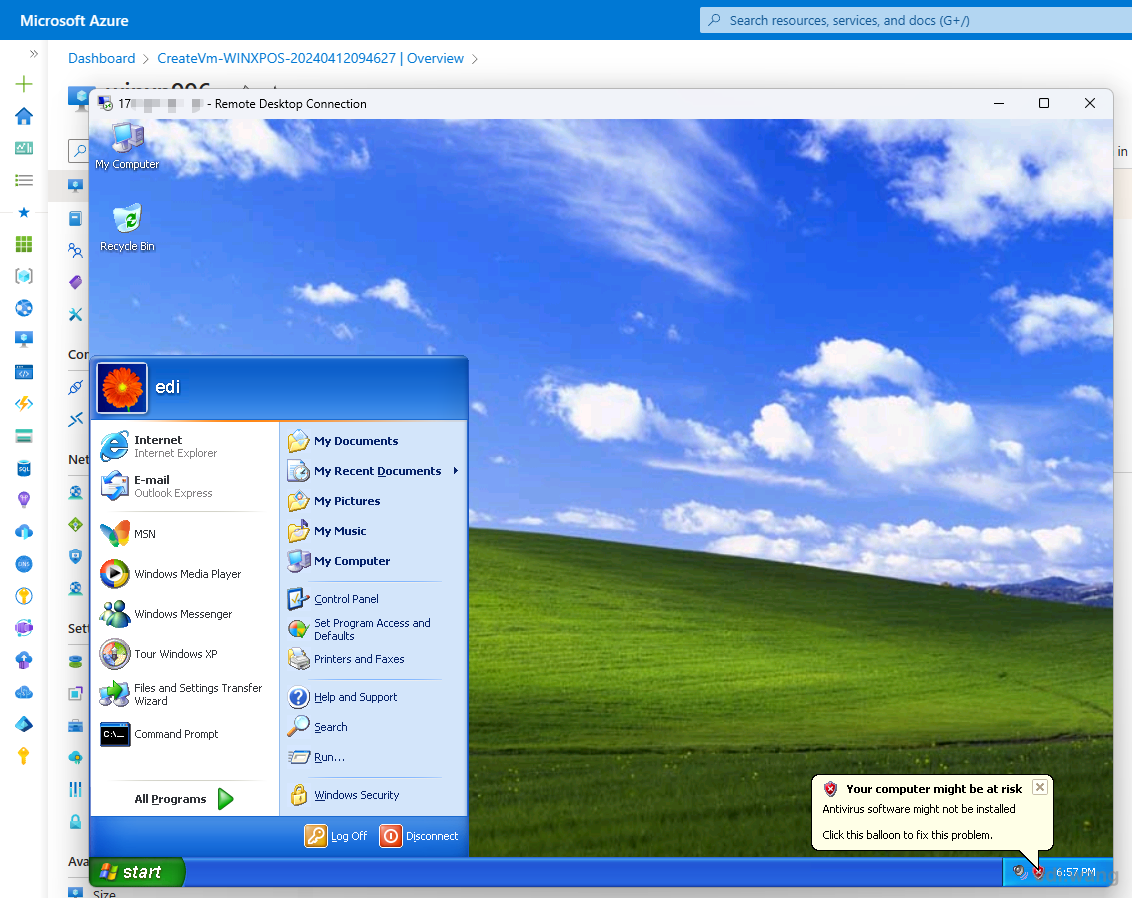
How about Windows 2000
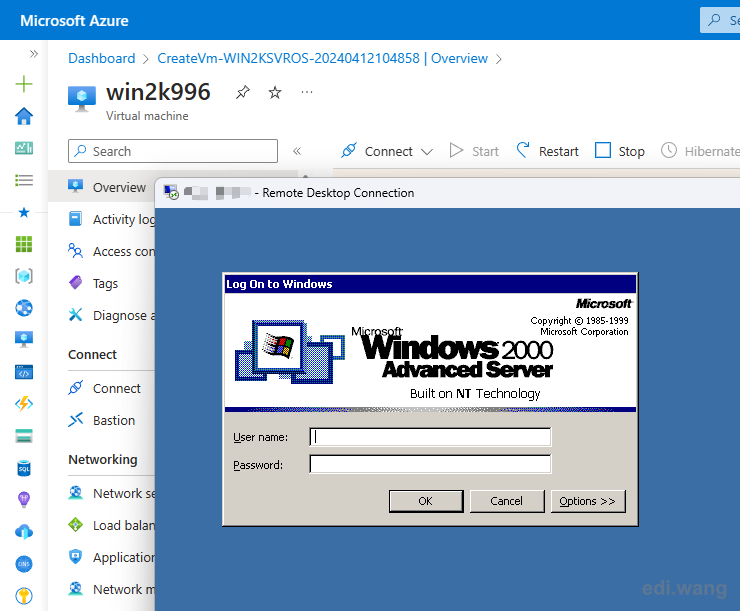
I also managed to have Windows 2000 VM running in Azure. Just a little bit complex than running XP.
- Windows 2000 Server or Advanced Server is required, because only server OS has Terminal Service (Remote Desktop)
- Hyper-V Integration Service is a little bit different. You must use an older version of the vmguest.iso from Windows Server 2008 R2. You can find it here: https://archive.org/download/hyper-v_vmguest_2008_2008R2_2012R2
Kenny
This is really helpful. How is the performance of the XP Azure VM?
You've described creating the XP VM in Win 11 Pro. Does that mean I could actually run the XP VM on that local Win 11 machine? The benefit of Azure is cloud access to anyone with permission?
Crispy
Hi Edi Thanks for the article. I have followed the steps and able to generate the vdi and convert into azure disk and spin up the vm. But once the vm is up i am not able to connect through rdp eventhough in xp rdp is enabled. In boot diagnostics i could see boot failure reboot and select proper boot device. i have selected the same B1s standard machine. Please let me know if anything else to check