Introduction
I own a Windows 11 PC equipped with an RTX 4070 GPU and would like to use its power for local AI applications. While many online tutorials tend to steer users towards Linux, Docker, and complex network configurations, which I've also tried this complex route and successfully set up AI on a Linux system. However, this approach isn't the most accessible for beginners. Given that Windows remains the predominant operating system for non-IT professionals, there's a clear need for a simpler way to leverage AI technology without delving into the technicalities or setting up a complicated environment.
In this guide, I'll walk you through the essential steps to get your AI model up and running on a Windows machine with a interactive UI in just 30 minutes—no advanced expertise required.
Why
Running a Large Language Model (LLM) AI like llama3 on a local machine rather than using a cloud-based service over the internet can offer several benefits, depending on the specific use case and requirements.
-
Privacy and Security: When you run an LLM locally, the data processed by the model never leaves your machine. This can be crucial for sensitive applications involving proprietary, confidential, or personal information where data security is paramount.
-
No Internet Dependency: Running the model locally eliminates the need for a constant internet connection. This can be beneficial in environments with unreliable internet access or when working in remote locations.
-
Latency: Local execution can reduce latency since there's no need to send data over the internet and wait for a response from a remote server. This can result in faster interactions with the AI, which is particularly important for real-time applications.
-
Cost Control: While there may be a higher upfront cost to acquire the necessary hardware and software to run an LLM locally, it might be more cost-effective in the long term because there are no ongoing fees associated with API usage or cloud services.
-
Compliance: Some industries have strict regulatory requirements regarding data handling. Running an LLM locally can make it easier to comply with such regulations.
However, it's important to note that running an LLM locally also has its challenges and downsides:
-
Hardware Requirements: LLMs are resource-intensive, and running them locally requires significant computational power, which can involve expensive hardware and high energy consumption.
-
Maintenance and Updates: You are responsible for maintaining the software and hardware, which includes handling updates, security patches, and potential technical issues.
-
Scalability: Scaling up may require additional hardware, whereas cloud-based services can offer near-instant scalability.
-
Technical Expertise: Deploying and managing an LLM locally requires a certain level of technical expertise that might not be necessary when using a cloud-based service.
Whether to run an LLM locally or use a cloud-based service will depend on the balance between these benefits and challenges in the context of the specific needs and capabilities of the user or organization.
Install and Configure Ollama
Ollama is a lightweight, extensible framework for building and running language models on your local machine.
Download and Install
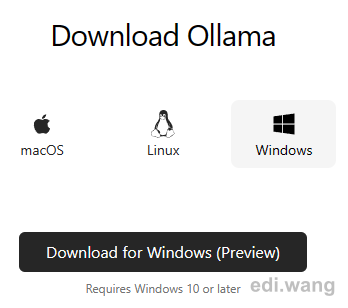
Go to https://ollama.com/ and download the Windows edition of ollama. It's currently in preview.
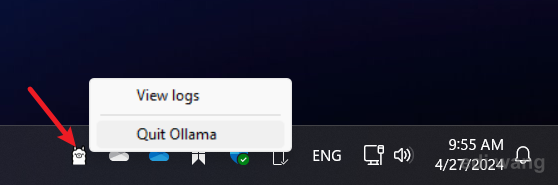
After install is completed, don't rush to try it. Close the PowerShell window it opened for you, and quit Ollama from system tray on your taskbar.
Set environment variables
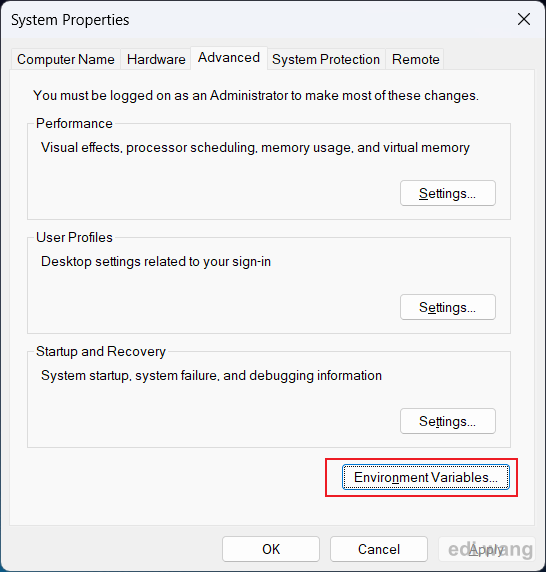
Search for "environment variables" in your start menu, open system properties settings, and click "Environment Variables" button.
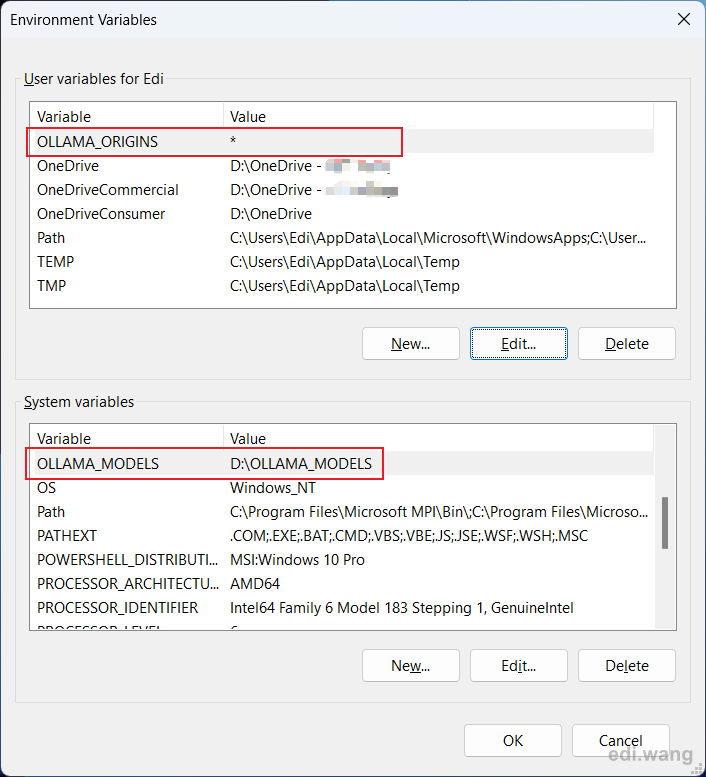
Required: Create a new user variable named OLLAMA_ORIGINS with value of *
Optional: If your C drive is running out of space, you can set another system or user variable with name OLLAMA_MODELS and give it a value of the path where you want to download AI models. These models can usually be 2-10 GB each.
Now, restart Ollama. You will see it pop up in system tray again.

Download Models
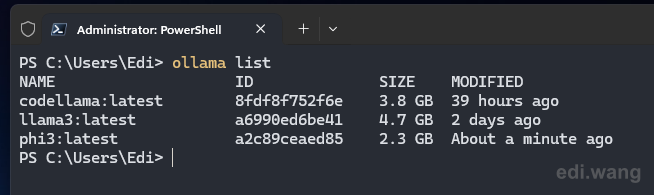
I use 3 models: phi3, llama3 and codellama. If you are a beginner that not from IT industry, you typically need llama3 only.
Open a PowerShell window (search for PowerShell in start menu), and run ollama pull <model name> to download models.
For example:
ollama pull phi3
ollama pull llama3
You can use ollama list command to verify the download
Install and Configure NextChat
Download
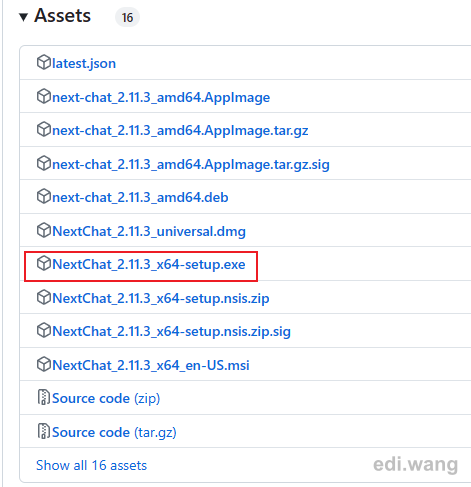
Go to https://github.com/ChatGPTNextWeb/ChatGPT-Next-Web/releases and find the latest release.
Download and install the one in exe format, typically named with _x64-setup.exe
Settings
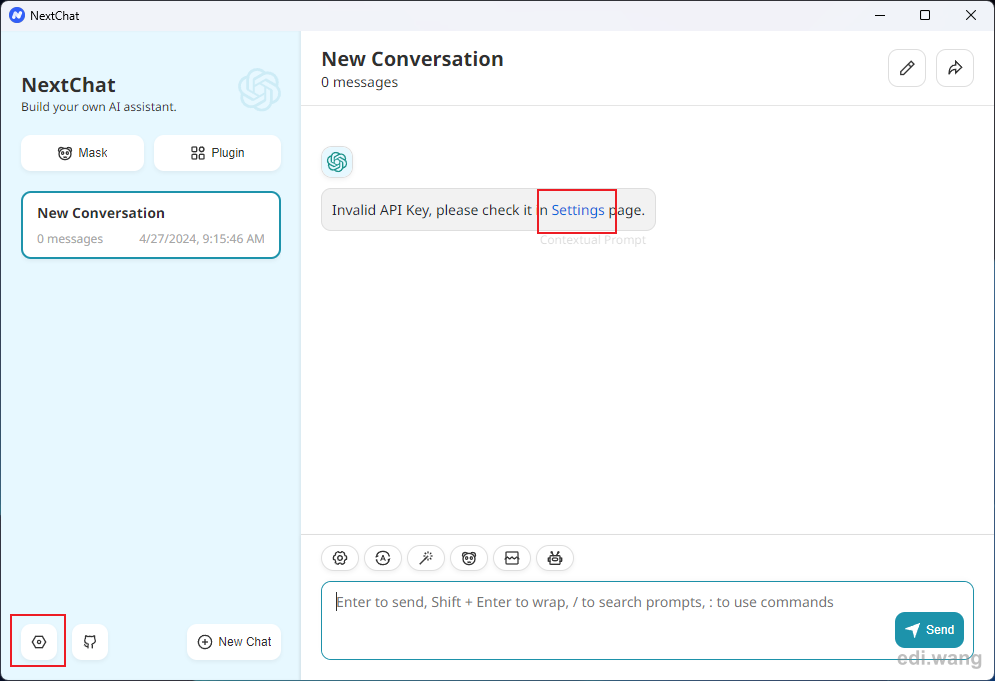
Go to settings page
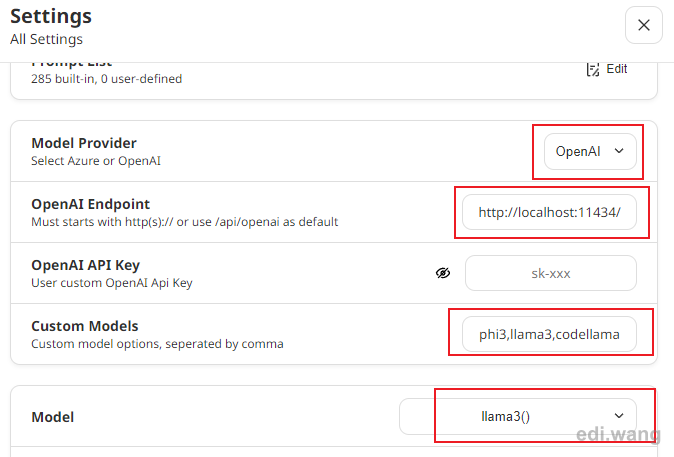
Use the following settings:
- Model Provider: Open AI
- OpenAI Endpoint: http://localhost:11434/
- Custom Models: phi3,llama3,codellama
- Set to what ever you download in the previous step. If you download llama3 only, here will also be llama3 only.
- Model: llama3
- The default model used for your chat, set to whatever you like.
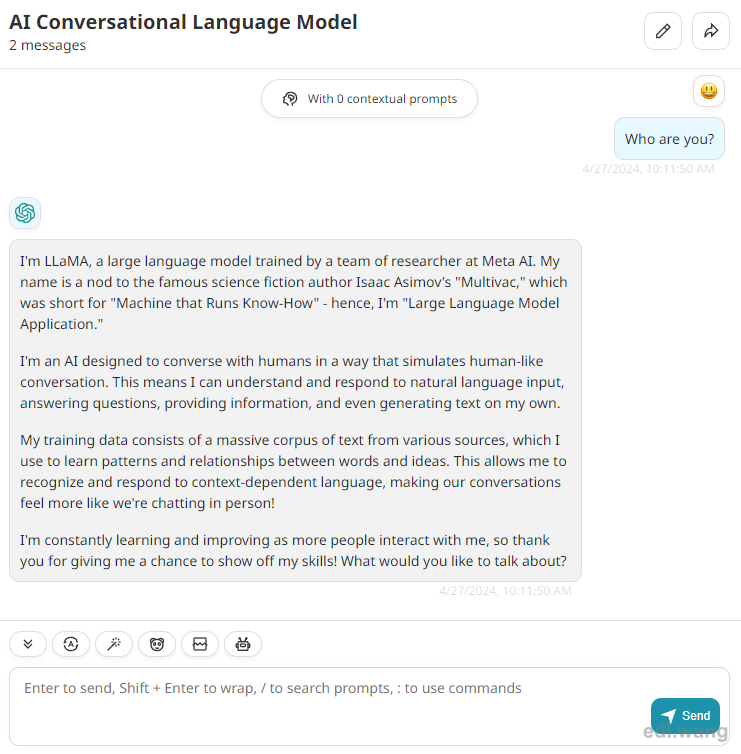
Chat
Close settings page. You will now be able to chat with AI model on local machine!
If this doesn't work, it may have a change after this blog post is written. You may check the latest document here: https://docs.nextchat.dev/models/ollama
Behind the Scenes
For readers that are interested in how it works. Here's the magic behind the scenes.
Model
Models serve as the intelligence behind artificial intelligence. In our domain, we primarily focus on Large Language Models (LLMs), which are designed to leverage the processing power of GPUs before CPUs. Each model is unique in its application and is developed by a diverse range of entities, from corporations to individual contributors. Comprehensive introductions to these models can be found at https://ollama.com/library.
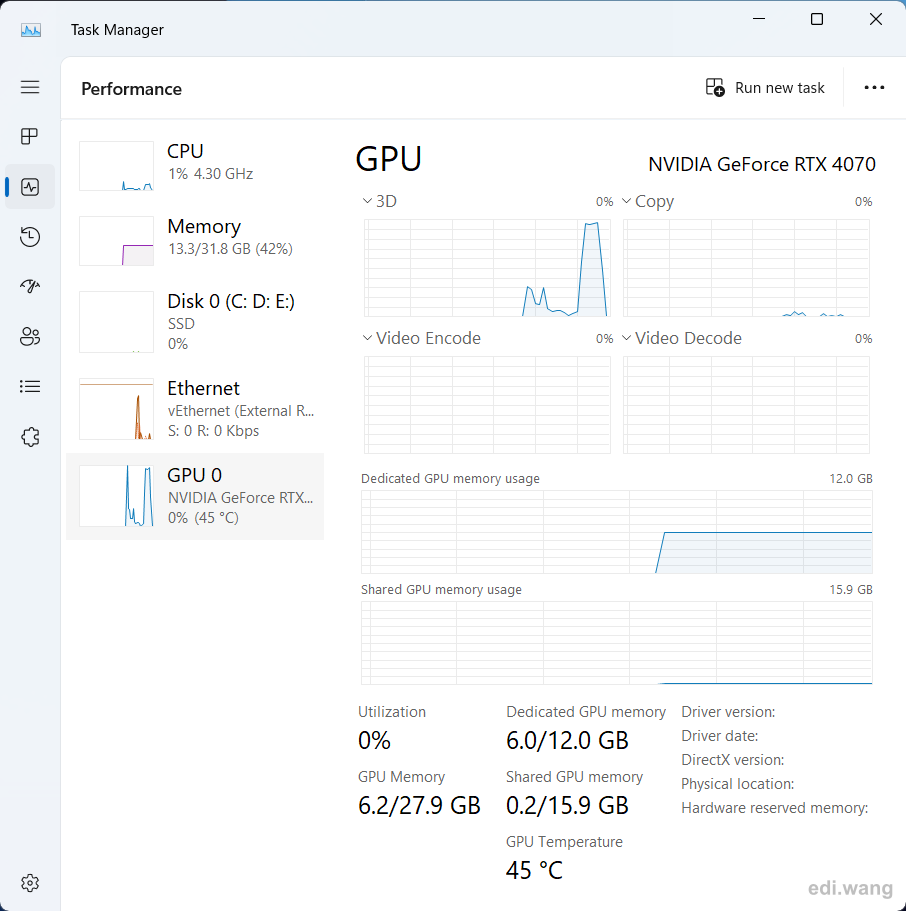
This is an example of my GeForce RTX 4070 GPU utilization during my chat with llama3 model:
Ollma
It is the program to run AI models, it will open an REST API server on your local machine http://localhost:11434/ .
A REST API (Representational State Transfer Application Programming Interface) is a set of rules and conventions for building and interacting with web services. It enables different software applications to communicate with each other over the internet using standard HTTP methods. REST APIs are designed to be scalable, simple, and stateless, and they are widely used to build web services that are easy to integrate with a wide variety of clients, including browsers, mobile apps, and other web services.
NextChat
This is the user interface (UI) for users to chat with AI. There are other types of UI as well. In this post, NextChat will call the REST API provided by Ollama on your local machine. Basically send your chat message to the API, and show the response on your screen. NextChat is a open-source project on GitHub: https://github.com/ChatGPTNextWeb/ChatGPT-Next-Web. It typically runs on a server that provides services to users coming from internet, rather than running locally to serve only one user that is describe in this post.
Prompt
A prompt when chatting with AI refers to the initial input or instruction given by a user to the AI system. It's the starting point of the conversation or interaction. The prompt can be a question, a statement, a command, or even a single word that the AI uses to generate a response or perform a task.
For example, if you're using an AI chatbot, you might prompt it with a question like "What's the weather forecast for today?" The AI would then process this prompt and respond accordingly, providing you with the weather information.
Prompts can vary greatly in complexity, from simple requests for information to more complex instructions that require the AI to perform multiple steps or generate creative content. The quality and clarity of the prompt can significantly influence the relevance and usefulness of the AI's response.
Comments