
Background
A few years ago, I shared step-by-step guides on deploying NextChat (ChatGPT Next Web) and BigAGI to Azure using managed PaaS services such as App Service—eliminating the hassle of configuring and maintaining virtual machines. Now, a new UI called Open WebUI has been generating a lot of buzz for its user-friendly interface and open approach.
In this post, I’ll walk you through how to easily deploy Open WebUI to Azure using Azure Container Apps. I’ll also show you how to connect it directly to your Azure OpenAI endpoint, all without the need for any additional proxy services like LiteLLM. Let’s get started!
Idea and Problem
Traditionally, deploying Open WebUI involves running a Docker container on a virtual machine, like so:
docker run -d -p 8080:8080 -v open-webui:/app/backend/data --name open-webui --restart always ghcr.io/open-webui/open-webui:mainIn a production environment, you’d also set up a separate web proxy and configure TLS to secure your traffic.
But what changes when moving to a fully managed cloud solution without VMs? There are two key challenges to address:
-
Persistent Data Storage:
How do we mount a volume for Open WebUI’s data so it persists beyond container restarts? -
Custom Domain & HTTPS:
How can we bind a custom domain and ensure secure (HTTPS) access for users?
The good news is that Azure Container Apps handle both of these requirements seamlessly—with just a few simple steps in the portal.
Let’s walk through how you can do this with ease.
Create Storage Account and File Share
First thing we do is to create a Storage Account and a File Share, this will later act as the mounted volume in the Docker container.
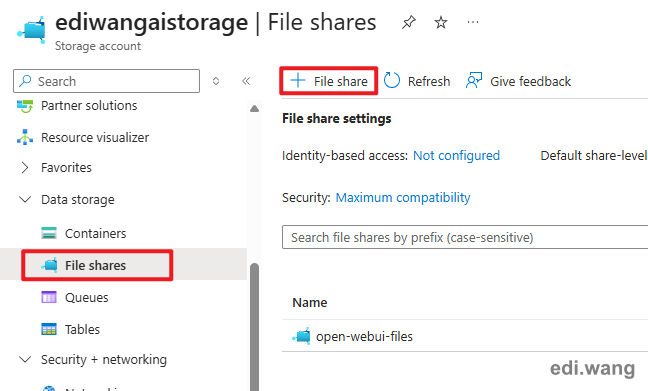
First, create an Azure Storage Account as usual. Then go to File shares blade, click + File share
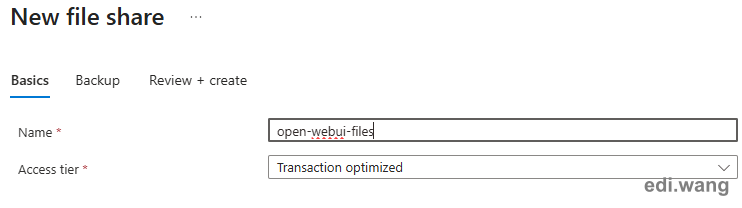
Then, create a file share with a name, and select Transaction optimized for the Access tier. You can disable Backup if you don't need it.
Go to Access keys, and copy one of the keys.
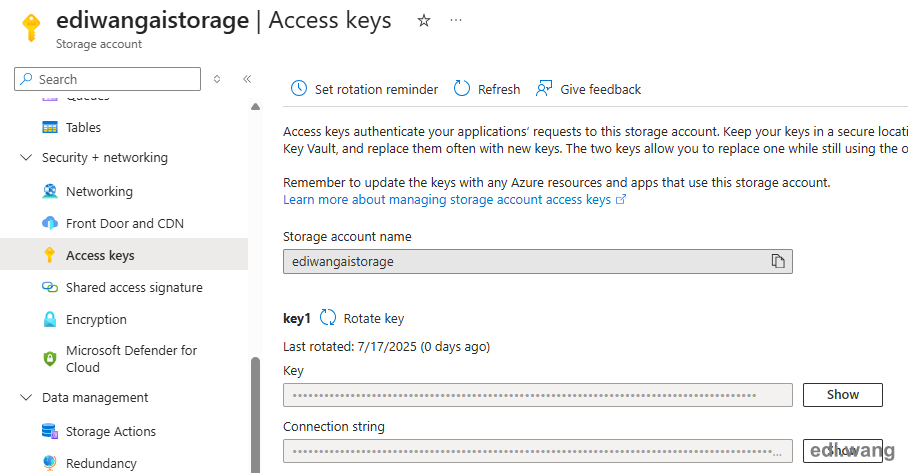
Make sure you copied all three things in this step. We'll use them later.
- Storage Account name
- File Share name
- Storage Account key
Create Container App
Next, create a new Container App
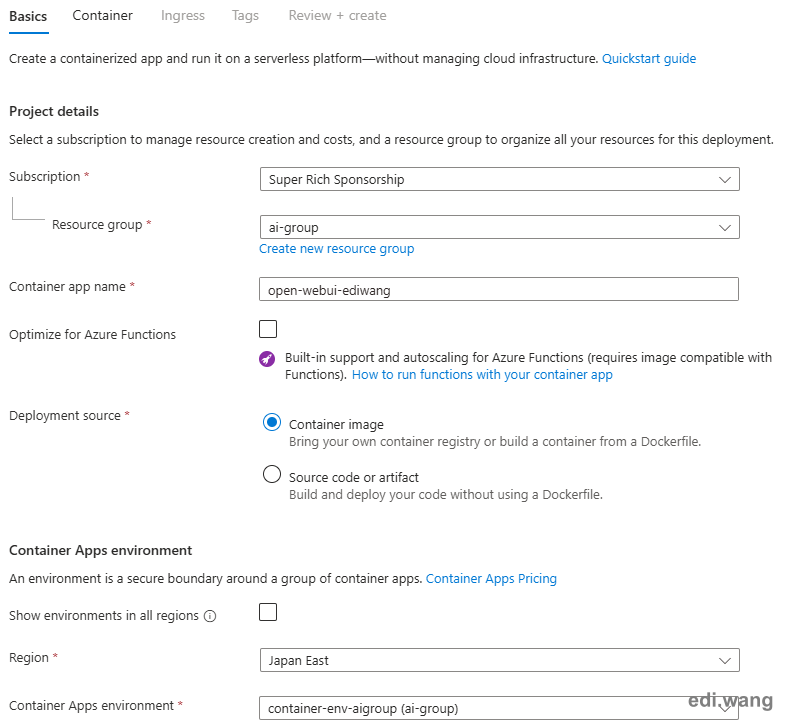
Basics Tab
- Deployment source: Container image
- Region: I would suggest using the same region as your storage account. In my case, both of them are in Japan East.
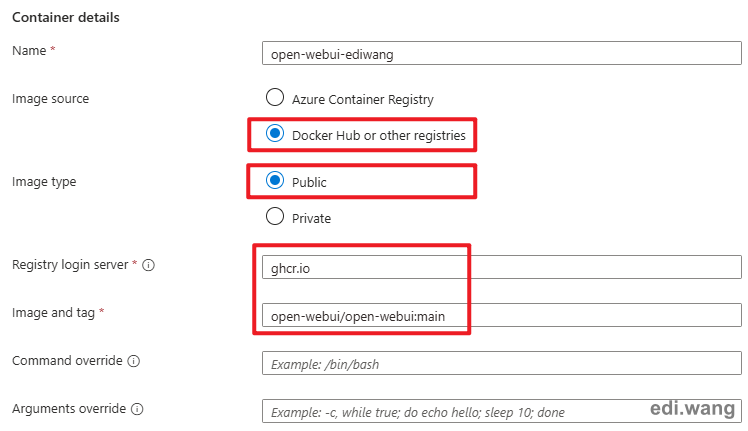
Container Tab
- Image source: Docker Hub or other registries
- Image type: Public
- Registry login server:
ghcr.io - Image and tag:
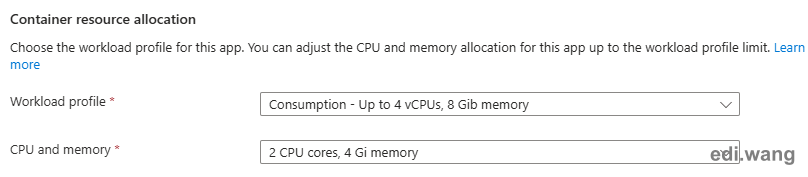
open-webui/open-webui:main - Workload profile: Consumption
- CPU and memory: 2 CPU / 4GB
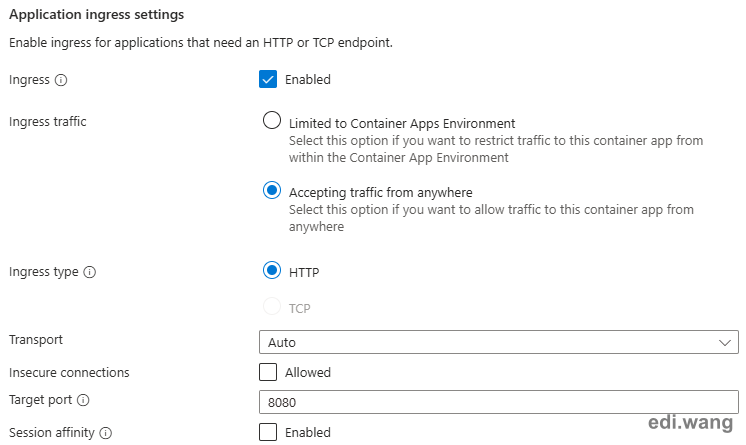
Ingress Tab
- Ingress: Enabled
- Ingress traffic: Accepting traffic from anywhere
- Target port: 8080
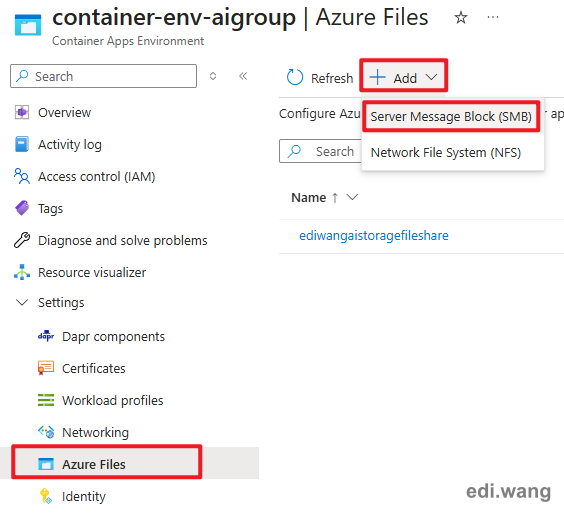
Configure File Share
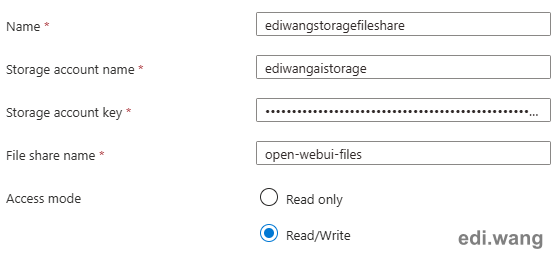
Go to the Container Apps Environment (NOT Container App) that just created. Navigate to Azure Files blade and add a new SMB file share.
Give it a name, and fill everything you copied in the first step.
Set Access mode to Read/Write. This is important as Open WebUI program will both read and write the database.
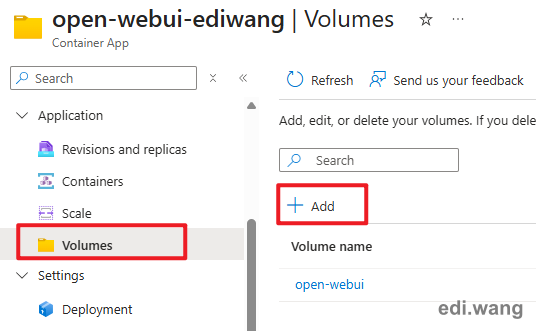
Then, go to the Container App we just created. Go to Volumes blade and add a new volume.
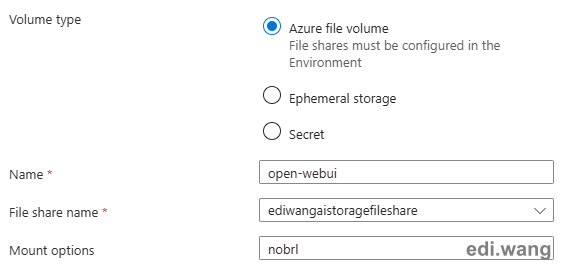
- Type: Azure file volume
- Name: open-webui (or any name you can use)
- File share name: Select the file share name we just created in the previous step
- Mount options: nobrl (disable sending byte range lock requests to the server and for applications which have challenges with posix locks)
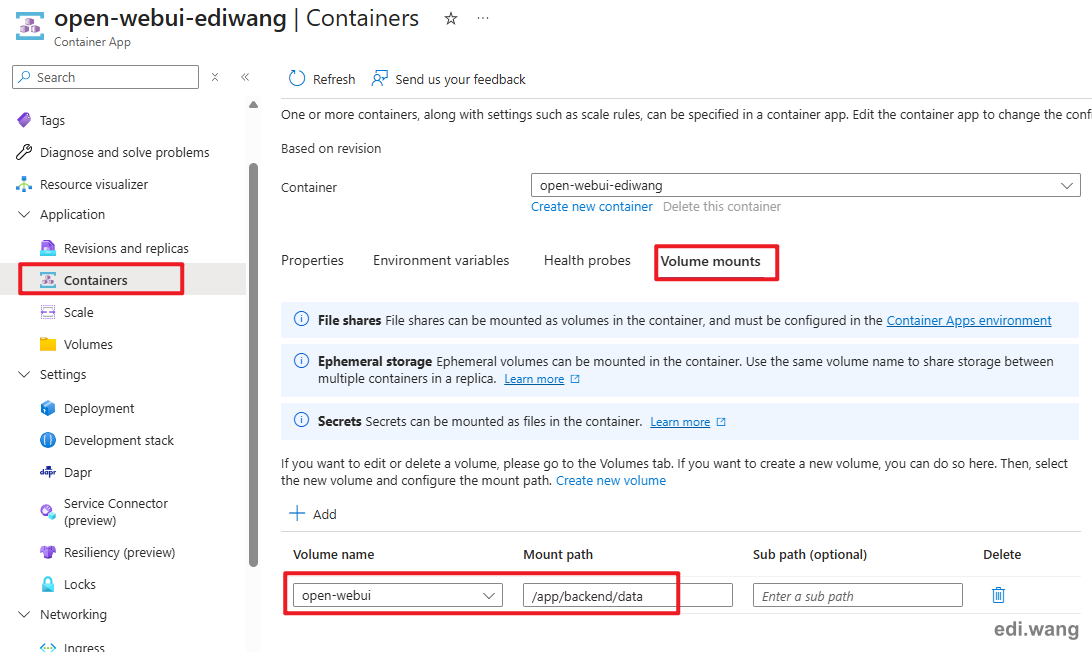
Go to Containers blade. In Volume mounts tab, mount open-webui volume to /app/backend/data
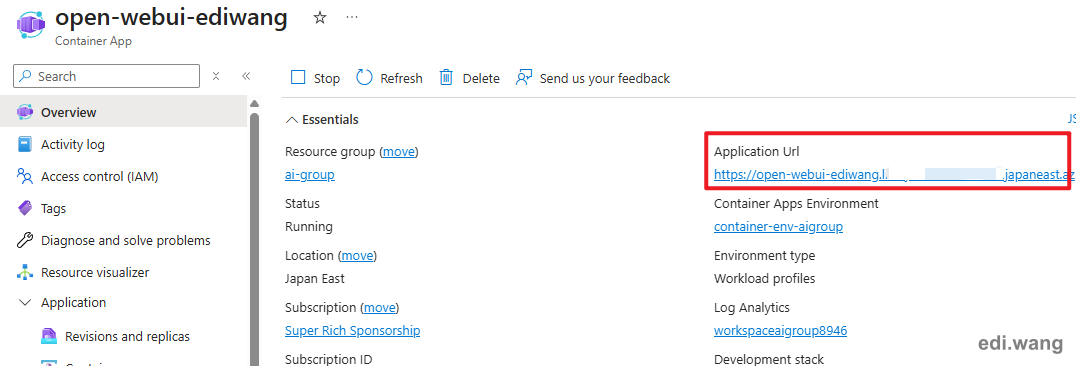
Now, you should be able to open your Open WebUI instance by the default URL.
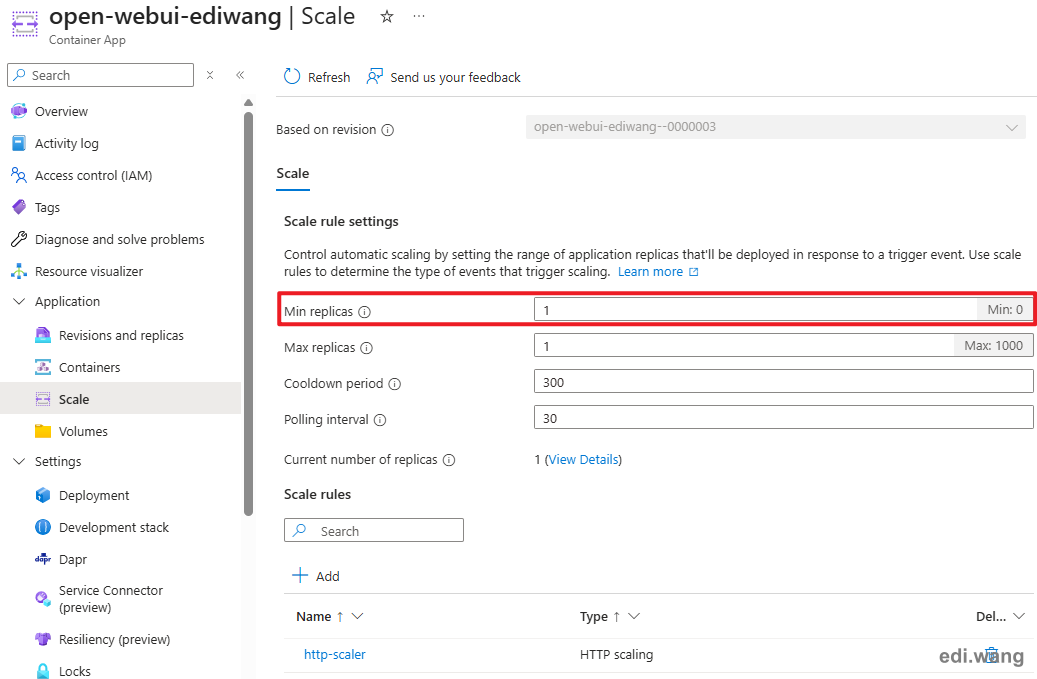
Optionally, you can set the min replicas to 1 to keep the application always running.
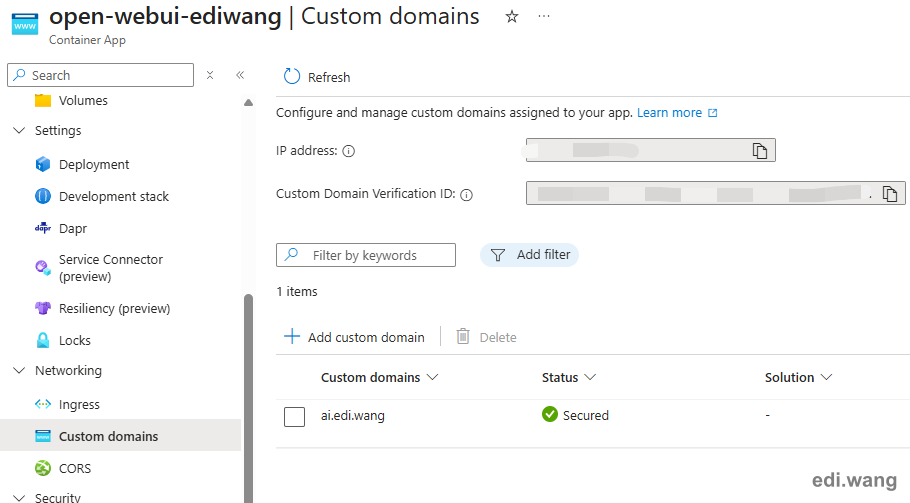
Setup Domain and HTTPS Binding
The last step is to bind your custom domain and enable HTTPS. You can easily do this in Custom domains tab by following the instructions on screen.
Configure Azure OpenAI
Open WebUI now supports Azure OpenAI out of box. Go to Settings / Connections page.
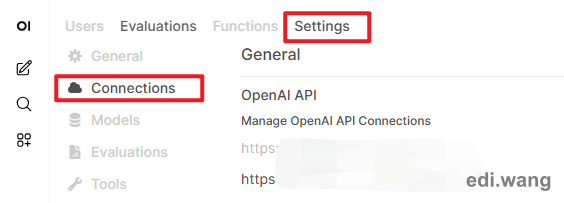
Add a new OpenAI API connection as below:
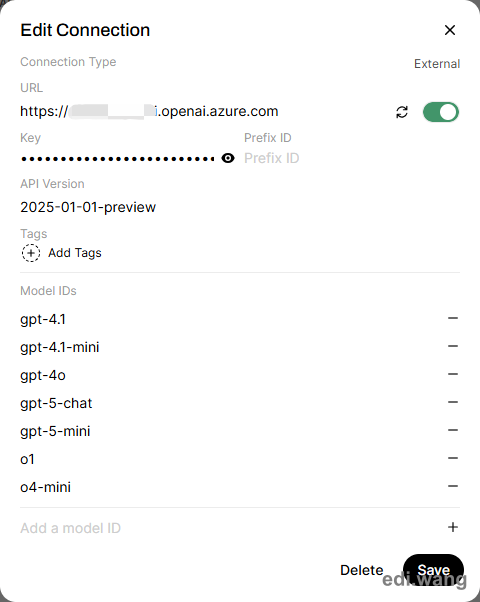
You can get these values in your Azure AI Foundry.
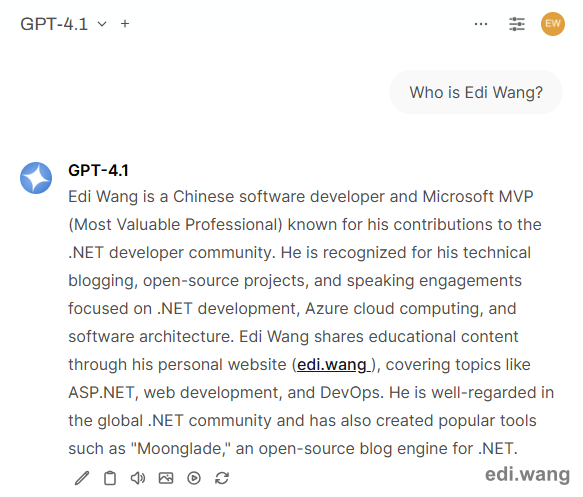
Now, you can finally use your Azure OpenAI models in Open WebUI that is also running on Azure, without a VM!
Rechard
Howsit! Thank you very much for this, I was wondering if you would be able expand it and include a how to on setting up SSO for Microsoft aswell? Cheers
zoli.gyenge
Great guide - thank you.
Could you provide some guidance on how to update openWebUI deployed as a comtainer app?