Today I am trying new DevOps tools in VS2017 and Azure, my goal is to automate the process from development to production for an exsiting ASP.NET Core project. I have encountered some issues, and with the help of Microsoft Support, I was able to solve them and share with you guys.
First, there are two ways to configure CD for Azure Web Apps. I prefer create a website first, then configure it from Azure portal. The pros is that it can configure build and release automatically in your VSTS. But you can also do it from VSTS to Azure, however it will require you to set the build and release configuration by yourself.
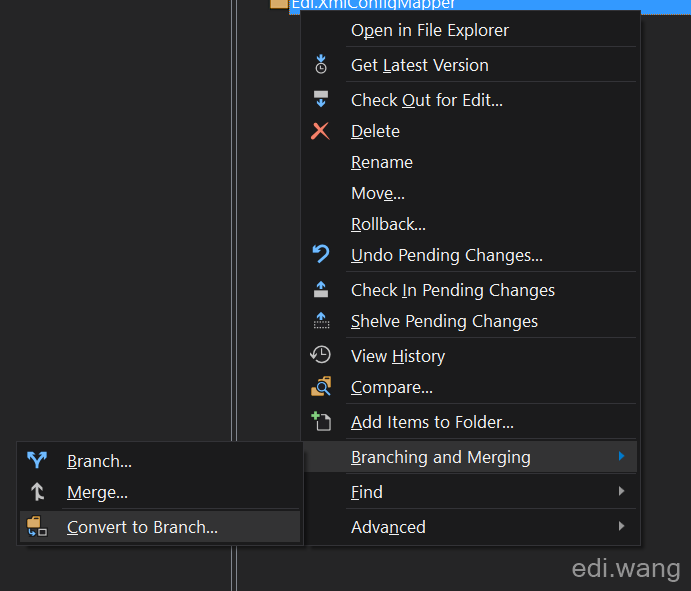
1. Convert Your Solution Project to Branch
Azure can only choose branches from a VSTS project. So, make sure you convert or branch your existing folder. Just right click your project folder form VS2017 Team Explorer, and choose "Branching and Merging" "Convert to Branch"
2. Link Your VSTS Account to Azure
In your Azure portal, find "Team Services accounts", and finish linking your VSTS
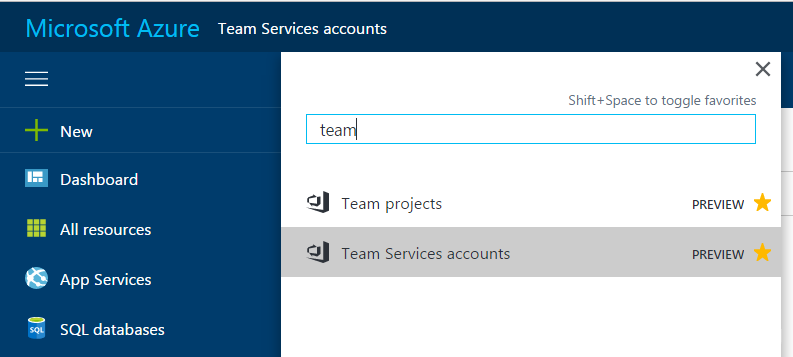
Azure will find the VSTS account that you have access to. Just link the one you want.
But be aware, your VSTS account shoud only be linked to the same Azure subscription where your target ASP.NET Core website is.

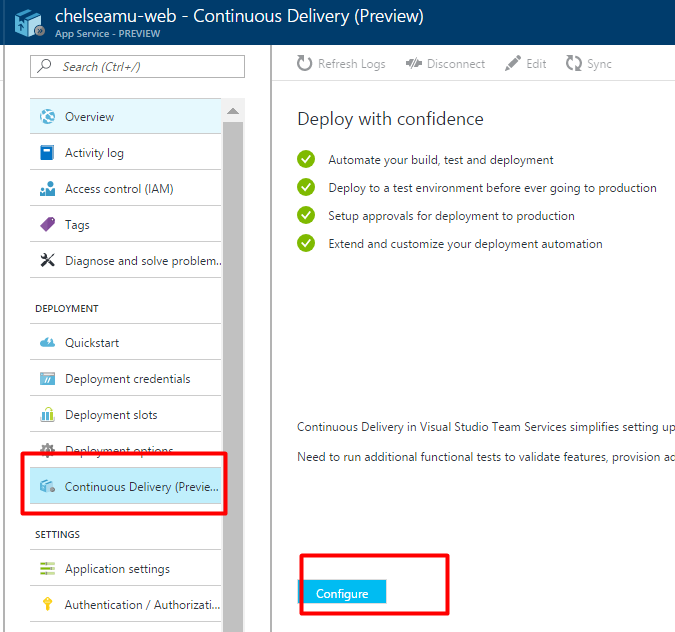
3. Create CD Configuration in Azure Web Apps
Enter your target ASP.NET Core app service.
Click "Continuous Delivery (Preview)" under "DEPLOYMENT" section, anc click "Configure" button.
In the configuration blade, find your VSTS project and the branch that you created in step 1.
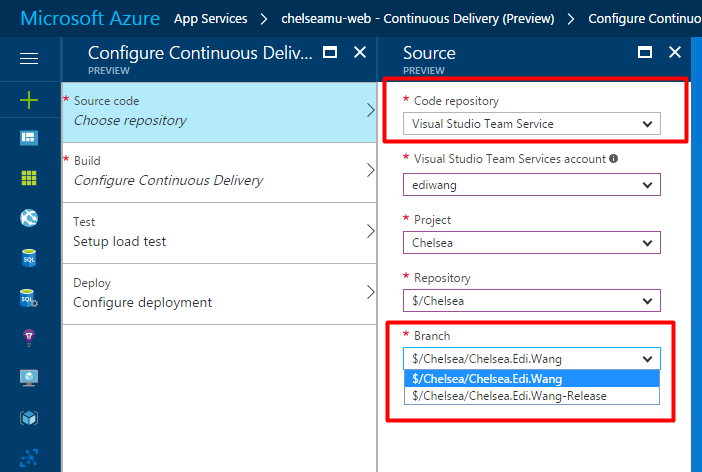
Under the "Build" section, make sure you select "ASP.NET Core" or your build will blow up sky high.
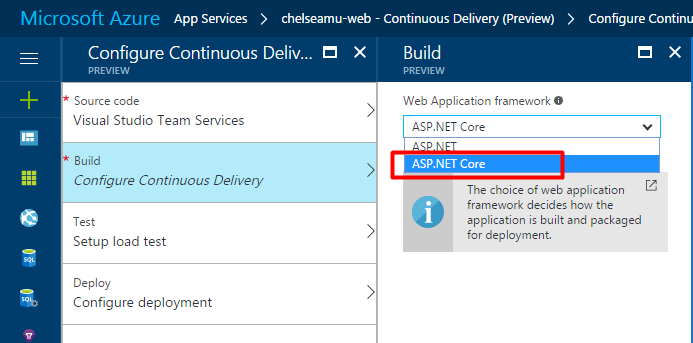
For test and deploy, just leave default. Then click "OK" to wait for Azure to create the build and release definations in your VSTS.
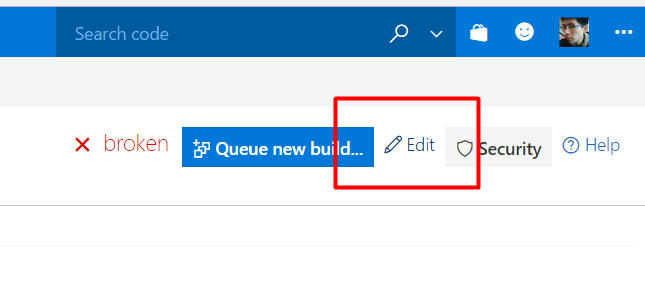
4. Fix VSTS Build Defination
Your first CI / CD build will certainlly blow up sky high. This is where I contacted Microsoft Support. Looks like Azure is truly in preview for the CD functionality.
For now, we will need to fix the build ourselves.
The error is that, csproj file for the latest ASP.NET Core tooling will not be recognized. Thus, your build will fail, and there will be no deployment to Azure.

To fix this, you need to edit your build defination. Click "Edit" button from the top right corner of the build tab.
In the "Options" tab, change "Default agent queue" to "Hosted VS2017" and save the build.
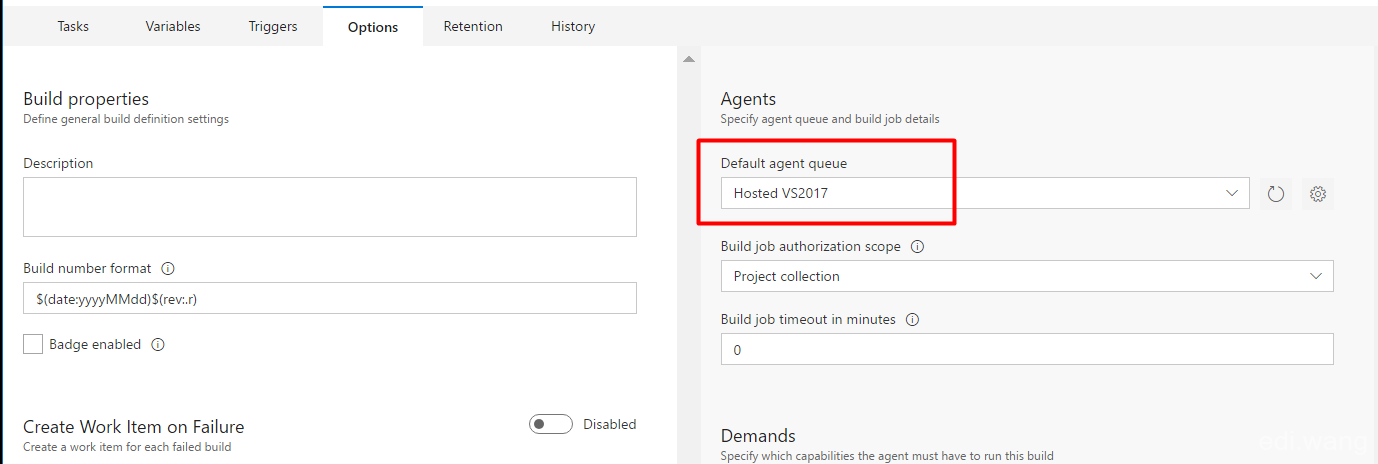
Now, make some code changes or try trigger the build. It shoud work. And then it will try deploy to Azure.

5. Fix "Rejected in Production" Error (Optional)
If you find an error in your log looks like this:
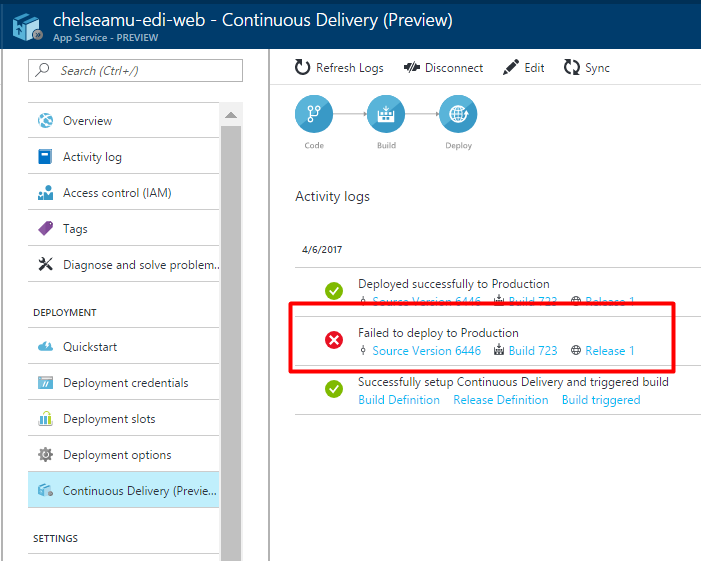
It is most likely that the target DLL file is in use. To fix this, stop your website, do the build and it will work!
You can then start the website after the deployment.
It looks like a web deploy bug for ASP.NET Core. If you do the same thing from VS2017, you will sometimes encounter this problem too. The only workround for this is to stop the website, deploy, start the website.
Thank you for reading! Happy coding!
评论