VMs on the Microsoft Azure platform can be configured to automatically shut down by schedule. However, currently only VMs in the DevTest Lab service can be powered on automatically. Regular VMs have not been updated with the auto start capability. But still, we can take advantage of Azure Function V3 and PowerShell Core to start the VM by timed schedule.
Update 3/15/2023: If you are rich, you may consider using Microsoft official feature "Start/Stop VMs v2". But if you see this post, you can save plenty of money.
The Idea
I have wrote a post 6 year ago for how to use PowerShell to power on and off the VM on schedule. The method is to create an extra VM and use Windows Task Scheduler to run the power on and off script to operate the target VM. Although this method is feasible, it needs to consume additional VM resources.
6 years later, Azure has undergone earth-shaking evolution. The Serverless Azure Function is the most fashionable gameplay today. Azure Function can trigger custom code logic through a variety of Triggers, one of which is Timer, so that Azure Function would be able to switch VMs on and off on schedule. Let's see how to do it.
Create Function App
Click Create a resource and select Function App. Give it a nice name, such as start996.
Runtime stack means what language we would like to write the Function logic. Azure Function provides support for mainstream languages or platforms such as .NET, Java, Node.js, Python, and PowerShell Core. Here I will choose PowerShell Core. We can only choose version 6, but in fact the latest version is already 7.1. I don’t know why Microsoft has not deployed the latest version for its own platform.
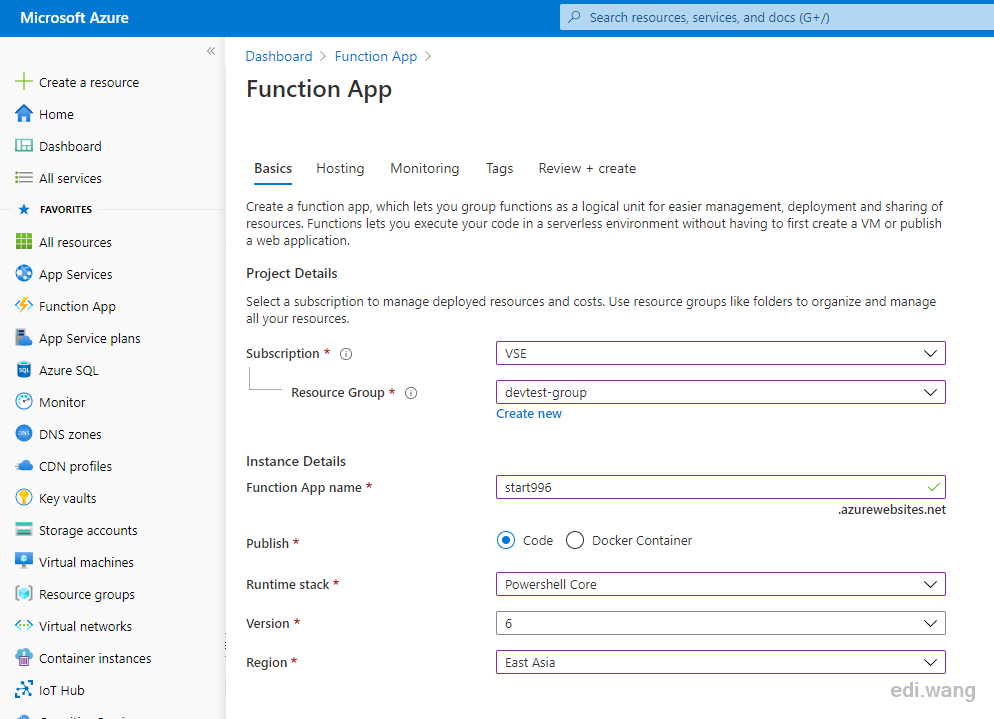
Next, we have to create or select a Storage Account, which is required by the latest version of Azure Function V3
Select Consumption (Serverless) for Plan type, this Plan can be billed dynamically according to your usage, which helps save money when the usage is small.

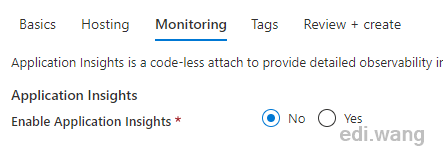
Application Insights can be used to monitor the running health of the function, and can also be used as a console output capture when debugging the function. It's up to you to decide enabling it or not.
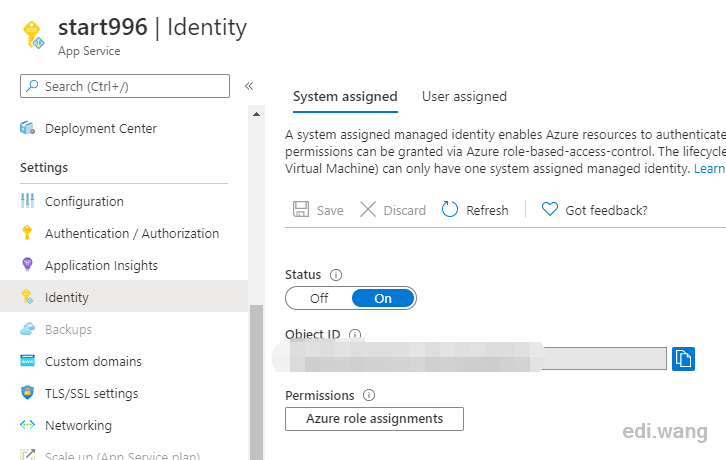
After the creation is completed, we need to configure permissions for this Function App to access VM.
Under the Identity menu, turn on the System assigned switch. This authorization method allows Azure resources to authorize each other within a few mouse click.
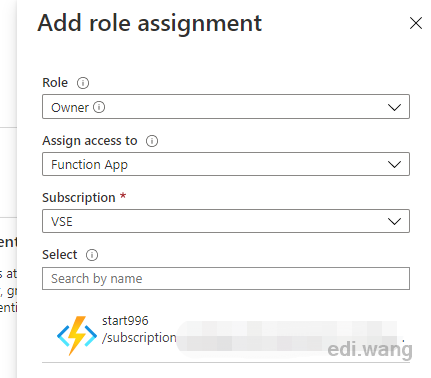
Now go to your VM management screen, go to Access control (IAM) and select Add a role assignment
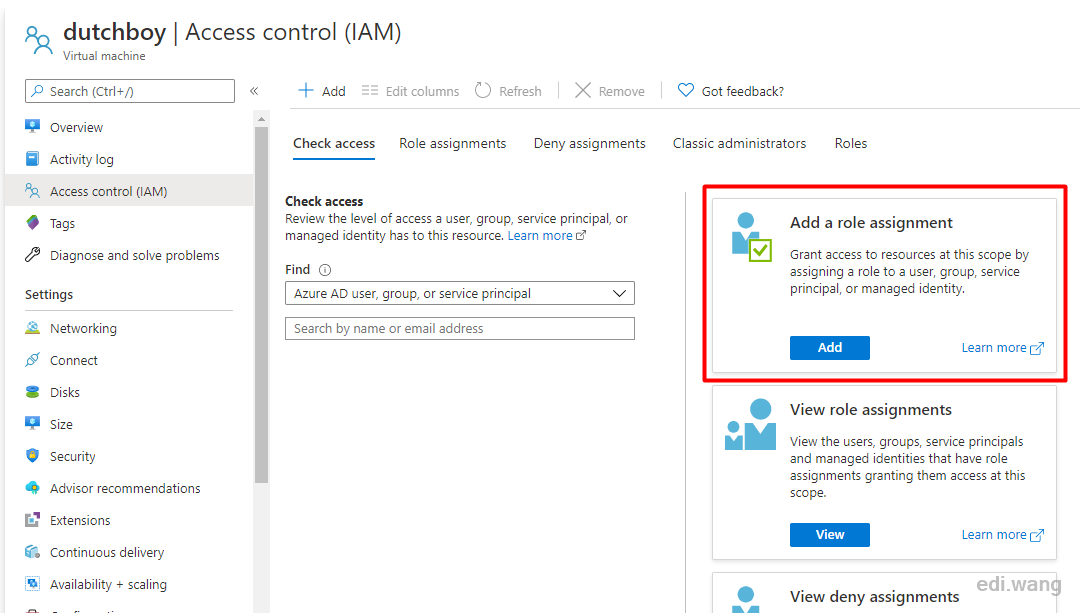
Choose Function App under "Assign access to", find the Function App we just created, and add it as Owner role. However, it should be noted that Owner is not the best practice because it has the highest permissions. In a real enterprise scenario, please select the appropriate permissions according to the company's security regulations.
Write Function Code
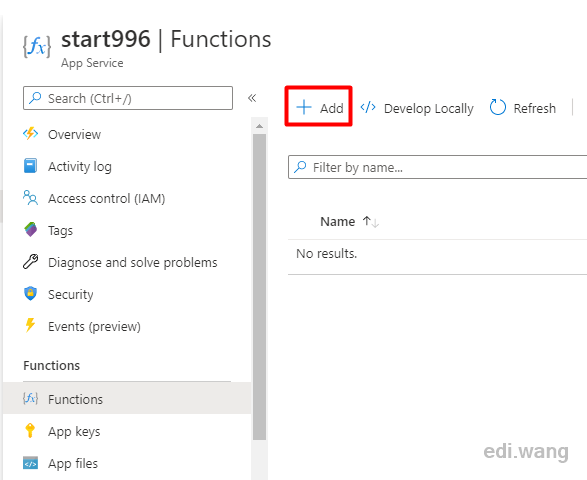
After the Function App is created, enter Functions menu, and then click Add to create a Function.
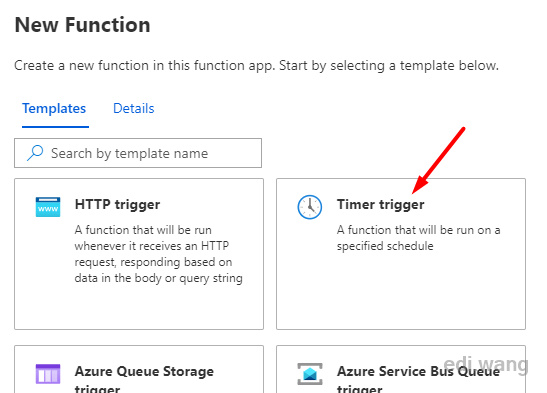
Select Time Trigger
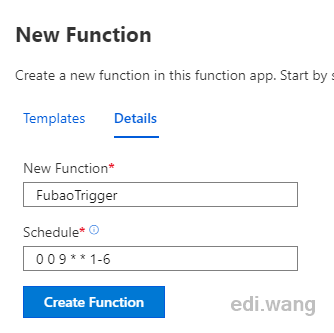
Enter the name of Function, such as "FubaoTrigger", and then enter the CRON expression of the timing logic in "Schedule". Take 996 as an example. From Monday to Saturday, at 9 am, the expression would be: 0 0 9 * * 1-6
But keep in mind that this time is UTC time. If you need to change the time zone, you can add a settings named WEBSITE_TIME_ZONE in the Configuration menu of the Function App. For example, the time zone in Mainland China can be set to China Standard Time. For reference, please check Microsoft document here.
After creation, go to Code + Test, replace the default PowerShell code with below, please replace each variable value with your Azure information.
# Input bindings are passed in via param block.
param($Timer)

$subscriptionId = "<Your Azure Subscription ID>"
$tenantId = "<Your Azure AD Tenant ID>"
$rsgName = "<Your VM's Resource Group Name>"
$vmName = "<Your VM's name>"

Select-AzSubscription -SubscriptionID $subscriptionId -TenantID $tenantId
Start-AzVM -ResourceGroupName $rsgName -Name $vmName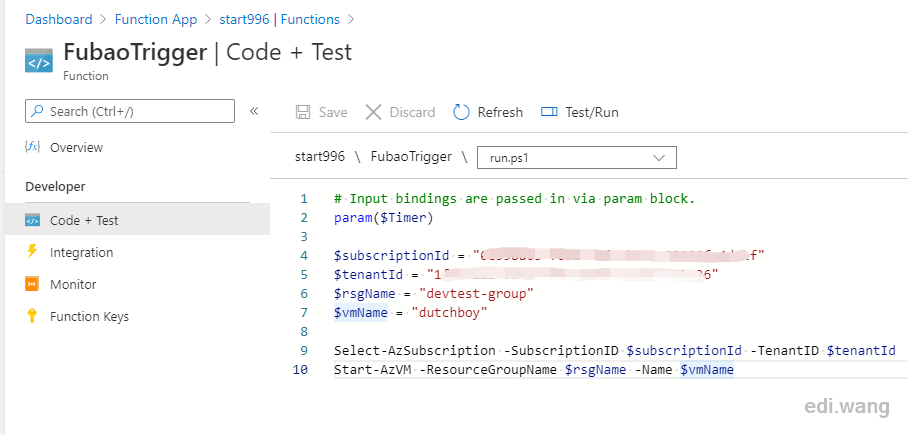
Although param($Timer) in the script is not used in the code logic, it cannot be deleted. This is a required parameter of Timer Trigger.
Select-AzSubscription and Start-AzVM are not PowerShell's own modules, they are from Azure PowerShell. Since Azure PowerShell is already installed on the Function host, they can be used directly.
Update 3/15/2023: Now you need to manually enable Az module in requirements.psd1 file. See https://learn.microsoft.com/en-us/azure/azure-functions/functions-reference-powershell?tabs=portal#dependency-management
# This file enables modules to be automatically managed by the Functions service.
# See https://aka.ms/functionsmanageddependency for additional information.
#
@{
# For latest supported version, go to 'https://www.powershellgallery.com/packages/Az'.
# To use the Az module in your function app, please uncomment the line below.
# 'Az' = '9.*' # Don't believe this, will take a long time, and make function timeout
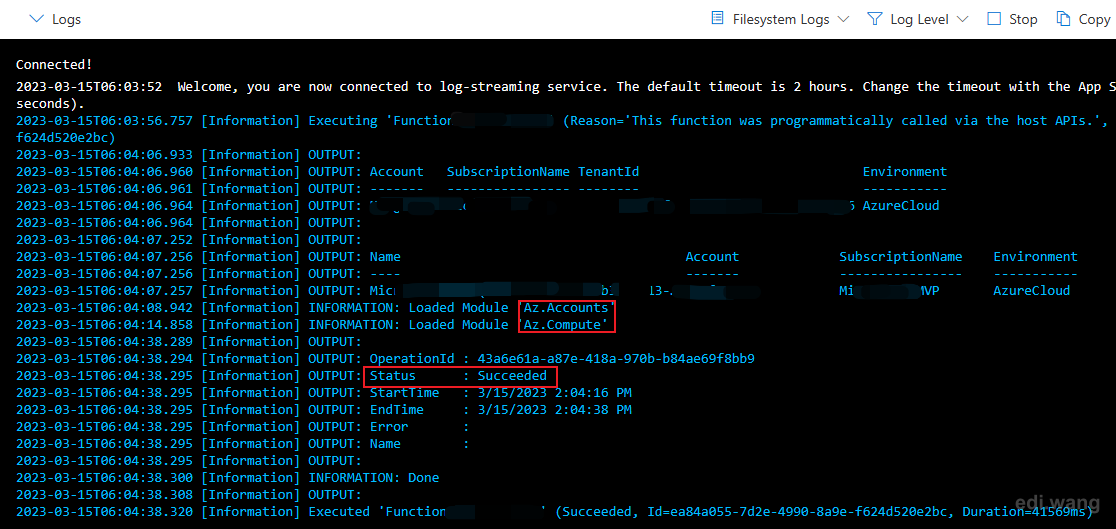
'Az.Accounts' = '2.*'
'Az.Compute' = '5.*'
}
Save your code and click "Test/Run"

If everything is OK you should now see your VM starts.
Update 3/15/2023: First run will take a few minutes because Function runtime need to download Az modules.
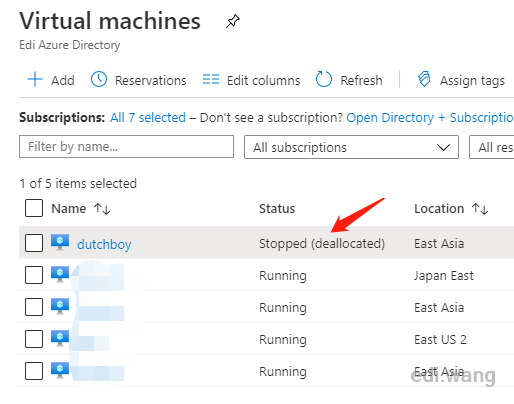
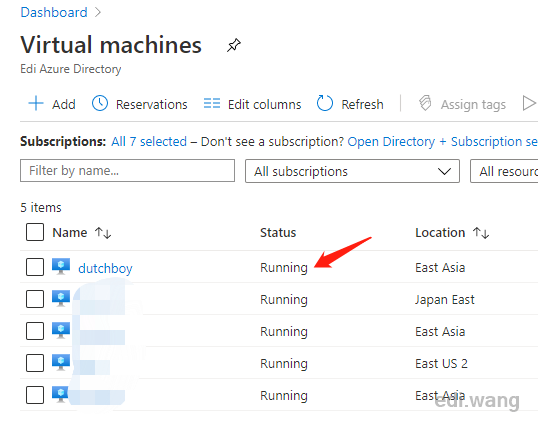
Now, you have an Azure Function that will start your VM at 9 AM on Monday to Saturday! As for automatically shutdown, you can find the option in VM's management menu.
janepark
Thank you for sharing your knowledge. What should I do if I wanna start the VMs as a Resource Group?