Intro
Deploying a public DNS server on Microsoft Azure can be a crucial step for organizations and individuals that want to provide DNS resolution to the public. Deploying a public DNS server on Azure can provide benefits such as scalability, high availability, and global reach. In this blog post, we will discuss the steps involved in deploying a public DNS server on Microsoft Azure.
My objective is to set up a DNS server that functions as a relay, utilizing forwarders to serve as an intermediary for client DNS queries to other public DNS servers, such as Microsoft or Google. Users can then set DNS IP address on their devices to this server. No custom domains are involved here. This is typically used in China where a lot of well-known DNS servers could be affected by some magic of the Chinese internet.
Notice
Kindly note that the topic of discussion in this post does not pertain to Azure DNS Zones. Azure DNS Zones serve a different purpose, primarily when you have a custom domain name, and you need to add records on the Azure Portal. Users are not required to modify DNS IP addresses on their devices. For instance, my blog uses Azure DNS Zones, but users don't have to alter their network configurations to access it. Therefore, if you are seeking information about Azure DNS Zones, this is not the appropriate post for you.
Platforms
We will be using VMs to deploy DNS services. We will not be covering the steps involved in creating the VMs themselves. Instead, we will be focusing on the key steps and configurations required to deploy the DNS services on the VMs.
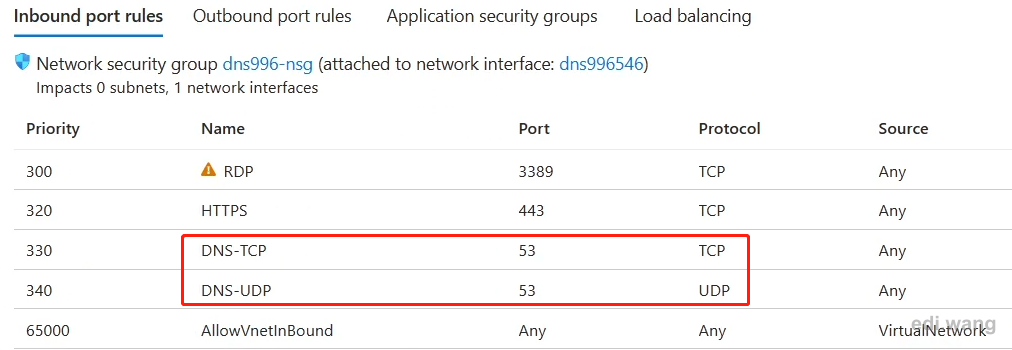
Network Security Group configuration
No matter what type of OS you choose. NSG must be configured to open both TCP/53 and UDP/53 ports.
Static IP Address
Make sure your VM is bound with a static public IP address.

Windows Server 2022 Server Core
Go to PowerShell and run:
Install-WindowsFeature -Name DNS -IncludeManagementTools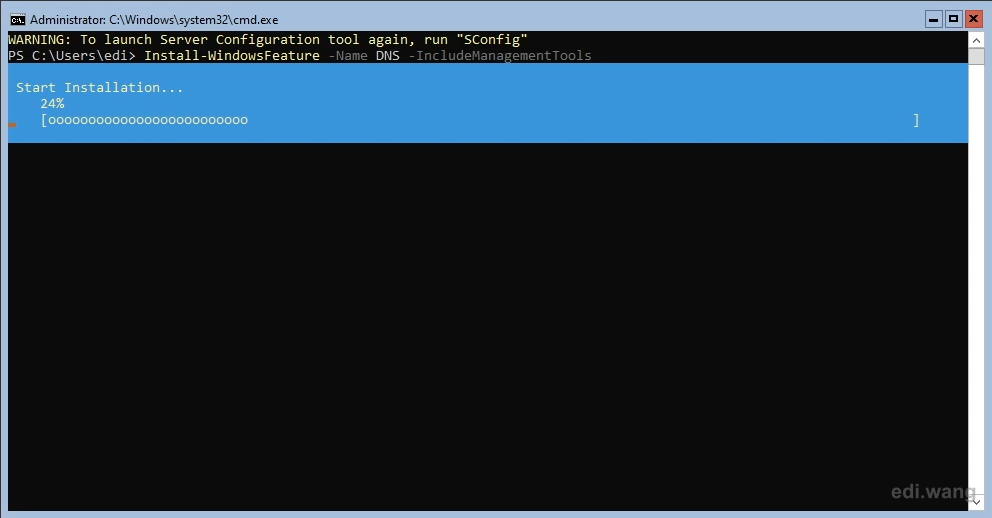
Then, add forwarders. I am using Google's DNS server IP address as forwarders.
DNS forwarders are used to allow a DNS server to forward DNS queries to another DNS server, typically one that is authoritative for a particular domain. This is useful in situations where the DNS server is not authoritative for the requested domain, or when the DNS server is unable to resolve the query locally. By forwarding the query to another DNS server, the DNS server can obtain the necessary information to resolve the query and return the result to the client. This can improve DNS performance and reduce network traffic, as the DNS server does not need to perform recursive queries for every request.
Add-DnsServerForwarder -IPAddress 8.8.8.8 -PassThru
Add-DnsServerForwarder -IPAddress 8.8.4.4 -PassThru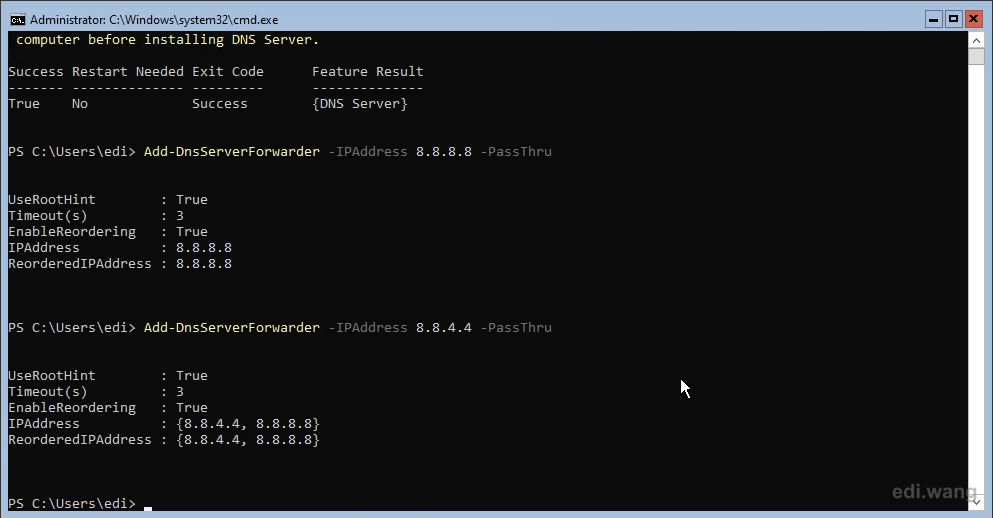
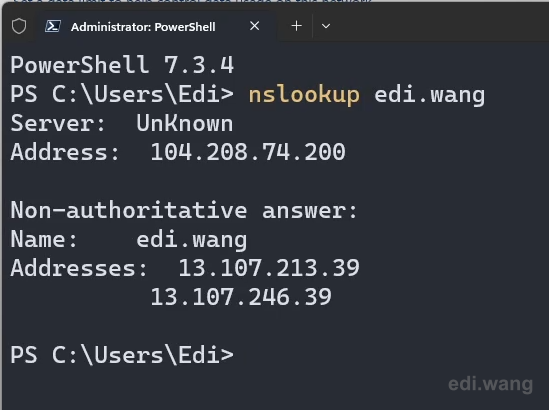
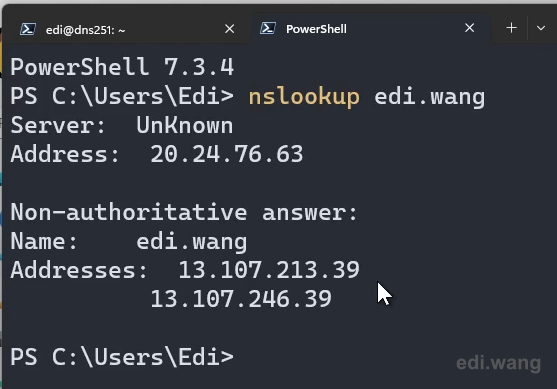
Now, on your client device, set DNS server IP to this server, and run nslookup to check if DNS records can be resolved correctly.
Ubuntu Server
SSH into your VM and run
sudo apt update && sudo apt upgrade -y
sudo apt install bind9 -y
If you are using a minimized Ubuntu Server image, you may also need to install a text editor like nano
sudo apt install nano -yUse nano to open bind9 configuration file
sudo nano /etc/bind/named.conf.optionsAdd forwarders to Google DNS server as an example. Please note, we must also add allow-query-cache { any; };
forwarders {
    8.8.8.8;
    8.8.4.4;
};

allow-query-cache { any; };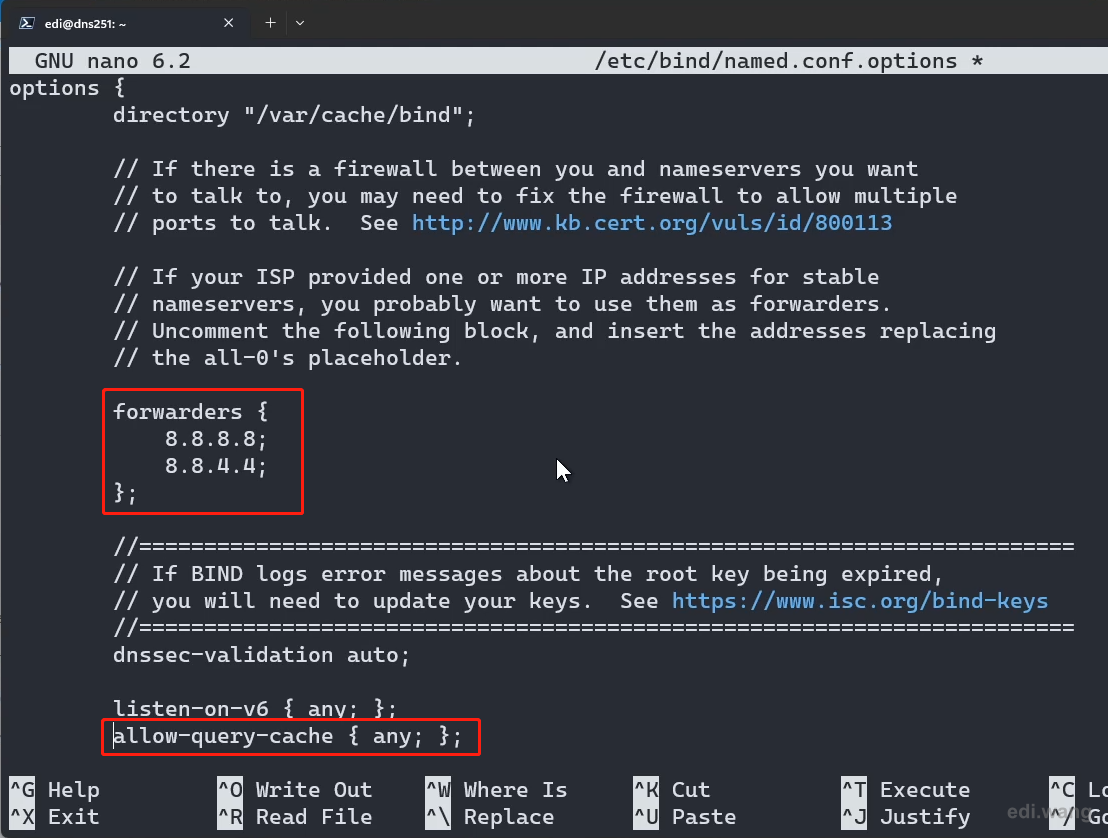
Save the configuration file, then restart bind9 services.
sudo systemctl restart bind9Test the DNS server on your client device.
Quintos
How to setup the client device on Linux system? Show I configure twice for WSL systems?