Background
When deploying Azure OpenAI resources, prioritizing security is essential. One critical step is to restrict access to your API endpoint, ensuring only your applications can connect. By implementing such measures, even if your API key is leaked, unauthorized users will be unable to exploit it—protecting you from unexpected charges.
A recent incident highlights the importance of these precautions. A friend of mine was using a popular Chinese chat UI to connect to their Azure OpenAI deployment. Unfortunately, the application had a security flaw: API keys were logged in plain text, and the log files were not properly secured. As a result, their API key was stolen, leading to over $10,000 in charges overnight.
It's not too late to secure your Azure OpenAI deployment. Follow the steps outlined in this blog post to implement network restrictions and safeguard your resources.
Steps
The architecture of my application consists of a web-based UI hosted on Azure App Service, which communicates with the Azure OpenAI API. This is a common and widely used configuration. Our goal is to enhance security by restricting access to the API, ensuring it can only be accessed by the App Service while blocking any requests originating from the public internet.
Create Virtual Network
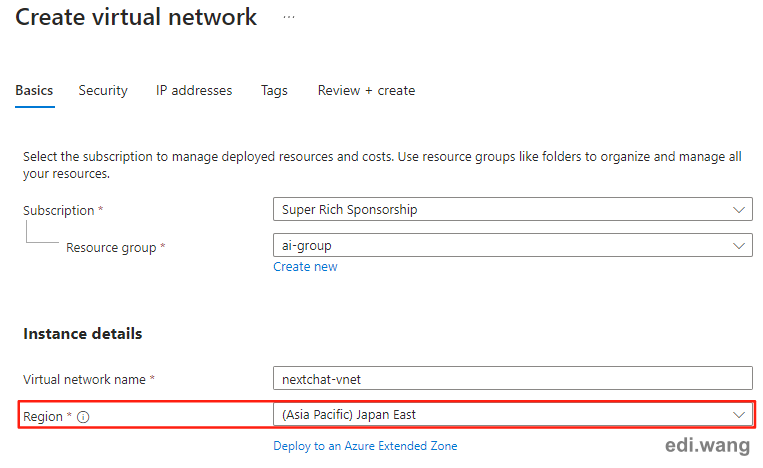
First, create a virtual network in the same region as your App Service instance. Please double check the region, it must be in the same location as your App Service, otherwise your App Service will not be able to add the network.
Connect VNet to App Service
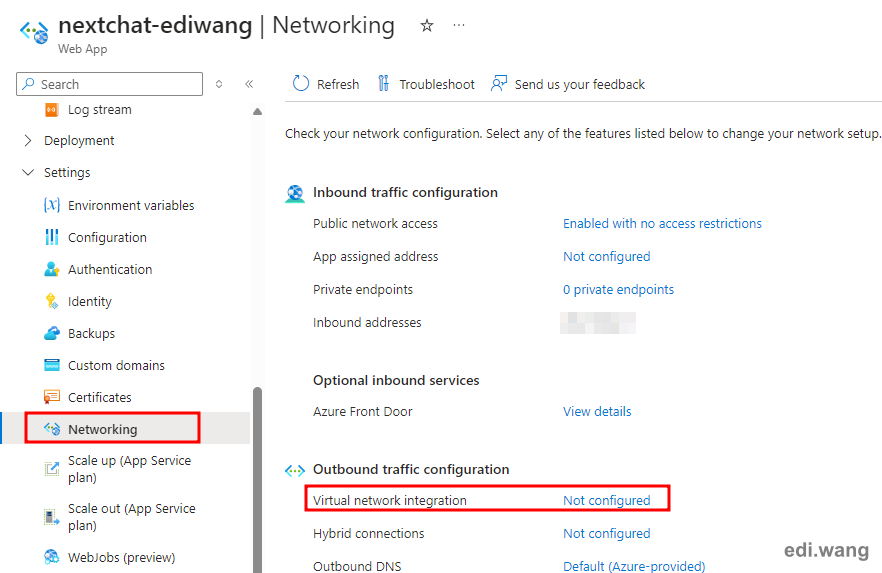
In your App Service menu, go to "Networking", and click the "Not configured" link in "Virtual network integration".
Click "Add virtual network integration" and select the Virtual Network that we just created.
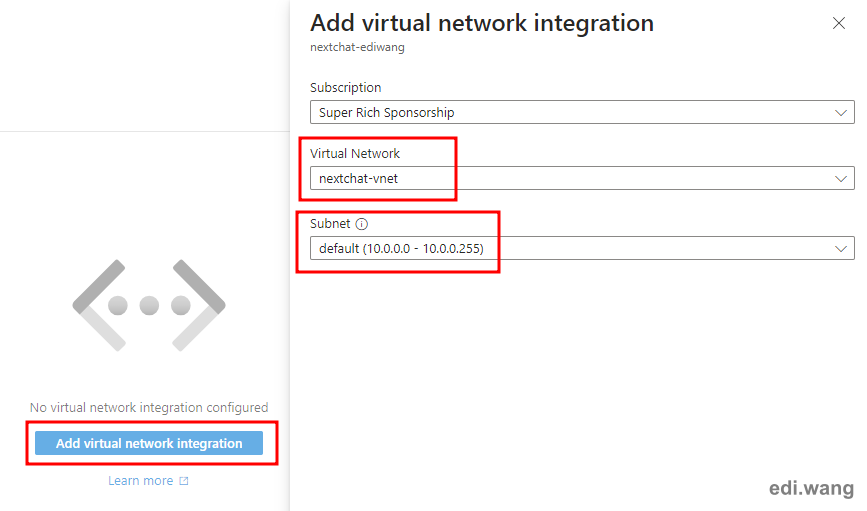
Wait for Azure to finish the configuration on your App Service.
Connect VNet to Azure Open AI
Go to your Azure Open AI resource, go to "Networking" menu, and choose "Selected Network and Private Endpoints" option.
Then, click "Add existing virtual network"
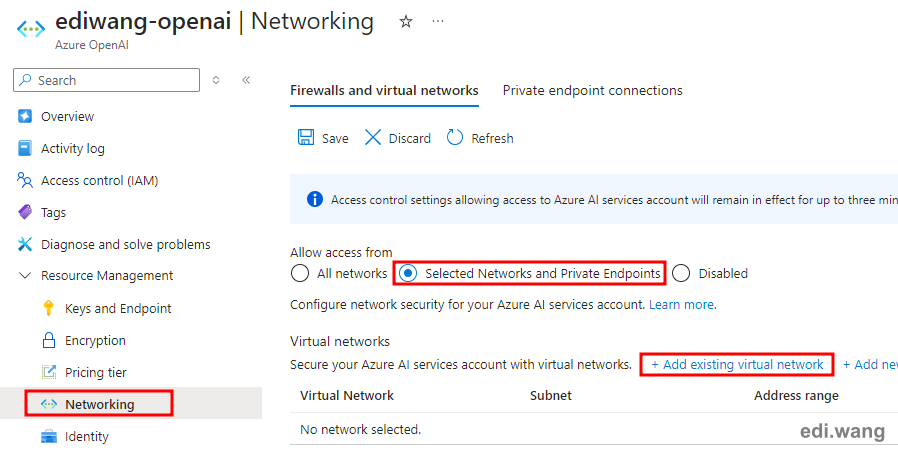
Select the virtual network that was created in the previous step. Azure will automatically add an endpoint for you.
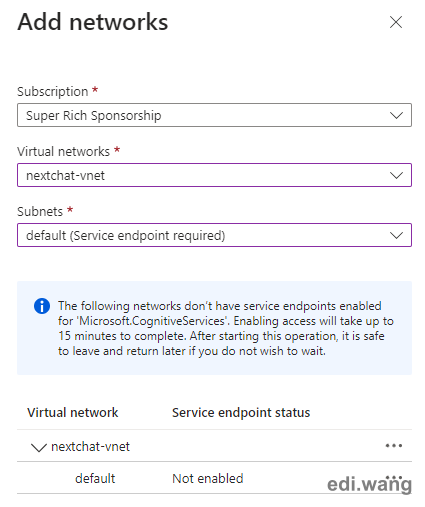
Finally, review your changes and don't forget to click the "Save" button.
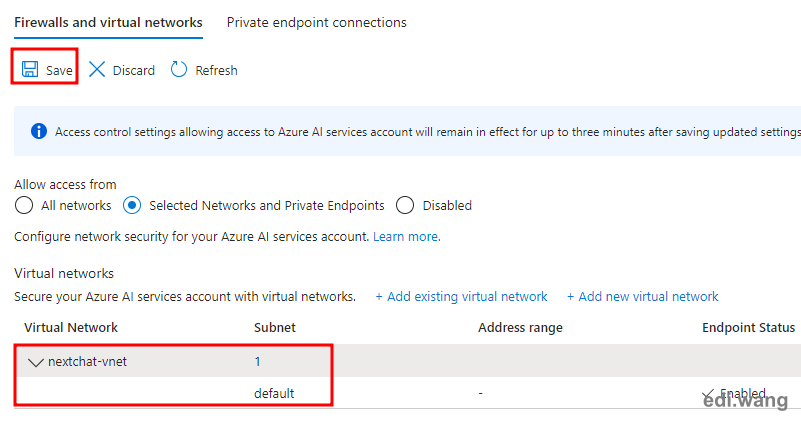
Wait for a few moments for the setup to take effect.
Test
Now, return to our application deployed on App Service, it should still be functioning properly.
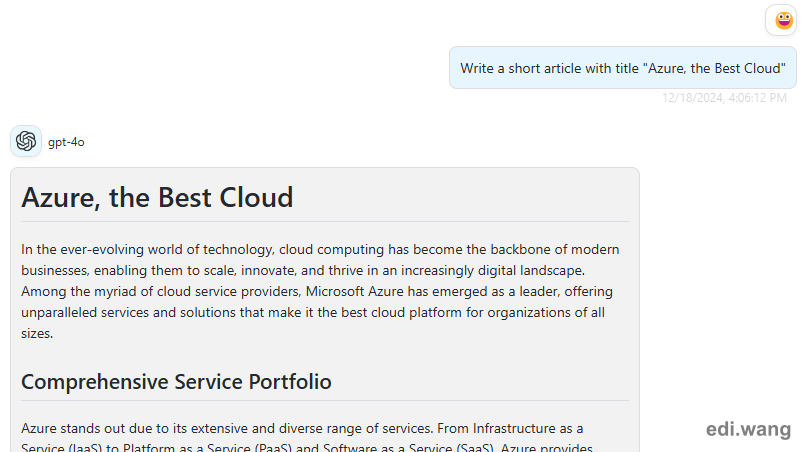
At this time, other unauthorized use should be blocked. For example, this application is using the same API endpoint and API key, but it is not in the allowed virtual network:
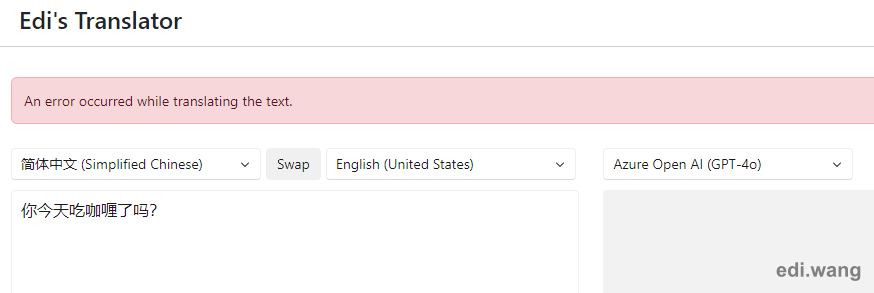
For blocked access, Azure will now return an HTTP 403 error.
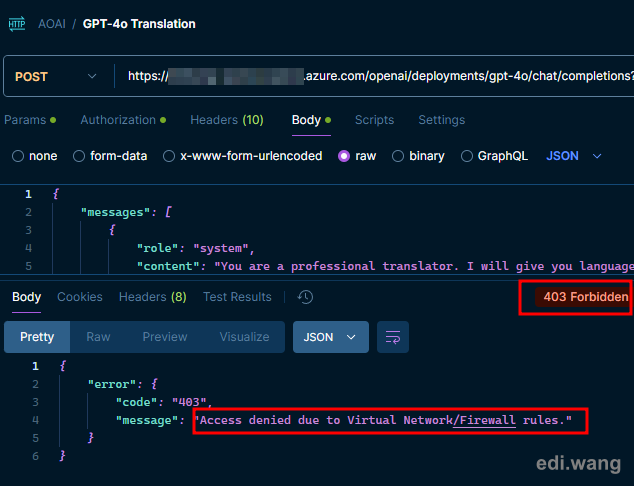
Now, your Azure OpenAI API is much more secure than before!
For extra security methods, please also consider proxy your Azure OpenAI API behind Azure API Management.
Comments