In my previous blog post, I introduced how to deploy Open WebUI with Azure OpenAI on Azure Container Apps in Azure Portal manually. However, manual deployment usually makes people work 996. In this post, I will show you how to automate everything using Bicep. If you’re new to Bicep, think of it as a friendlier way to define Azure resources as code compared to raw ARM templates. I’ll walk you through my Bicep file, explaining how each block helps set up a scalable, persistent, and easy-to-manage Open Web UI deployment.
1. Define Parameters
At the very top, we’ve got a few parameters:
@description('Name of the storage account (must be globally unique)')
param storageAccountName string = 'openwebuistorage1069'

@description('Location for all resources')
param location string = resourceGroup().location

@description('Name of the file share')
param fileShareName string = 'owuifileshare'

@description('Name for the Container Apps Environment')
param envName string = 'ca-env'

@description('Name for the Container App')
param containerAppName string = 'openwebui-app'
These are self-explanatory, just names of your resources.
2. Data Storage
Open Web UI needs somewhere to save data so you don’t lose info across restarts. We use Azure Storage Account with file share to help that.
// Storage Account
resource storageAccount 'Microsoft.Storage/storageAccounts@2022-09-01' = {
  name: storageAccountName
  location: location
  sku: {
    name: 'Standard_LRS'
  }
  kind: 'StorageV2'
  properties: {
    accessTier: 'Hot'
    supportsHttpsTrafficOnly: true
  }
}

// Storage Share
resource fileShare 'Microsoft.Storage/storageAccounts/fileServices/shares@2022-09-01' = {
  name: '${storageAccount.name}/default/${fileShareName}'
  properties: {
    shareQuota: 100 // in GB
    accessTier: 'TransactionOptimized'
  }
}
We:
- Create a Storage Account (needs a globally unique name!).
- Set up a File Share (100GB quota, TransactionOptimized tier—a good fit for lots of small file activity).
3. Create Log Analytics
This creates a workspace with a 30-day log retention (also adjustable). All logs from Container Apps Environment will show up here.
// Log Analytics for Container Apps Environment
resource logAnalytics 'Microsoft.OperationalInsights/workspaces@2022-10-01' = {
  name: '${envName}-log'
  location: location
  properties: {
    sku: {
      name: 'PerGB2018'
    }
    retentionInDays: 30
  }
}
4. Create Container Apps Environment
A "Managed Environment" is required for any Container App in Azure. We link it to the Log Analytics workspace for log aggregation.
// Container Apps Environment
resource containerAppEnv 'Microsoft.App/managedEnvironments@2023-05-01' = {
  name: envName
  location: location
  properties: {
    appLogsConfiguration: {
      destination: 'log-analytics'
      logAnalyticsConfiguration: {
        customerId: logAnalytics.properties.customerId
        sharedKey: logAnalytics.listKeys().primarySharedKey
      }
    }
  }
}
5. Hooking Up Azure File as a Persistent Volume
We fetch the storage account key, then create an Azure File storage for the Container Apps Environment. This is what enables volume mounting from your container.
// Get Storage Key for mounting File Share
var storageAccountKey = storageAccount.listKeys().keys[0].value

resource meStorage 'Microsoft.App/managedEnvironments/storages@2023-05-01' = {
  parent: containerAppEnv
  name: '${storageAccountName}fileshare'
  properties: {
    azureFile: {
      accountName: storageAccountName
      shareName: fileShareName
      accountKey: storageAccountKey
      accessMode: 'ReadWrite'
    }
  }
}
6. Deploying the Open WebUI Container App
Finally, we can deploy the main web application since all the dependencies are ready.
resource containerApp 'Microsoft.App/containerApps@2023-05-01' = {
  name: containerAppName
  location: location
  properties: {
    managedEnvironmentId: containerAppEnv.id
    configuration: {
      ingress: {
        external: true
        targetPort: 8080
        transport: 'auto'
        allowInsecure: false
      }
      secrets: [
        {
          name: 'storage-account-key'
          value: storageAccountKey
        }
      ]
    }
    template: {
      containers: [
        {
          name: 'open-webui'
          image: 'ghcr.io/open-webui/open-webui:main'
          resources: {
            cpu: 2
            memory: '4Gi'
          }
          volumeMounts: [
            {
              volumeName: 'open-webui'
              mountPath: '/app/backend/data'
            }
          ]
        }
      ]
      volumes: [
        {
          name: 'open-webui'
          storageType: 'AzureFile'
          storageName: meStorage.name
          mountOptions: 'nobrl'
        }
      ]
    }
  }
}

output storageAccountName string = storageAccount.name
output fileShareName string = fileShare.name
output containerAppFqdn string = containerApp.properties.configuration.ingress.fqdn
Usage
Install Azure CLI and Bicep CLI on your computer, and combine the scripts above to main.bicep.
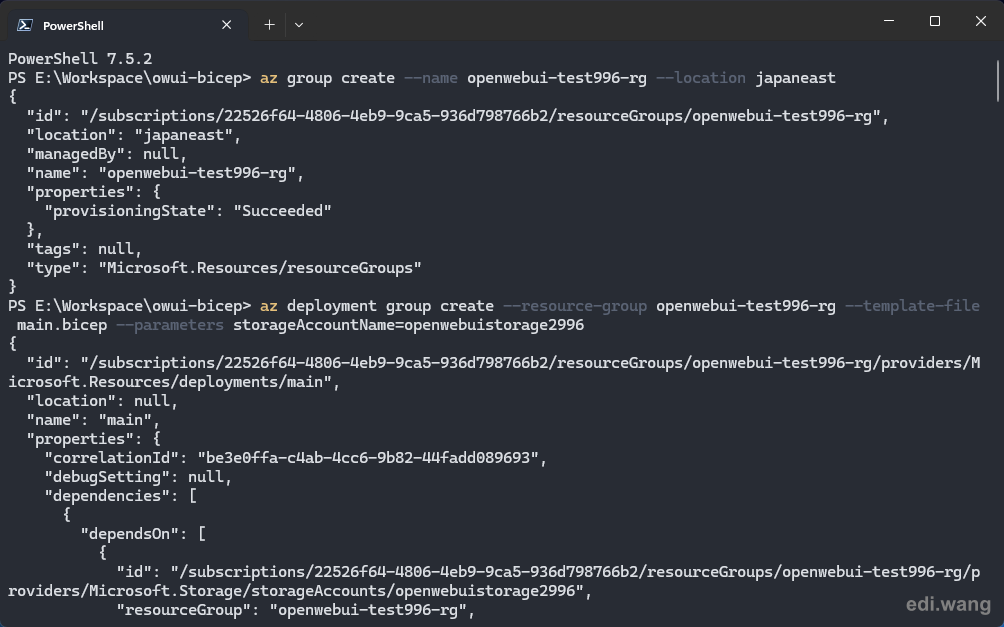
Create a resource group first:
az group create --name openwebui-test996-rg --location japaneastThen one key deployment!!!
az deployment group create --resource-group openwebui-test996-rg --template-file main.bicep --parameters storageAccountName=openwebuistorage2996Notice the storage account name must be globally unique. If your deployment blow up, it is very possible that the name is already taken, just change another name.
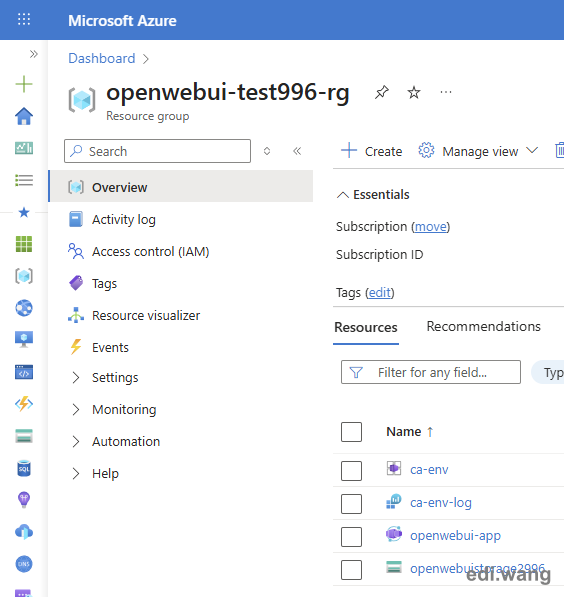
The final resource group:
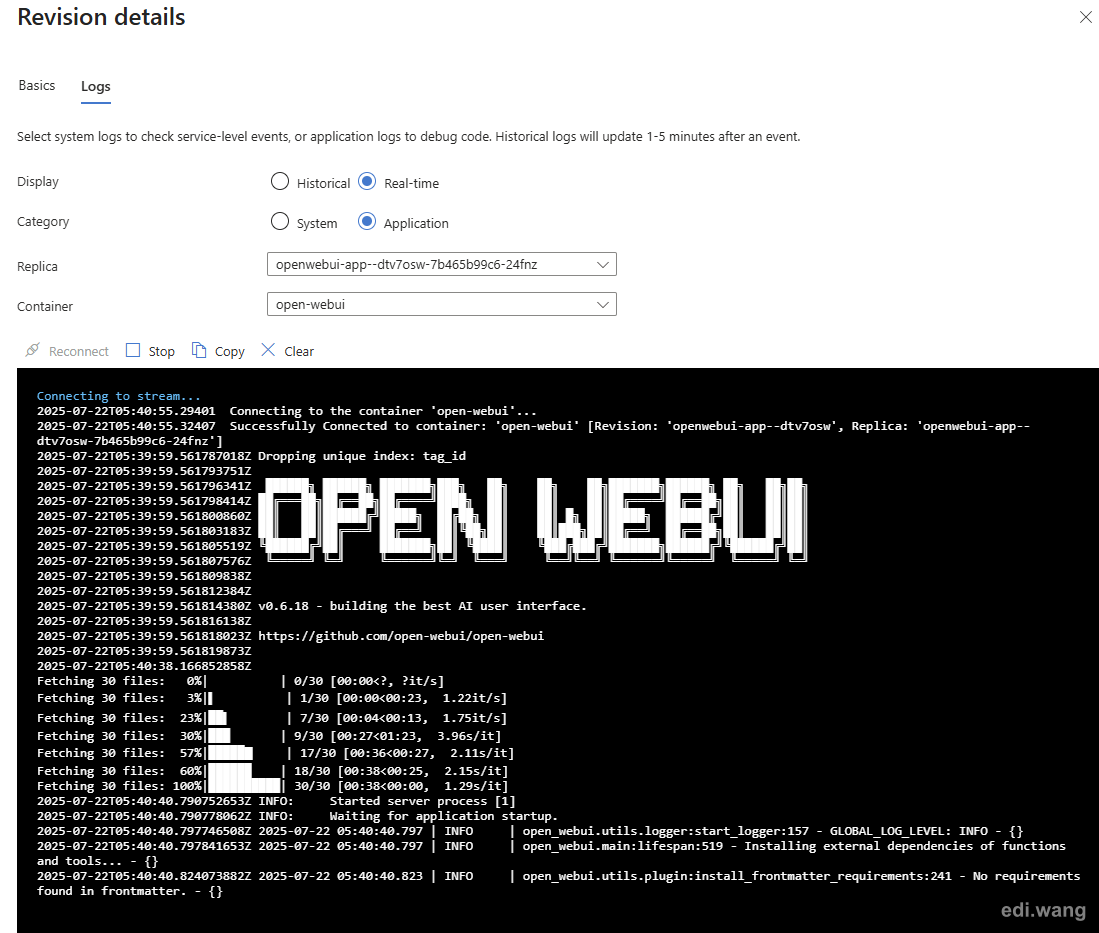
Container log:
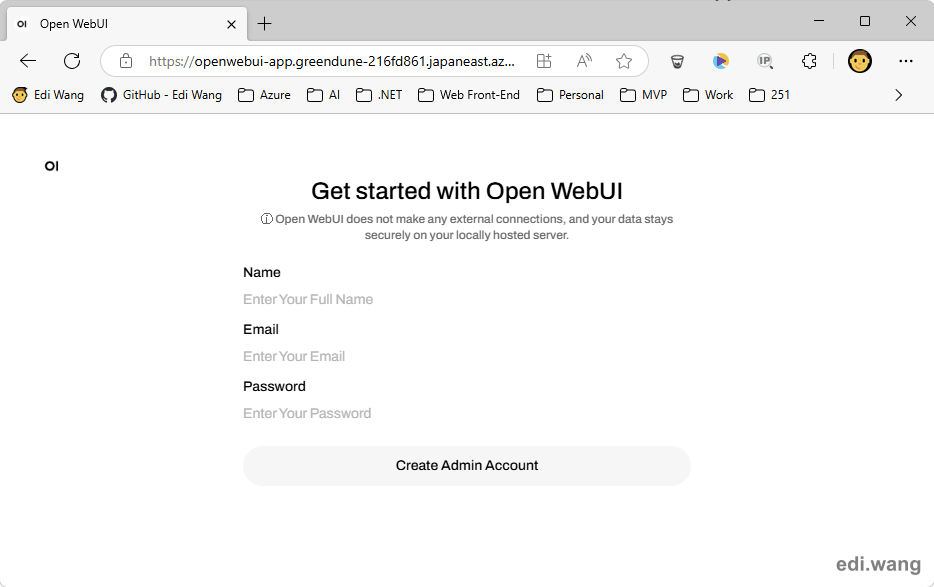
Finally, your Open WebUI application is now running!
Wrapping Up
With this one Bicep file, you get:
- Persistent storage for app data (survives upgrades/restarts!)
- A managed container app, easily upgradable by swapping container images.
- Centralized, queryable logs.
- All-in-one deployment—no clicking around the portal!
Comments